
Honeywell TH8320R1003 Installation Manual: A Comprehensive Plan
This manual guides users through installing the Honeywell TH8320R1003 thermostat, covering everything from initial setup to troubleshooting common issues for optimal performance.
The Honeywell TH8320R1003 is a programmable thermostat designed for efficient home climate control. As a product of Honeywell International, a diversified technology and manufacturing company with a rich history dating back to 1885, it embodies a legacy of innovation and quality. This thermostat offers users precise temperature management, contributing to energy savings and enhanced comfort.
Honeywell’s commitment to creating advanced technologies is evident in this model, providing features for scheduling, remote access, and optimized performance. Whether upgrading an existing system or installing in a new construction, the TH8320R1003 aims to deliver reliable and user-friendly operation. This manual provides a comprehensive guide to ensure a smooth and successful installation process;
Understanding the Package Contents
Upon opening the Honeywell TH8320R1003 package, carefully verify all components are present. You should find the thermostat display unit itself, a separate mounting base plate for wall installation, and a comprehensive installation guide – this document! Additionally, a bag containing mounting screws and wall anchors will be included for secure attachment.
Wire labels are crucial for correct wiring and are also part of the package. These labels help identify each wire connected to your heating and cooling system. Some packages may also include a screwdriver, though it’s generally recommended to use your own for optimal control. Inspect all items for any damage before proceeding with the installation. Retain the packaging for potential warranty claims or returns.
Safety Precautions During Installation
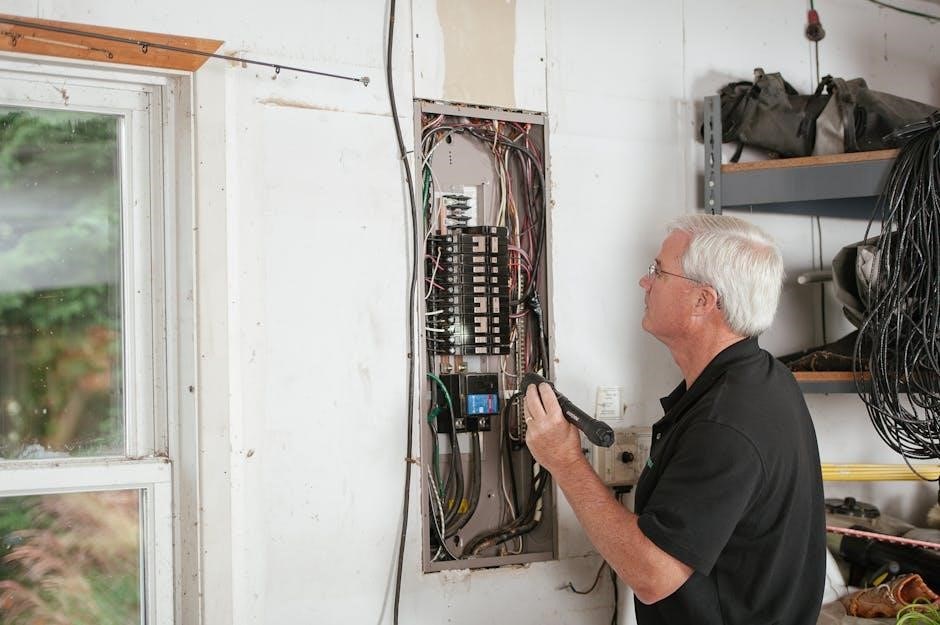
Prioritizing safety is paramount during the Honeywell TH8320R1003 installation. Always disconnect power to your heating and cooling system at the breaker box before commencing any wiring work. Failure to do so presents a serious risk of electrical shock. If you are uncomfortable working with electrical wiring, consult a qualified HVAC technician.
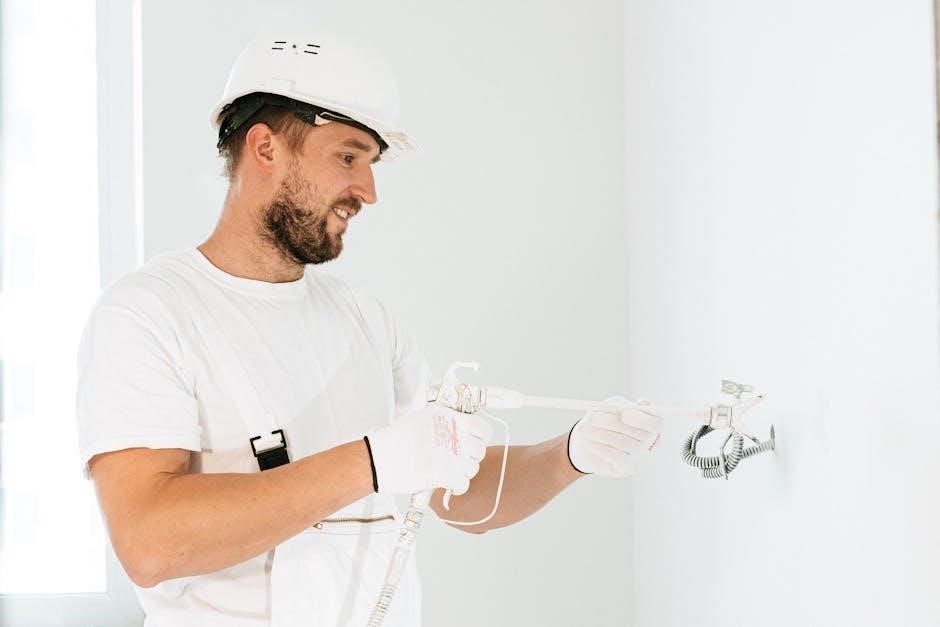
Wear appropriate safety glasses to protect your eyes from debris during drilling and mounting. Be mindful of existing wiring and avoid damaging it. Ensure the thermostat is mounted securely to prevent it from falling. Do not install the thermostat in a location exposed to direct sunlight, drafts, or extreme temperatures, as this can affect its accuracy. Follow all local electrical codes and regulations.
Tools Required for Installation
Successfully installing your Honeywell TH8320R1003 thermostat requires a few essential tools. You will need a Phillips head screwdriver for mounting the base and securing wiring connections. A flathead screwdriver may also be useful for certain terminal screws. A wire stripper is crucial for preparing the thermostat wires for connection, ensuring clean and secure contacts.
A small level will help ensure the thermostat base is mounted straight, providing an aesthetically pleasing and accurate installation. A drill with appropriate drill bits is necessary for creating mounting holes in the wall. A voltage tester is highly recommended to verify power is off before working with wiring. Finally, have a pencil for marking screw locations and a wire connector (if needed) for joining wires.
Wiring Diagram Overview
Understanding the wiring diagram is paramount for a successful Honeywell TH8320R1003 installation. The diagram illustrates how to connect the thermostat to your specific heating and cooling system. Common wires include Rh (power), Rc (cooling power), W (heating), Y (cooling), G (fan), and C (common – often blue).
Carefully compare your existing thermostat’s wiring to the Honeywell diagram. Note the color coding of the wires, but always verify the function with a wiring code identifier. Incorrect wiring can damage your system. The diagram will show where each wire connects to the thermostat base terminals. If you have a heat pump system, the wiring will be slightly different, requiring careful attention to detail.
Identifying Thermostat Wiring Codes
Accurate identification of thermostat wiring codes is crucial before beginning installation. Don’t rely solely on wire color; always confirm the function. Common codes include: Rh/Rc (24V power – heating/cooling), W (heating), Y (cooling), G (fan), C (common – provides continuous power), and often, auxiliary or emergency heat wires (Aux/E).
Your old thermostat should have labels indicating each wire’s function. If not, a multimeter can help identify live wires. The ‘C’ wire is particularly important for the TH8320R1003, as it powers the display. If you lack a ‘C’ wire, an adapter may be necessary. Refer to the Honeywell documentation for compatible adapters. Incorrectly identified wires can lead to system malfunction or damage, so double-check everything!
Connecting the Power Supply
Before connecting the power supply, ensure the HVAC system’s power is completely switched off at the breaker box. This is a critical safety precaution. Locate the Rh and Rc wires – these typically provide 24V power. If you have separate Rh and Rc wires, use the jumper wire provided with the thermostat to connect them. If there’s only one ‘R’ wire, connect it to either Rh or Rc.
The ‘C’ wire (common wire) is essential for continuous power to the TH8320R1003’s display. Connect the ‘C’ wire to the designated ‘C’ terminal on the thermostat base. Securely tighten all screw terminals to ensure a reliable connection. Double-check all connections before restoring power to avoid short circuits or damage.
Connecting Heating and Cooling Systems
Identify your heating and cooling system wiring codes before proceeding. Typically, ‘W’ represents heating, ‘Y’ cooling, and ‘G’ the fan. Connect the ‘W’ wire to the W terminal on the thermostat base for heating control. Similarly, connect the ‘Y’ wire to the Y terminal for cooling operation. The ‘G’ wire connects to the G terminal to control the blower fan.
If you have a heat pump system, additional wiring may be required, such as an ‘O/B’ wire for reversing valve control. Refer to the wiring diagram specific to your system type. Ensure all connections are secure and properly seated in their respective terminals. Incorrect wiring can lead to system malfunction or damage.
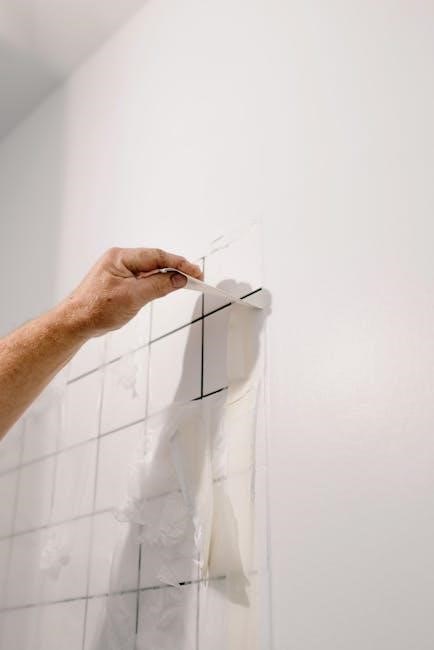
Mounting the Thermostat Base
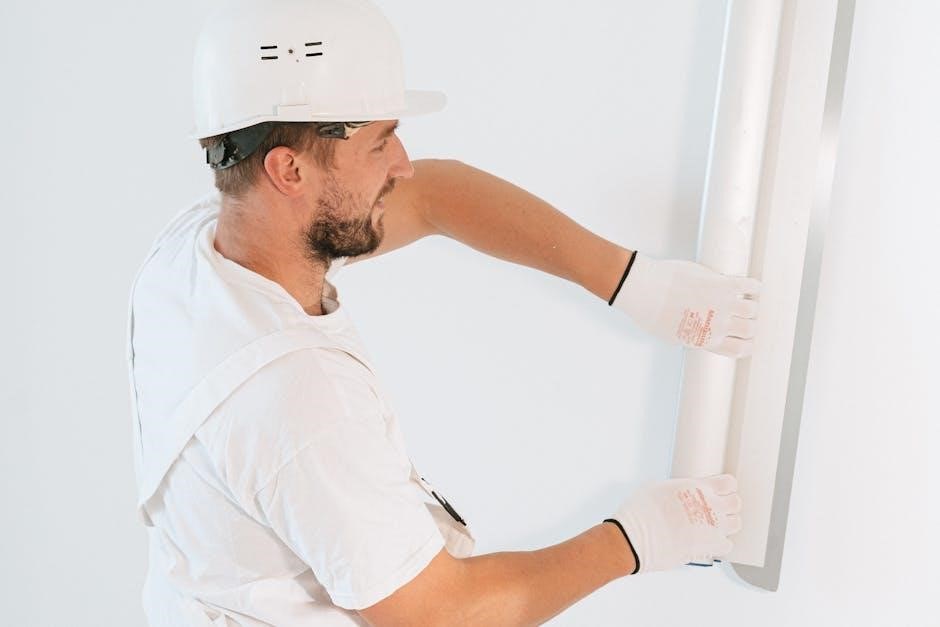
Before mounting, ensure the power to your HVAC system is completely turned off at the breaker. Position the thermostat base on the wall where the old thermostat was located, or a suitable alternative location. Use a level to ensure the base is perfectly horizontal for accurate temperature readings and a professional appearance.
Mark the screw holes through the baseplate onto the wall. Drill pilot holes at the marked locations, using a drill bit appropriate for your wall material. Secure the baseplate to the wall using the provided screws. Ensure the base is firmly attached and doesn’t wobble. Proper mounting is crucial for stable operation.
Wall Mounting Considerations
When selecting a wall location, avoid areas exposed to direct sunlight, drafts, or near heat-generating appliances. These factors can interfere with accurate temperature sensing. Interior walls are generally preferable to exterior walls for more consistent readings. Ensure the chosen location allows sufficient space for wiring connections behind the thermostat base.
Consider the height of the thermostat; typically, around 5 feet from the floor is recommended. Avoid mounting near doorways or high-traffic areas where accidental bumps could occur. Verify the wall material can securely support the thermostat’s weight. For drywall, use appropriate anchors if necessary to prevent loosening over time.
Attaching the Thermostat Display
Carefully align the thermostat display with the mounted baseplate, ensuring the pins on the display module correspond correctly with the receptacles on the base. Gently press the display onto the base until it clicks securely into place. Avoid forcing it, as this could damage the pins or the display itself.
Once attached, verify the display is firmly seated and doesn’t wobble. A secure connection is crucial for proper operation and to prevent intermittent issues. Double-check that all wiring remains undisturbed during this process. If the display doesn’t power on after attachment, re-examine the connection and wiring for any potential problems.
Securing the Wiring Connections
After connecting the wires, meticulously inspect each connection to ensure it’s firmly secured within the terminal blocks. Gently tug on each wire to confirm it doesn’t loosen or pull out. Loose connections are a primary cause of thermostat malfunctions, leading to inaccurate readings or system failures.
Arrange the wires neatly within the thermostat base, avoiding any pinching or strain. This prevents damage to the wires and ensures proper airflow. Once satisfied with the connections and arrangement, carefully close the thermostat base cover, ensuring no wires are trapped. A secure and organized wiring setup is vital for reliable operation.
Initial Thermostat Setup
Upon powering on the Honeywell TH8320R1003, the thermostat will initiate a self-test and guide you through the initial setup process. The display will prompt you to confirm the system type – heating, cooling, or both. Accurate selection is crucial for proper operation.
Next, the thermostat will ask you to configure basic settings like language preference and display brightness. Take time to personalize these settings for optimal usability. The system will then proceed to request date and time information, essential for scheduling features. Ensure accurate input for correct timekeeping and automated temperature control. Follow the on-screen instructions carefully.
Setting the Date and Time
Accurate date and time settings are fundamental for the Honeywell TH8320R1003’s scheduling and automation features. Access the date/time settings through the thermostat’s menu, typically found under “Settings” or a similar option. Use the navigation buttons to adjust the month, day, and year. Confirm each selection before proceeding.
Setting the correct time is equally important. The thermostat usually displays the time in a 12-hour or 24-hour format; choose your preference. Ensure the AM/PM designation is correct. Proper timekeeping enables precise temperature scheduling, maximizing energy savings and comfort. Incorrect settings will lead to inaccurate program execution. Save the changes to finalize the setup.
Configuring System Type (Heating/Cooling)
Correctly identifying your heating and cooling system is crucial for the Honeywell TH8320R1003’s proper operation. Navigate to the “System Type” setting within the thermostat’s menu. Options typically include “Heating Only,” “Cooling Only,” “Heat Pump,” or “Conventional.” Select the option that accurately reflects your home’s setup.
If you have a heat pump, further configuration might be needed, such as specifying auxiliary heat settings. Incorrect system type selection will result in the thermostat controlling the wrong equipment, leading to discomfort or system malfunction. Double-check your selection and save the changes. This ensures the thermostat manages temperature effectively based on your specific HVAC configuration.
Programming Temperature Schedules
The Honeywell TH8320R1003 allows for customized temperature schedules to maximize comfort and energy savings. Access the “Schedule” menu and create different periods for each day – typically “Wake,” “Leave,” “Return,” and “Sleep.” For each period, set your desired temperature. You can copy schedules to other days for convenience.
Consider your daily routine when programming. Lowering the temperature while away or asleep significantly reduces energy consumption. Utilize the thermostat’s ability to create unique schedules for weekdays and weekends. Regularly review and adjust your schedule as your needs change to optimize both comfort and efficiency. Experiment to find the ideal settings for your lifestyle.
Testing the Heating System
After installation, thoroughly test the heating system to ensure proper functionality. Set the thermostat to “Heat” mode and raise the temperature several degrees above the current room temperature. Verify that the heating system activates and warm air begins to circulate. Listen for any unusual noises from the furnace or heating unit.
Allow the system to run for at least one complete heating cycle. Check that the thermostat accurately displays the room temperature and responds correctly to adjustments. If the system fails to activate, double-check the wiring connections and power supply. Consult a qualified HVAC technician if issues persist. Proper testing guarantees a warm and comfortable environment.
Testing the Cooling System
Following heating system verification, rigorously test the cooling functionality. Switch the thermostat to “Cool” mode and lower the set temperature significantly below the current room temperature. Confirm that the air conditioning system initiates and cool air begins to flow. Listen attentively for any atypical sounds emanating from the outdoor condenser unit or the indoor air handler.
Permit the system to complete at least one full cooling cycle. Validate that the thermostat accurately reflects the room temperature and responds appropriately to temperature adjustments. Should the system not engage, re-examine the wiring connections and power source. If problems continue, seek assistance from a certified HVAC professional. Thorough testing ensures efficient and reliable cooling.
Fan Operation Verification
After confirming heating and cooling functionality, verify proper fan operation in all modes. Select the “Auto” fan setting and observe whether the fan activates only during heating or cooling cycles. Then, switch to the “On” setting to ensure the fan runs continuously, regardless of temperature demands. Listen for any unusual noises or vibrations during fan operation, indicating potential issues.
Confirm the fan speed is appropriate for your system. Some models offer adjustable fan speeds; test each setting to ensure optimal airflow and comfort. If the fan fails to operate correctly in any mode, revisit the wiring connections and thermostat settings. Consistent fan operation is crucial for efficient air distribution and system longevity.
Troubleshooting Common Installation Issues
If the thermostat displays a “No Power” message, double-check the C-wire connection and breaker status. A loose wire or tripped breaker are frequent causes. For unresponsive heating or cooling, verify correct wiring according to the diagram and confirm system compatibility. Incorrect wiring can damage the thermostat or HVAC equipment.
If the temperature reading is inaccurate, ensure the thermostat isn’t exposed to direct sunlight or drafts. Recalibrate the temperature setting within the thermostat menu. Persistent issues may indicate a faulty sensor. Finally, if the mobile app connection fails, confirm Wi-Fi connectivity and re-enter credentials. Refer to Honeywell’s support website for detailed troubleshooting guides and FAQs.
Honeywell Brand Overview
Honeywell International, established in 1885, is a diversified technology and manufacturing powerhouse with a rich history of innovation. Boasting revenues exceeding $30 billion, Honeywell operates globally across numerous sectors, including aerospace, building technologies, and performance materials. The company’s legacy is built on creative technologies and strong leadership, consistently delivering cutting-edge solutions.
Honeywell’s building technologies division focuses on automation and control systems, enhancing comfort, security, and efficiency. From smart thermostats like the TH8320R1003 to comprehensive building management systems, Honeywell provides solutions for residential and commercial applications. Their commitment to quality and reliability makes them a trusted brand worldwide, offering advanced products like air purifiers (KJ900) and lighting solutions.
Honeywell Experion PKS System Structure
The Honeywell Experion Process Knowledge System (PKS) utilizes a Distributed Server Architecture (DSA) for robust and scalable process control. This DSA integrates multiple process control systems or control units, ideal for geographically dispersed operations with interconnected remote stations and a central control room. Experion PKS is designed for complex industrial environments, offering advanced functionalities for process optimization and safety.
The system’s structure allows for redundancy and high availability, ensuring continuous operation even in the event of component failures. It supports a wide range of applications, from oil and gas to chemical and pharmaceutical industries. While distinct from a home thermostat installation, understanding Honeywell’s broader capabilities highlights their expertise in control systems and reliability.
Honeywell Lighting Solutions (e.g., Ceiling Lights)
Honeywell offers a diverse range of lighting solutions, including ceiling lights like the “Ideal Light 02LFPro” model, boasting 40-50W output and suitability for 10-20 square meter spaces. These lights prioritize eye comfort with full-spectrum RG0-rated illumination, minimizing glare and providing a natural light experience. Features like stepless dimming allow for customizable brightness levels, enhancing ambiance and energy efficiency.
While seemingly unrelated to thermostat installation, Honeywell’s commitment to smart home technology extends beyond climate control. Their lighting products often integrate with broader home automation systems, potentially offering synergistic benefits with a connected Honeywell thermostat. This demonstrates Honeywell’s holistic approach to creating comfortable and efficient living spaces.
Honeywell Air Purifiers (e.g., KJ900)
Honeywell’s air purifier line, exemplified by the KJ900 model, focuses on enhancing indoor air quality by removing pollutants like formaldehyde and smog. These purifiers utilize advanced filtration technologies to create a healthier home environment, a concern often linked to overall well-being and comfort – factors also addressed by precise temperature control. Though distinct from thermostat installation, air purification complements a comfortable home.
Like their lighting solutions, Honeywell’s air purifiers showcase the brand’s dedication to improving living spaces. A clean air environment can reduce allergy symptoms and improve respiratory health, contributing to a more enjoyable home experience alongside a properly functioning HVAC system controlled by the TH8320R1003.
Advanced Features and Settings
Beyond basic heating and cooling control, the Honeywell TH8320R1003 offers several advanced features to optimize home comfort and energy efficiency. These include customizable temperature schedules, allowing users to program different settings for various times of the day and week. Remote access via a mobile app provides convenient control from anywhere, enabling adjustments even when away from home.
Further customization options encompass fan control settings and potentially smart home integration capabilities. Exploring these advanced settings unlocks the full potential of the thermostat, tailoring it to individual preferences and lifestyle needs. Proper configuration ensures optimal performance and maximizes energy savings, complementing the initial installation process.
Remote Access and Mobile App Integration
The Honeywell TH8320R1003 facilitates convenient remote control through Honeywell’s mobile application, offering access to thermostat settings from any smartphone or tablet. This integration allows users to adjust temperatures, view current system status, and manage schedules while away from home, enhancing comfort and energy savings.
Setting up remote access typically involves connecting the thermostat to your home’s Wi-Fi network and creating a Honeywell Home account. The app provides a user-friendly interface for managing all thermostat functions, including setting temporary holds and receiving alerts for system issues. This feature streamlines home climate control and provides peace of mind, ensuring optimal comfort regardless of location.
Energy Saving Tips and Optimization
Maximize energy efficiency with your Honeywell TH8320R1003 by utilizing its programmable features. Implement customized heating and cooling schedules tailored to your daily routine, reducing energy consumption when the home is unoccupied. Leverage geofencing capabilities within the Honeywell Home app to automatically adjust temperatures based on your location, further optimizing savings.
Regularly review and adjust temperature settings to find the optimal balance between comfort and energy use. Consider utilizing the thermostat’s learning features, if available, to allow it to adapt to your preferences over time. Proper insulation and sealing of air leaks in your home will also significantly enhance the effectiveness of your thermostat and reduce energy waste, leading to lower utility bills.
Warranty Information and Support
Your Honeywell TH8320R1003 thermostat is covered by a limited warranty against defects in materials and workmanship. Please retain your proof of purchase for warranty claims, as the warranty period typically begins from the date of original purchase. Specific warranty details, including duration and coverage limitations, are outlined in the documentation included with your product.
For technical support, troubleshooting assistance, or warranty claims, Honeywell offers various resources. Visit the official Honeywell Home website for FAQs, user manuals, and online support tools. You can also contact Honeywell’s customer support team via phone or email, details of which are available on their website. Ensure you have your model number readily available when contacting support.