
Cuisinart Bread Maker Instruction Manual: A Comprehensive Guide
This manual details the Cuisinart Compact Automatic Bread Maker, a top value pick offering comprehensive guidance for baking delicious breads with ease and precision.
Understanding Your Cuisinart Bread Maker
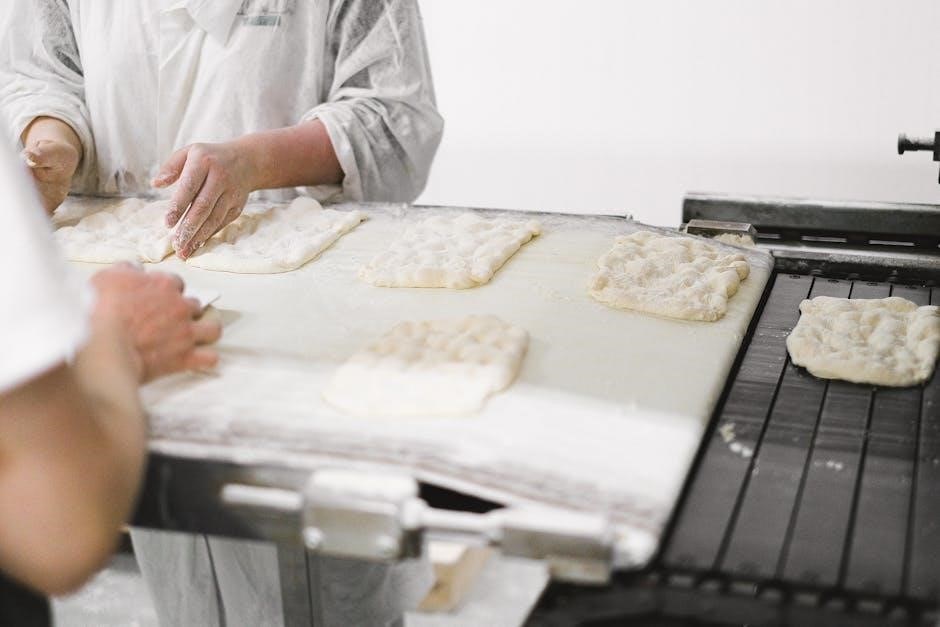
Your Cuisinart bread maker is designed for convenient, automated bread baking. It simplifies the process, handling kneading, rising, and baking within a single appliance. Before your first loaf, familiarize yourself with its capabilities. The Cuisinart Compact Automatic Bread Maker, frequently praised for its value, offers a range of pre-programmed settings to accommodate various bread types – from basic white bread to whole wheat, and even dough-only cycles for pizzas or pastries.
Understanding the machine’s operation is key to consistent results. The bread maker utilizes a heating element, a kneading paddle, and a non-stick bread pan. The control panel allows you to select cycle lengths, crust colors, and special functions. Proper ingredient ratios and order are crucial, as the machine relies on precise timing for optimal performance. This guide will walk you through each step, ensuring you unlock the full potential of your Cuisinart bread maker.
Model Variations & Identifying Your Machine
Cuisinart offers several bread maker models, each with slightly different features and capacities. Identifying your specific model is the first step towards accessing the correct support and instructions. Look for the model number typically located on the underside of the unit, or within the appliance’s housing near the power cord. Common models include the CBK-100, CBK-200, and the more recent Compact Automatic Bread Maker.
Variations exist in bread pan size, cycle options, and control panel interfaces. The Compact Automatic Bread Maker, noted for its value, features a streamlined design and essential cycles. Some models offer gluten-free settings, specialty bread programs (like French or sourdough), and adjustable delay timers. Refer to the model number to download the specific instruction manual from the Cuisinart website for detailed information tailored to your machine. Knowing your model ensures you utilize all available features effectively.
Key Components & Parts Overview
Your Cuisinart bread maker consists of several key components working in harmony to create perfect loaves. The bread pan, typically non-stick, holds the ingredients during baking. The kneading paddle, crucial for dough development, is inserted into the bread pan. The heating element, located within the machine, provides the necessary heat for baking.
The control panel allows you to select cycles, crust color, and other settings. A viewing window lets you monitor the bread-making process. The lid securely encloses the baking chamber. Some models include a dispenser for adding fruits, nuts, or seeds at the appropriate time. Familiarize yourself with each part’s location and function. Proper understanding of these components is essential for successful bread making and maintaining your machine’s longevity. Always ensure the paddle is securely attached before starting a cycle.
Getting Started: Initial Setup & Preparation
Before your first bake, carefully unpack your Cuisinart bread maker and prepare it for operation. This ensures optimal performance and delicious, homemade bread!
Unpacking & Cleaning Before First Use
Upon receiving your Cuisinart bread maker, begin by carefully removing all packaging materials. Inspect the machine for any visible damage that may have occurred during shipping. Retain the packaging for potential future transport or storage needs.
Before the initial bake, a thorough cleaning is essential. Remove the bread pan, kneading paddle, and any included accessories. Wash these components with warm, soapy water. Ensure all traces of soap are rinsed away, and then allow them to air dry completely.
The exterior of the bread maker can be wiped down with a damp cloth. Avoid using abrasive cleaners or immersing the main unit in water, as this could cause damage. Pay particular attention to the control panel area, ensuring it remains dry. A clean machine is a happy machine, ready to produce wonderful loaves!
Double-check that no protective films or stickers remain on the machine before operation. This simple step prevents unwanted residue from affecting your bread.
Setting Up the Bread Maker: Power & Placement
Proper placement and power connection are crucial for optimal bread maker performance. Select a stable, level surface away from water sources and direct heat. Ensure adequate ventilation around the machine – avoid placing it directly against walls or under cabinets.
Plug the bread maker into a dedicated electrical outlet. Do not use extension cords if possible, as they can sometimes limit power delivery. Verify the voltage compatibility between the bread maker and your outlet to prevent damage.
Before each use, confirm the power cord is securely connected. Avoid operating the machine with a damaged cord or plug. If you notice any issues, discontinue use and contact Cuisinart customer support.
Ensure the area around the bread maker is clear of obstructions, allowing easy access for adding ingredients and removing the finished loaf. A well-positioned machine contributes to a seamless baking experience.
Understanding the Control Panel
The Cuisinart bread maker’s control panel is designed for intuitive operation. It typically features a digital display and several buttons for cycle selection, crust control, and start/stop functions.
Familiarize yourself with the cycle options: Basic, Artisan, Whole Wheat, Gluten-Free, Dough, and Quick Bread are common choices. Each cycle is pre-programmed with specific kneading, rising, and baking times.
The Crust Control button allows you to select your preferred crust darkness – Light, Medium, or Dark. Experiment to find your ideal setting. The Start/Stop button initiates and halts the baking process.
Some models include a Delay Timer for convenient baking schedules. Consult your specific model’s diagram to identify each button’s function. A thorough understanding of the control panel unlocks the full potential of your bread maker.
Basic Bread Making: The Core Process
The core process involves adding ingredients in the correct order, selecting the appropriate cycle (like White Bread), and utilizing crust control for perfect loaves.
Adding Ingredients: Order & Measurements
Precise ingredient order is crucial for optimal bread making with your Cuisinart. Generally, liquids are added first – water, milk, or oil – directly into the bread pan. Following liquids, add sugar, salt, and then flour. Dry yeast should be placed on top of the flour, ensuring it doesn’t come into direct contact with liquids or salt initially. This prevents premature activation or inhibition of the yeast;
Accurate measurements are equally important. Use dry measuring cups for flour and dry ingredients, and liquid measuring cups for liquids. Level off dry ingredients with a straight edge for consistency. The Cuisinart manual provides specific measurements for various loaf sizes (1 lb, 1.5 lb, 2 lb). Always refer to your recipe and the manual for precise quantities.
For best results, use room temperature ingredients unless otherwise specified. This aids in proper mixing and rising. Avoid overfilling the bread pan, leaving sufficient space for the dough to expand during the baking process. Following these guidelines will significantly improve your bread-making success.
Selecting the Right Cycle: White, Wheat, etc.
Your Cuisinart bread maker offers a variety of pre-programmed cycles designed for different bread types, ensuring optimal results. The “Basic” or “White Bread” cycle is ideal for traditional loaves using all-purpose flour. For whole wheat breads, select the “Wheat” cycle, which features a longer kneading and rising time to accommodate the denser flour.
Specialty cycles cater to specific needs. The “French Bread” cycle creates a crispier crust, while the “Sweet Bread” cycle is perfect for enriched doughs like challah or brioche. “Rapid Bake” cycles offer quicker baking times, though may compromise on texture. “Gluten-Free” cycles are specifically calibrated for gluten-free flour blends.

Consult your recipe and the Cuisinart manual to determine the most appropriate cycle. Understanding each cycle’s parameters – kneading, rising, and baking times – will help you achieve consistently delicious bread. Experimenting with different cycles allows you to customize your loaves to your preferences.
Crust Control: Light, Medium, Dark
Cuisinart bread makers provide adjustable crust control, allowing you to customize the color and texture of your bread’s exterior. The “Light” crust setting results in a pale, soft crust, ideal for sandwiches or those who prefer a delicate texture. Selecting “Medium” yields a golden-brown crust with a slight crispness, a versatile option for everyday use.
For a robust, deeply browned, and crunchy crust, choose the “Dark” setting. This is perfect for artisan-style loaves or breads with hearty ingredients. The crust control function adjusts the final baking time, influencing the level of browning.
Experimenting with different crust settings is encouraged to find your preferred level. Factors like flour type and humidity can also affect the final crust color, so adjustments may be necessary. Refer to your recipe for suggested crust settings, but don’t hesitate to personalize!

Advanced Bread Making Techniques
Explore diverse baking with Cuisinart! Master whole wheat, rye, gluten-free options, and enhance loaves with fruits, nuts, and seeds for unique flavors.
Using Different Flour Types (Whole Wheat, Rye)
Expanding beyond all-purpose flour unlocks a world of bread flavors and textures. When utilizing whole wheat flour, remember it absorbs more liquid than white flour. Adjustments are often necessary; start by adding 1-2 tablespoons of extra water to your recipe; A dedicated “Whole Wheat” cycle on your Cuisinart bread maker is optimized for this flour’s characteristics, providing a longer rise time for proper development.
Rye flour presents another unique challenge. It contains less gluten, resulting in denser loaves. Combining rye flour with bread flour (typically a 25-50% rye ratio) is recommended to achieve a better rise and structure. The Cuisinart machine’s cycles can accommodate rye, but monitoring the dough consistency is crucial.
Experimentation is key! Different brands of whole wheat and rye flour can vary in absorption rates. Observe your dough closely – it should form a cohesive ball, not too sticky or too dry. Adjust liquid accordingly, a tablespoon at a time, until the desired consistency is reached. Enjoy the robust flavors these alternative flours bring to your homemade bread!
Adding Fruits, Nuts & Seeds
Elevate your bread with delightful additions! The Cuisinart bread maker allows for incorporating fruits, nuts, and seeds, but timing is crucial. Generally, add these ingredients during the second knead cycle, signaled by a beep. This prevents them from being crushed during the initial mixing.
Dried fruits, like raisins or cranberries, should be chopped into smaller pieces and may benefit from a brief soak in warm water to plump them up. Nuts, such as walnuts or pecans, add texture and flavor; coarsely chop them for even distribution. Seeds, including sunflower, pumpkin, or flax, contribute nutritional value and a subtle crunch.
Avoid overloading the bread pan. A general guideline is to limit additions to approximately 1-1.5 cups total. Too many additions can hinder the dough’s rise. Utilize the “Fruit & Nut” cycle if your model has one, as it’s pre-programmed for optimal results. Remember to check the paddle after baking, as nuts and seeds can sometimes become lodged within it.
Gluten-Free Bread Making with Your Cuisinart
Baking gluten-free bread requires a specialized approach. Your Cuisinart bread maker can handle it, but understanding the differences is key. Gluten provides structure; without it, gluten-free doughs are often lighter and require binding agents.
Utilize a gluten-free flour blend specifically formulated for bread making. These blends typically contain starches and gums (like xanthan gum) to mimic gluten’s properties. Follow the blend’s instructions carefully, as ratios vary. The “Gluten-Free” cycle, if available, is optimized for these doughs.
Expect a different texture. Gluten-free bread tends to be denser and may not rise as dramatically as traditional bread. Adding a tablespoon of apple cider vinegar can help improve the rise. Monitor the dough closely during the initial mixing stages; it may appear wetter than wheat-based dough. A dedicated gluten-free paddle is recommended to avoid cross-contamination.
Troubleshooting Common Issues
Addressing problems like insufficient rise, paddle issues, or error codes is crucial for successful baking. This section provides solutions to common Cuisinart bread maker challenges.
Bread Not Rising Properly
A common frustration is bread that doesn’t rise sufficiently. Several factors can contribute to this issue. First, ensure your yeast is fresh and active. Expired yeast, or yeast that hasn’t been properly proofed, won’t provide the necessary lift. Proofing involves dissolving the yeast in warm water with a pinch of sugar; it should become foamy within 5-10 minutes.
Incorrect ingredient measurements are another frequent cause. Too much salt can inhibit yeast activity, while too much liquid can create a slack dough. Always use measuring cups and spoons specifically designed for baking, and level off dry ingredients.
Ambient temperature also plays a role. Colder environments can slow down yeast activity. Consider placing the bread maker in a warmer location during the rising process. Finally, check the cycle selected. Ensure you’ve chosen a cycle appropriate for the type of bread you’re making – a longer rise time is often needed for whole wheat or rye breads.
If the problem persists, try using a different brand of yeast to rule out a potential issue with the specific yeast you’re using.
Paddle Stuck in Bread
Finding the kneading paddle embedded in your finished loaf is a common occurrence, but thankfully, usually avoidable. The primary cause is often using excessive amounts of sticky ingredients like honey, molasses, or fruit pieces without adjusting the liquid content. These additions can create a dough that clings tightly to the paddle.
To minimize this, reduce the liquid in the recipe slightly when adding sticky ingredients. Ensure the paddle is securely attached before starting the cycle; a loose paddle can become more easily dislodged during kneading.

If the paddle does become stuck, allow the bread to cool completely before attempting removal. Gently use a non-metallic utensil, like a wooden skewer or plastic spatula, to carefully work around the paddle and loosen it. Avoid using metal tools as they can damage the non-stick coating of the bread pan.

Regularly check the paddle’s condition; a worn or damaged paddle may be more prone to sticking.
Error Codes & Their Meanings
Your Cuisinart bread maker utilizes error codes to signal potential issues during operation. Understanding these codes is crucial for troubleshooting and ensuring optimal performance. “Err 1” typically indicates a power interruption during the baking cycle, requiring a restart. “Err 2” suggests a temperature sensor malfunction, potentially needing professional service.
“Err 3” often points to a heating element failure, also requiring professional attention. If you encounter “Err 4,” it usually means the lid wasn’t properly secured during operation – ensure a tight fit. A flashing “Err” code may signify a general system error, prompting a machine reset by unplugging and replugging.
Consult your specific model’s manual for a complete list of error codes and their corresponding solutions, as variations exist. Documenting the error code before contacting customer support can expedite the troubleshooting process. Ignoring error codes can lead to further damage.
Maintenance & Cleaning
Regular cleaning extends your Cuisinart bread maker’s lifespan. Thoroughly clean the bread pan and paddle after each use, and wipe down the exterior with a damp cloth.
Cleaning the Bread Pan & Paddle
After each baking cycle, promptly remove the bread pan and kneading paddle from the Cuisinart bread maker. Allow both components to cool completely before attempting to clean them. Warm water and mild dish soap are generally sufficient for removing bread residue.
For stubborn, baked-on dough, soak the pan and paddle in warm, soapy water for approximately 15-20 minutes. This will help loosen the debris, making it easier to scrub away. Avoid using abrasive cleaners, scouring pads, or harsh chemicals, as these can damage the non-stick coating of the bread pan.
A soft sponge or cloth is ideal for cleaning. Ensure all soap residue is thoroughly rinsed away with clean water. The bread pan and paddle are often dishwasher safe (check your specific model’s manual to confirm), offering a convenient cleaning option. However, hand washing can help preserve the non-stick coating for a longer period.
Dry both components completely before reassembling and storing. Proper cleaning ensures optimal performance and prevents the buildup of bacteria or odors.
Exterior Cleaning & Care
Maintaining the exterior of your Cuisinart bread maker is simple and ensures its longevity. Always unplug the appliance and allow it to cool completely before cleaning. Use a soft, damp cloth to wipe down the exterior housing. Avoid using abrasive cleaners, scouring pads, or harsh chemicals, as these can damage the finish.
For stubborn stains or splatters, a mild dish soap solution can be used sparingly; Ensure the cloth is only damp, not soaking wet, to prevent water from entering the appliance. Wipe the exterior with a clean, damp cloth to remove any soap residue.
The control panel can be cleaned with a soft, dry cloth. Avoid applying liquids directly to the control panel, as this could cause damage. Regular dusting will help keep the control panel looking its best.
Never immerse the bread maker in water or any other liquid. Proper exterior care will keep your Cuisinart bread maker looking new and functioning optimally for years to come.
Long-Term Storage Instructions
When storing your Cuisinart bread maker for an extended period, proper preparation is crucial. First, ensure the appliance is completely clean and dry, following the cleaning instructions in this manual. Remove the bread pan, kneading paddle, and any accessories, washing them thoroughly and drying them completely before storage.
Store the bread maker in a cool, dry place, away from direct sunlight and extreme temperatures. Ideally, use the original packaging to protect the appliance from dust and damage. If the original packaging isn’t available, use a sturdy box and wrap the bread maker in protective materials like bubble wrap or packing peanuts.
Avoid storing the appliance in a damp basement or attic. Periodically check the stored bread maker to ensure it remains dry and free from pests. Proper long-term storage will help maintain its functionality and extend its lifespan.