
Manual Dumbwaiter Kit: A Comprehensive Guide
Exploring manual dumbwaiter kits reveals a fascinating blend of DIY ingenuity and practical home solutions. These systems, often utilizing rack and pinion drives, offer a unique way to transport items between floors.
Consider garage winches, Arduino control, and crucial limit switches for safety, especially a failsafe at the top to prevent structural damage or motor hazards.
Professional installation ensures safety and efficiency, while understanding dimensions, clearances, and fireblocking are vital for a successful and compliant setup.
Some kits boast up to 20 cycles during power outages, a significant benefit for food service, and pre-assembled components simplify the installation process.
Limit switch connections, typically using two-wire attachments to a terminal strip, are essential for proper functionality and operational safety within the system.
Manual dumbwaiter kits represent a compelling alternative to traditional elevators, offering a cost-effective and space-saving solution for vertical transport within a home or small commercial setting. These kits empower homeowners and builders to install a functional lifting system without the complexities and expense of full-scale elevator installations.
Historically, dumbwaiters were primarily used for transporting food and dishes between kitchen and dining areas. However, modern kits broaden this application, enabling the movement of groceries, laundry, books, and other household items. The core of many systems relies on a rack and pinion drive, eliminating the need for cables, chains, or drums, thus minimizing potential issues like cable slack and lockups.
The appeal of a DIY approach is significant, but careful consideration of safety features, building codes, and proper installation techniques is paramount. Integrating components like Arduino for control and strategically placed limit switches – including a failsafe at the upper limit – enhances both functionality and safety.
Understanding the Benefits of a Dumbwaiter
A manual dumbwaiter kit offers numerous advantages, primarily centered around convenience and accessibility. They significantly reduce physical strain associated with carrying items between floors, proving invaluable for individuals with mobility limitations or when transporting heavy loads. Beyond simple convenience, dumbwaiters enhance the functionality of multi-level homes, streamlining daily tasks.
For food service applications, the reliability of a dumbwaiter is crucial; some models can operate up to 20 cycles even during a power outage, ensuring uninterrupted service. The compact design minimizes the footprint compared to elevators, making them suitable for homes where space is at a premium.
Furthermore, a well-installed dumbwaiter can increase a property’s value and appeal. Choosing a kit with pre-assembled components simplifies installation, while features like limit switches contribute to a safer and more reliable operation.
Safety Considerations for DIY Dumbwaiter Installation
Installing a manual dumbwaiter kit demands meticulous attention to safety. Prioritize a robust failsafe limit switch at the top of the shaftway to prevent collisions and potential motor damage. Thoroughly address fireblocking issues, adhering to local building codes to contain potential fire spread within the shaft.
Weight capacity is paramount; strictly adhere to the dumbwaiter’s load limits to avoid mechanical failure or accidents. Proper wiring and control system integration, potentially utilizing Arduino for precise control, are crucial. Regularly inspect all components, especially cables (if applicable), for wear and tear.
Professional guidance is recommended, particularly regarding structural integrity and electrical connections. Ignoring these precautions could lead to serious injury or property damage.

Components of a Typical Manual Dumbwaiter Kit
Essential components include the car/cabinet, a robust track system with guide rails, and a drive mechanism—often rack and pinion—plus vital safety limit switches.
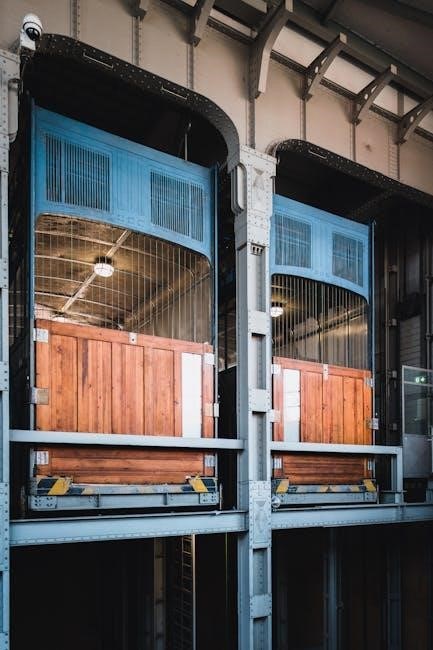
The Dumbwaiter Car/Cabinet
The heart of the system, the dumbwaiter car or cabinet, is typically constructed from durable materials like wood or metal, designed to withstand regular use and varying loads. Its size dictates what can be transported, so careful consideration of dimensions is crucial during kit selection.
These cabinets often feature a door with a secure latching mechanism, ensuring items remain safely contained during transit. The internal space should be adequate for common household items, groceries, or small packages.
Properly designed cars integrate seamlessly with the track system, utilizing slide guides for smooth vertical movement. Aesthetics can vary, with options ranging from basic utility to more finished designs that blend with home décor.
Track System and Guide Rails
A robust track system is fundamental to a safe and efficient manual dumbwaiter. Typically constructed from metal, the track provides the vertical pathway for the car’s ascent and descent. Precise installation is paramount, ensuring a perfectly plumb and level alignment throughout the shaftway.
Guide rails, running parallel to the track, keep the car stable and prevent swaying during operation. These rails interface with the car’s slide guides, facilitating smooth, controlled movement. The entire system must be securely anchored to the building’s structure.
Some kits feature pre-assembled track sections, simplifying installation. The track’s length is determined by the height of the building and the desired travel distance of the dumbwaiter.
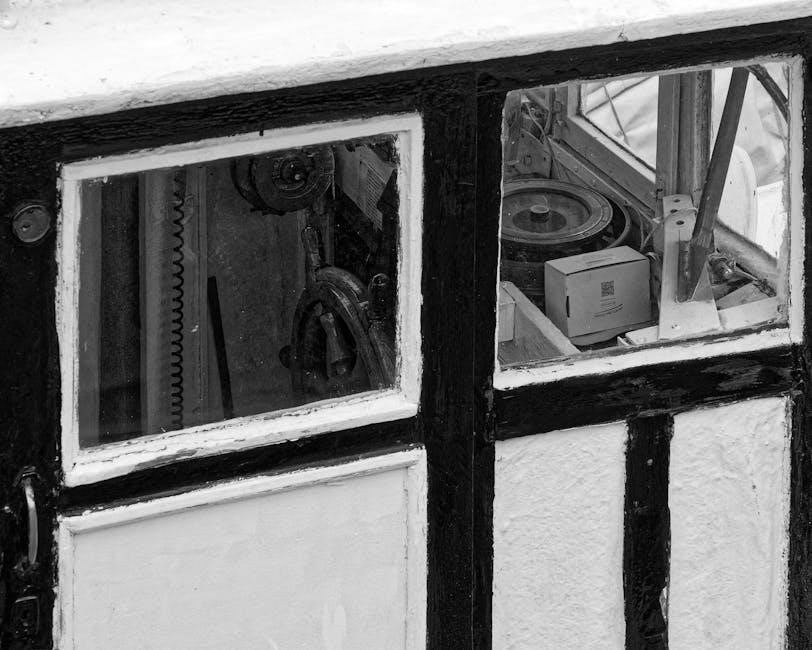
Drive Mechanism: Rack and Pinion vs. Cable Systems
The drive mechanism is the heart of a manual dumbwaiter, responsible for lifting and lowering the car. Two primary systems exist: rack and pinion, and cable-driven. Rack and pinion systems utilize a gear that engages with a toothed rack along the track, offering direct drive and eliminating cables.
This design avoids issues like cable slack and lockups, providing reliable operation, even during power outages – some models offer up to 20 cycles without power. Cable systems, conversely, employ a winch and cable to lift the car.
While potentially less expensive, cable systems require careful maintenance to prevent slack and potential failures. The choice depends on budget, desired reliability, and the complexity of installation.

Limit Switches and Safety Mechanisms
Safety is paramount when installing and operating a manual dumbwaiter. Limit switches are crucial components, acting as fail-safes to prevent over-travel at the top and bottom of the shaftway. These switches automatically halt the mechanism, protecting both the dumbwaiter and the structure.
Typically, these switches connect via two wires to a designated terminal strip on the control system. A final, upper limit switch is particularly important, acting as a redundant safety measure against potential motor runaway or system malfunctions.
Emergency stop mechanisms should also be incorporated for immediate control. Proper installation and regular testing of these safety features are essential for reliable and secure operation.
Installation Process: A Step-by-Step Overview
Begin by preparing the shaftway, then install the track system and carefully mount the dumbwaiter car. Finally, connect the drive mechanism, ensuring proper alignment and secure fastening.
Preparing the Shaftway
The shaftway preparation is a critical first step, demanding careful attention to structural integrity and safety regulations. Begin by thoroughly inspecting the designated space, ensuring it’s clear of obstructions and adequately sized for the dumbwaiter’s travel.
Prioritize fireblocking – a non-negotiable aspect of installation, preventing fire spread between floors. This often involves sealing any openings within the shaftway with approved fire-resistant materials.
Confirm the shaftway walls are structurally sound and capable of supporting the dumbwaiter’s weight and operational forces. Precise measurements are essential for accurate track installation, and any necessary framing or reinforcement should be completed before proceeding. Remember to adhere to local building codes throughout this preparation phase.
Installing the Track System
Precise track installation is paramount for smooth and safe dumbwaiter operation. Begin by securely mounting the lower section of the track, often pre-assembled with the motor and electronics in some kits, ensuring perfect alignment.
Utilize the provided mounting template to accurately position the track and attach it firmly to the shaftway walls. Then, carefully install the upper track section, maintaining consistent alignment with the lower portion.
Verify the track is level and plumb throughout its entire length, as any deviation will cause operational issues. Some systems utilize slide guides; ensure these are correctly set within the track before proceeding.
Mounting the Dumbwaiter Car
Carefully position the dumbwaiter car within the installed track system. Gently lift the car into the shaftway and align it with the slide guides, ensuring it seats correctly within the track.
Securely attach the car to the slide guides, utilizing the provided hardware. Double-check that all connections are tight and that the car moves freely along the track without binding or obstruction.
Verify the car’s alignment with the track at various points along its travel path. Proper mounting is crucial for balanced operation and prevents potential issues like cable slack or lockups, especially in systems without rack and pinion drives.
Connecting the Drive Mechanism

With the car mounted, connect the chosen drive mechanism – either a rack and pinion system or a cable-based setup. For rack and pinion drives, ensure the motor and electronics assembly, often pre-assembled, are securely fastened to the lower section of the track.
If utilizing a cable system, carefully install the cables, avoiding slack that could lead to lockups. Ensure proper spooling and tensioning. For either system, integrate the limit switches, connecting the two wires to the designated terminal strip, typically on the lower left.
Thoroughly test the drive mechanism’s functionality, verifying smooth operation and responsiveness to the limit switches for safe and controlled movement.
Wiring and Control Systems
Essential wiring connects the drive mechanism, limit switches, and control interface, potentially integrating Arduino for advanced control. Proper connections ensure safe operation and responsiveness.
Basic Wiring Diagram
A fundamental wiring setup for a manual dumbwaiter kit involves connecting the power source to the drive motor, ensuring correct voltage and polarity. Crucially, limit switches require dedicated wiring to the control system, typically utilizing two-wire connections to a terminal strip marked “limit.”
These switches act as safety cutoffs, halting operation at the upper and lower travel limits. The control interface, whether a simple up/down switch or an Arduino-based system, receives signals from the limit switches and controls power to the motor.
Proper grounding is paramount for safety, and all connections should be secure and insulated. A clear understanding of the wiring diagram provided with the kit is essential before commencing any electrical work. Incorrect wiring can lead to malfunction or, more seriously, safety hazards.
Arduino Control Integration (Advanced)
Integrating an Arduino unlocks advanced control possibilities for your manual dumbwaiter. Utilizing the microcontroller allows for customized operation, including soft starts and stops, precise positioning, and remote control capabilities. Limit switches connect to Arduino digital input pins, providing feedback on the dumbwaiter’s position.

Programming the Arduino involves defining pin assignments, reading limit switch states, and controlling the motor driver. Implementing safety features, like emergency stop routines, is crucial. You can add features like a display showing the current floor or a timer to prevent prolonged operation.
This approach demands coding knowledge and a solid understanding of electronics, but offers a highly adaptable and feature-rich dumbwaiter control system beyond basic on/off functionality.
Limit Switch Connections and Functionality
Limit switches are critical safety components in a manual dumbwaiter system, preventing over-travel at the top and bottom of the shaftway. Typically, these switches utilize two-wire connections, attaching to a designated terminal strip – often marked “limit” – on the control system or motor assembly.
Functionally, they act as sensors, interrupting power to the drive mechanism when the dumbwaiter car reaches its designated limits. This prevents damage to the structure, motor, and the dumbwaiter itself. Proper adjustment is vital; switches should activate just as the car reaches its endpoint.
Adding a final limit switch at the top provides a crucial failsafe, shutting down the system even if the primary stopping mechanism fails, safeguarding against potential hazards.

Safety Features and Best Practices
Prioritize safety with emergency stops, robust fireblocking adhering to building codes, and strict adherence to weight capacity limits for reliable operation.
Implementing failsafe limit switches and regular inspections are crucial for preventing accidents and ensuring long-term, secure dumbwaiter functionality.
Emergency Stop Mechanisms
Robust emergency stop mechanisms are paramount for safe manual dumbwaiter operation. A primary safety feature involves a readily accessible, clearly labeled emergency stop button, ideally positioned at each landing.
Beyond this, a crucial failsafe is a top limit switch, acting as a final barrier to prevent the car from over-traveling and potentially causing structural damage or a motor fire hazard. This is especially important given the potential for control system malfunctions.
Consider redundant systems; for example, a secondary limit switch or a mechanical brake that engages automatically upon power loss or excessive speed. Regular testing of these mechanisms is non-negotiable, ensuring they function reliably when needed. Proper signage detailing emergency procedures should also be prominently displayed.
These features collectively minimize risks and provide peace of mind during operation.
Fireblocking and Building Codes
Adhering to fireblocking regulations and local building codes is absolutely critical when installing a manual dumbwaiter. The shaftway must be properly fireblocked at each level to prevent the rapid spread of fire and smoke throughout the structure.
This typically involves using fire-rated materials to seal any openings where the shaftway penetrates floor or ceiling assemblies. Consult your local building department for specific requirements, as these can vary significantly.
Furthermore, ensure the dumbwaiter installation doesn’t compromise existing fire safety systems, such as sprinkler systems or smoke detectors. Proper permits and inspections are essential to verify compliance. Ignoring these regulations can lead to significant safety hazards and legal repercussions.
Prioritize safety and code adherence throughout the entire process.
Weight Capacity and Load Limits
Establishing and strictly adhering to weight capacity limits is paramount for the safe operation of any manual dumbwaiter kit. Exceeding these limits can cause mechanical failure, cable strain, or even complete system collapse, posing serious risks.
Manufacturers clearly specify the maximum load the dumbwaiter is designed to handle; this information must be prominently displayed near the unit. Regularly remind all users of this limit.
Consider the weight of the items and any containers used for transport. Avoid overloading, even temporarily. Inspect cables and drive mechanisms frequently for signs of stress or wear, especially after heavy use. Prioritize safety by consistently respecting the dumbwaiter’s specified load limits.
Safe operation depends on responsible usage.

Troubleshooting Common Issues
Addressing issues like cable slack, lockups, motor overheating, and limit switch malfunctions requires careful inspection and adjustment. Prioritize safety during diagnostics and repairs.
Cable lockups often stem from improper installation or overloading, while overheating suggests excessive use or mechanical resistance within the drive system.
Limit switch malfunctions can prevent proper operation, necessitating testing and potential replacement to ensure the dumbwaiter functions safely and reliably.
Cable Slack and Lockups
Cable slack is a frequent concern in manual dumbwaiter systems utilizing cable-driven mechanisms. This occurs when the cable loses tension, potentially leading to operational issues and safety hazards. Lockups, where the dumbwaiter car becomes stuck, are often directly related to excessive slack or improper cable winding.
The rack and pinion systems, thankfully, eliminate these cable-related problems entirely, offering a more reliable solution. However, for cable systems, regular inspection is crucial. Look for visible slack, uneven winding on the drum, or any signs of cable fraying.
Addressing slack often involves adjusting the cable tensioning mechanism, if equipped. If a lockup occurs, never attempt to force the car; instead, carefully assess the situation and attempt to gently release any binding. A final limit switch at the top can prevent damage during a potential runaway situation;
Motor Overheating
Motor overheating is a significant safety concern in manual dumbwaiter kits, particularly those relying on electric drive mechanisms. Prolonged or excessive use, especially with loads exceeding the dumbwaiter’s capacity, can cause the motor to generate excessive heat. This can lead to component failure, and in extreme cases, even a fire hazard.
Preventative measures include ensuring proper ventilation around the motor and adhering strictly to the specified weight limits. Regular inspections should check for unusual noises or smells emanating from the motor housing.
If overheating occurs, immediately cease operation and allow the motor to cool completely before attempting to restart. A failsafe limit switch at the top prevents strain and potential overheating from runaway operation. Consider systems with 20 cycles during power outages to reduce continuous use.
Limit Switch Malfunctions
Limit switch malfunctions pose a serious safety risk within manual dumbwaiter kits, potentially leading to uncontrolled movement or complete operational failure. These switches are crucial for defining the upper and lower travel limits, preventing the car from colliding with the shaftway structure.
Common issues include wiring problems, mechanical failures within the switch itself, or improper adjustment. A malfunctioning upper limit switch is particularly dangerous, as it could allow the dumbwaiter to continue rising unchecked.
Regularly test the functionality of both upper and lower limit switches. Ensure the two-wire connections to the terminal strip are secure. If a switch fails, replace it immediately. A failsafe upper limit switch is ideal, providing redundancy and preventing potential damage.

Maintenance and Long-Term Care
Consistent inspections and lubrication of moving parts are vital for longevity. Professional servicing is recommended to ensure continued safe and efficient operation of your manual dumbwaiter kit.
Regular Inspections
Consistent and thorough inspections are paramount for maintaining the safety and functionality of your manual dumbwaiter kit. Begin by visually examining the entire system – the car, track, and drive mechanism – for any signs of wear, damage, or loose components.
Pay close attention to the cable system (if applicable), checking for fraying, slack, or improper winding. Verify the secure attachment of all bolts, nuts, and fasteners. Inspect the limit switches to ensure they are functioning correctly, triggering at the appropriate points to prevent overtravel.
Regularly assess the condition of the dumbwaiter car itself, looking for cracks, dents, or structural weaknesses. A monthly inspection schedule is advisable, with more frequent checks if the dumbwaiter is heavily used. Document all findings and address any issues promptly to prevent potential hazards.
Lubrication of Moving Parts
Proper lubrication is crucial for the smooth and efficient operation of your manual dumbwaiter kit, minimizing friction and extending the lifespan of its components. Focus on the track system and guide rails, applying a silicone-based lubricant to ensure the car moves freely without binding.
If your kit utilizes a rack and pinion drive, lubricate the gears regularly to prevent wear and maintain optimal performance. For cable systems, apply lubricant to the cable itself, ensuring even distribution along its length. Avoid using oil-based lubricants, as they can attract dust and grime;
A light coating is sufficient; excessive lubrication can attract debris. Perform lubrication every six months, or more frequently with heavy use. Always wipe away any excess lubricant to prevent slippage or contamination.
Professional Servicing Recommendations
While DIY installation is achievable, periodic professional servicing is highly recommended for your manual dumbwaiter kit. A qualified technician can perform a comprehensive inspection, identifying potential issues before they escalate into costly repairs.
They can expertly assess the track system, drive mechanism, and safety features, ensuring everything functions correctly and safely. Technicians are also familiar with local building codes and fireblocking requirements, guaranteeing compliance.
Annual inspections are a good starting point, increasing frequency with heavy usage. Don’t hesitate to call a professional if you notice unusual noises, slow operation, or any safety concerns. Prioritize safety and longevity with expert maintenance.