
Johnson pocket doors offer space-saving solutions, sliding seamlessly into wall cavities. This guide details installation, utilizing Johnson Hardware systems for modern interiors and efficient use of space.
Understanding Pocket Doors and Their Benefits
Pocket doors represent a clever space-saving alternative to traditional swinging doors, sliding directly into a recess within the wall. This design eliminates the arc of a swinging door, making them ideal for smaller rooms like bathrooms or hallways where space is at a premium. Johnson Hardware systems are renowned for their quality and smooth operation, offering a variety of kits to suit different door weights and opening sizes.
Beyond space efficiency, pocket doors contribute to a cleaner, more modern aesthetic. They offer a streamlined look, enhancing interior design and maximizing usable floor area. Homeowners often choose them to modernize interiors and create a more open feel, particularly when connecting rooms. The ability to conceal the door when open further enhances this effect.
Overview of Johnson Hardware Systems
Johnson Hardware offers a comprehensive range of pocket door systems, catering to diverse needs and budgets. Their kits, like the 1500PPK3 and 1700726H (bi-fold options), include essential components like carriers, tracks, and guides. These systems are readily available at retailers like Home Depot, simplifying procurement for DIY enthusiasts and professionals alike.
Johnson’s designs prioritize smooth, quiet operation and durability. Different series support varying door weights and sizes, ensuring compatibility with standard and custom doors. Understanding the load capacity and specific features of each system is crucial for a successful installation. Proper selection guarantees a long-lasting, reliable pocket door solution.

Tools and Materials Needed
Essential tools include a level, stud finder, drill, and saw. Johnson Hardware kits require wood for framing, fasteners, and potentially drywall repair materials for a complete install.

Essential Tools for Installation
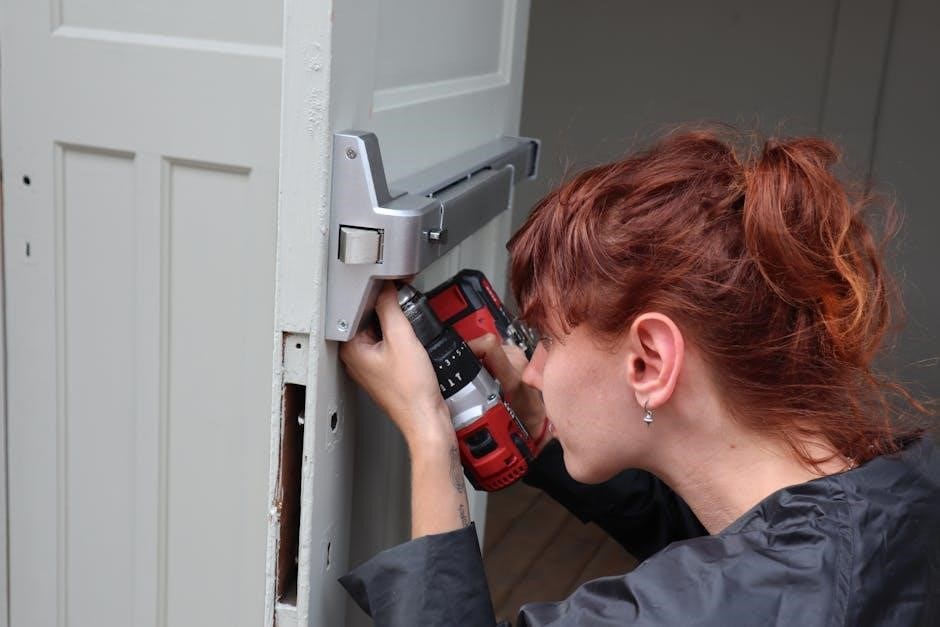
Successful Johnson pocket door installation demands a well-equipped toolkit. A stud finder is crucial for locating wall studs to securely mount the frame. You’ll need a level – both a spirit level and potentially a laser level – to ensure the frame is perfectly plumb and square, vital for smooth door operation. A power drill with various bits is essential for pre-drilling holes and driving screws.
A circular saw or hand saw will be needed for modifying the rough opening, while a measuring tape guarantees accurate dimensions. Don’t forget a utility knife for scoring drywall, and safety glasses and work gloves for protection. A hammer and a screwdriver set (or drill with screwdriver bits) complete the core tool list.
Johnson Hardware Kit Components
Johnson Pocket Door Hardware Kits, like the 1500PPK3 or 1700726H, typically include several key components. Expect a pocket door frame, consisting of header, jambs, and track. The door carrier (or rollers) allows the door to slide smoothly within the frame. Track and mounting hardware secure the system to the wall.
You’ll also find door guides (top and bottom) to keep the door aligned, and stops to control travel distance. Some kits include fascia to conceal the header. Carefully inventory all parts upon arrival to ensure everything is present before beginning installation; referencing the kit’s parts list is highly recommended.
Additional Materials (Wood, Fasteners, etc.)
Beyond the Johnson Hardware Kit, several supplementary materials are crucial for a successful installation. You’ll need lumber for framing the rough opening – typically 2x4s, sized to match your door and kit specifications. Wood shims are essential for leveling and plumbing the frame.
A variety of fasteners, including wood screws, drywall screws, and potentially construction adhesive, will be required. Door casing and trim provide a finished look; Don’t forget a door suitable for pocket door installation, and appropriate hardware like a door handle and potentially a lock.
Preparing the Door Opening
Accurate framing is key; verify dimensions and ensure the opening is level and plumb before proceeding with Johnson Hardware installation for optimal results.
Framing Requirements and Dimensions
Precise framing is crucial for successful Johnson pocket door installation. The rough opening width must accommodate the door width plus 1.5 inches, allowing for smooth operation. Height should be door height plus the required clearance specified by Johnson Hardware – typically around 1 inch.
Wall thickness needs to align with the chosen Johnson system; standard kits require a 4.5-inch wall depth. Studs flanking the opening must be plumb and securely fastened. Double studs are recommended for added support, especially with heavier doors. Carefully review the Johnson installation manual for specific dimensional requirements related to your chosen kit, as variations exist.
Checking for Level and Plumb
Accuracy is paramount when installing a Johnson pocket door. Before proceeding, meticulously check the existing door opening for level and plumb. Use a spirit level to verify that the floor is level across the opening’s width and that the door jambs are perfectly vertical (plumb).
Any deviations will hinder smooth door operation and potentially damage the Johnson hardware. Shim as needed to correct minor imperfections. Significant issues may require reframing. A laser level can enhance precision, especially for larger openings. Confirm these measurements multiple times throughout the installation process.
Creating the Rough Opening
Precise dimensions are crucial for a successful Johnson pocket door installation. Based on the chosen Johnson hardware kit and door size, carefully create the rough opening within the wall. Typically, this involves widening and heightening the existing opening, ensuring sufficient depth for the pocket.
Refer to the Johnson hardware instructions for specific measurements – they vary by model. Use a stud finder to locate wall studs and plan cuts accordingly. Maintain plumb and level lines during the cutting process. Reinforce the opening with headers as needed to support the load-bearing wall.

Installing the Pocket Door Frame
Johnson frames assemble easily within the rough opening, providing the structure for the sliding door. Securely fasten the frame to wall studs, ensuring stability and alignment.
Assembling the Frame Components
Carefully unpack the Johnson pocket door frame kit, identifying all components – side jambs, head jamb, and potentially a sill. Following the manufacturer’s diagrams is crucial for correct assembly. Typically, the side jambs attach to the head jamb using screws or pre-installed fasteners.
Ensure the frame is square during assembly; a slight misalignment now will cause significant issues later. Some kits require you to install the door carrier within the frame at this stage, while others suggest doing it after mounting. Double-check the orientation of the frame components – the carrier side must face the opening.
Pre-drilling pilot holes can prevent wood splitting, especially with hardwood jambs.
Securing the Frame to the Wall
Position the assembled frame within the rough opening, ensuring it’s centered and plumb. Use shims to achieve a perfectly vertical alignment, particularly at the jambs. Secure the frame to the wall studs using appropriate screws – typically 3-inch screws are recommended for solid studs.
Drive screws through the frame’s jambs and into the studs at multiple points, top and bottom. Regularly check for plumb as you secure the frame; adjustments can be made with shims before fully tightening the screws.
Avoid over-tightening, which could distort the frame. A solid, stable frame is essential for smooth door operation.
Ensuring Frame is Level and Square
Leveling and squaring the frame are critical for smooth pocket door function. Use a long level to check both the horizontal and vertical components of the frame. Adjust shims as needed until perfectly level – any deviation will cause operational issues.
Next, verify the frame is square by measuring diagonally from corner to corner. These measurements should be equal. If not, gently adjust the frame until square, re-checking with the level.
Once level and square, securely fasten all screws, ensuring the frame remains stable during this process.

Hanging the Pocket Door
Attaching the door to the carrier involves aligning the rollers and securing them properly. Precise adjustment ensures smooth gliding within the installed Johnson pocket door frame.
Attaching the Door to the Carrier
Carefully lift the door and align the door’s pre-drilled holes with the corresponding mounting points on the Johnson pocket door carrier. Utilize the provided hardware – typically screws – to securely fasten the door to the carrier assembly. Ensure the screws are tightened sufficiently, but avoid over-tightening, which could damage the door or carrier.
Double-check that the carrier is fully engaged with the door and that all connections are stable. A properly attached door will hang evenly and move freely on the track. If the door feels unstable, re-examine the connections and tighten any loose screws. This step is crucial for the door’s smooth and reliable operation.
Adjusting the Door Height and Alignment
After attaching the door, assess its height and alignment within the frame. Johnson hardware often includes adjustable carrier components allowing for fine-tuning. Use the adjustment screws on the carrier to raise or lower the door until it clears the floor evenly.
Check for plumbness using a level; slight adjustments may be needed to ensure the door hangs straight. Proper alignment prevents binding and ensures smooth sliding. If the door rubs against the frame, carefully adjust the carrier position until the clearance is uniform along the entire height. Consistent adjustments are key for optimal performance.
Testing the Door’s Smooth Operation
Following installation, thoroughly test the door’s sliding action. Gently push and pull the door along the track, observing for any resistance or binding. A smooth, effortless glide indicates successful installation. Listen for unusual noises, which may signal misalignment or hardware issues.
Repeatedly open and close the door, checking for consistent operation throughout its entire range of motion. Address any sticking points by re-adjusting the carrier or track. Ensure the door fully recesses into the wall cavity without obstruction. A properly installed Johnson door should operate silently and reliably.

Installing the Track and Hardware
Securely mount the track system within the frame, attaching guides and stops for controlled sliding. Precise adjustments ensure smooth, quiet operation of the Johnson door.
Mounting the Track System
Carefully position the Johnson track system within the prepared pocket door frame, ensuring it’s level and aligned with the opening. Utilize appropriate fasteners – screws are generally recommended – to securely attach the track to the header board and side jambs of the frame.
Pay close attention to the manufacturer’s specifications regarding fastener length and placement to avoid compromising the structural integrity of the frame or the track itself. Double-check that the track is flush against the framing members, eliminating any gaps that could cause instability or noise during operation.
Proper mounting is crucial for smooth and reliable sliding action, preventing the door from binding or derailing. A well-installed track forms the foundation for a successful pocket door installation.
Attaching Guides and Stops
Install floor guides to maintain door alignment and prevent swaying during operation; these typically screw into the floor directly beneath the door’s path. Carefully position the door stops at both ends of the track, defining the limits of travel and preventing the door from sliding out of the frame.
Adjustable stops are preferable, allowing for fine-tuning to ensure a snug fit and quiet operation. Securely fasten the stops to the track using the provided hardware, verifying their stability before testing the door’s full range of motion.
Properly installed guides and stops are essential for a safe, functional, and long-lasting pocket door system.
Adjusting Track for Smooth Sliding
Inspect the track for any obstructions or bends that could impede the door’s movement. Fine-tune the track’s alignment using shims if necessary, ensuring it remains perfectly level and plumb throughout its length. Lubricate the track and carrier wheels with a silicone-based spray to reduce friction and promote effortless gliding.
Test the door’s operation repeatedly, making small adjustments to the track as needed until it slides smoothly and quietly. Check for binding or resistance at any point in the travel, addressing these issues promptly to prevent damage.
A well-adjusted track is crucial for a seamless pocket door experience.

Finishing Touches and Troubleshooting
Install trim and casing for a polished look. Address common issues like sticking or misalignment, and ensure proper lock functionality for secure operation.
Installing Door Trim and Casing
Carefully measure and cut the door casing to fit snugly around the pocket door frame, ensuring a professional finish. Miter the corners at a 45-degree angle for clean, seamless joints. Apply wood glue to the back of the casing and secure it to the frame using finishing nails. Countersink the nails and fill the holes with wood putty.
Once the putty is dry, sand the casing smooth and apply primer, followed by your desired paint or stain. Install baseboard trim to match, carefully coping the joints where it meets the casing. This creates a polished, integrated look, concealing the gap between the wall and the door frame. Attention to detail during this stage significantly enhances the overall aesthetic.
Addressing Common Installation Issues
Sticking or binding doors often result from an improperly leveled track or misaligned carrier. Carefully re-check the track’s level and adjust the carrier height using the adjustment screws. If the door rubs against the frame, slightly loosen the frame and re-square it before tightening. Ensure the door is fully seated within the cavity during adjustments.
Rattling noises can be addressed by tightening all screws and bolts, and adding shims where necessary to eliminate movement. Gaps between the door and frame may require additional weather stripping or careful adjustment of the strike plate. Patience and methodical troubleshooting are key to resolving these common issues;
Lock Installation and Operation
Installing a lock on a pocket door requires careful consideration due to the lack of a traditional jamb. Utilize strike plates designed for pocket doors, ensuring precise alignment with the door’s edge. Mortise locks are often preferred for a flush finish, requiring accurate routing of the door.
Test the lock’s operation thoroughly after installation, verifying smooth latching and secure engagement. Adjust the strike plate if needed to prevent binding. Privacy locks are common, offering a simple turn-button mechanism. Remember to consider the door’s swing direction when positioning the lock and strike plate for optimal functionality.

Safety Precautions
Always wear safety glasses and gloves during installation. Employ proper lifting techniques for heavy components, and disconnect power before working near electrical wiring.
Wear appropriate safety gear
Prioritizing safety is crucial during a Johnson pocket door installation. Always wear safety glasses to protect your eyes from dust and debris generated during cutting and drilling. Robust work gloves are essential to shield your hands from sharp edges of metal hardware and wood components. A dust mask or respirator is recommended, especially when working with drywall or wood, to prevent inhalation of harmful particles.
Consider hearing protection if using power tools for extended periods. Sturdy, closed-toe footwear is a must to protect your feet from dropped tools or materials. Proper attire, avoiding loose clothing, minimizes snagging hazards; Remember, a safe work environment contributes to a successful installation.
Proper lifting techniques
Johnson pocket door components, like door frames and doors themselves, can be surprisingly heavy. Always lift with your legs, keeping your back straight, to avoid strain or injury. Bend at the knees, not your waist, and maintain a firm grip. If an item is too heavy to lift alone, absolutely enlist the help of another person.
Communicate clearly with your lifting partner to coordinate the lift and carry. Avoid twisting your body while lifting or carrying materials. Utilize a dolly or hand truck for transporting heavier components across longer distances. Remember, protecting your back is paramount throughout the installation process.
Electrical safety considerations
Before commencing any work near electrical wiring, always disconnect power to the circuit at the breaker box. Never assume wires are de-energized; use a non-contact voltage tester to confirm. If you are uncomfortable working with electrical components, immediately consult a qualified electrician.
Be mindful of existing wiring within the wall cavity during framing and installation. Avoid damaging wires, and ensure any new wiring is installed according to local electrical codes. Proper grounding is crucial for safety. If installing a door with integrated lighting or automated features, adhere strictly to manufacturer’s electrical guidelines.