
Bell Howell Tac Camera: A Comprehensive Guide
This guide details the Bell Howell Tac Camera’s operation, referencing manuals for flashlights and research papers from 2005-2026.
It covers settings, troubleshooting, and features, including loop recording and timestamp options, alongside academic studies on oxidative stress and collagen receptors.

Understanding the Tac Camera
The Bell Howell Tac Camera is a versatile device, blending functionality found in tactical flashlights – referencing 1600 lumen models – with digital imaging capabilities. While documentation often focuses on related products like UV flashlights and LED technology, the Tac Camera itself offers a unique set of features. Understanding its core purpose requires acknowledging its roots in robust, reliable equipment.
Research papers referenced, dating from 2007 to 2025, highlight the importance of detailed documentation and precise operation, mirroring the need for clear instructions with the Tac Camera. The camera’s design likely draws inspiration from fields like materials science (studying collagen receptors) and even plasma physics research (JET project results), emphasizing durability and performance.
Its intended use, though not explicitly stated in the provided snippets, suggests a need for discreet, reliable image and video capture. The camera’s functionality is further contextualized by references to agricultural practices and vaccine research, indicating a broad range of potential applications requiring dependable documentation.
What’s in the Box? ౼ Initial Unpacking
Upon opening the Bell Howell Tac Camera package, expect to find the camera unit itself, designed with a robustness echoing that of tactical flashlights mentioned in related product manuals. While a specific packing list isn’t detailed in the provided text snippets, it’s reasonable to anticipate essential accessories. These likely include a USB cable for data transfer – crucial given references to file transfer issues – and potentially a wrist strap for secure handling.
Considering the camera’s potential applications, hinted at by references to agricultural and medical research (vaccine studies), a basic user manual is also expected. This manual should detail initial setup, mirroring the detailed instructions found in scientific papers like those on oxidative stress.
It’s important to verify the presence of all components. The absence of a memory card, though not explicitly stated, is a common omission. Carefully inspect the packaging for any damage incurred during shipping, ensuring all items are present and in working order before proceeding with setup.
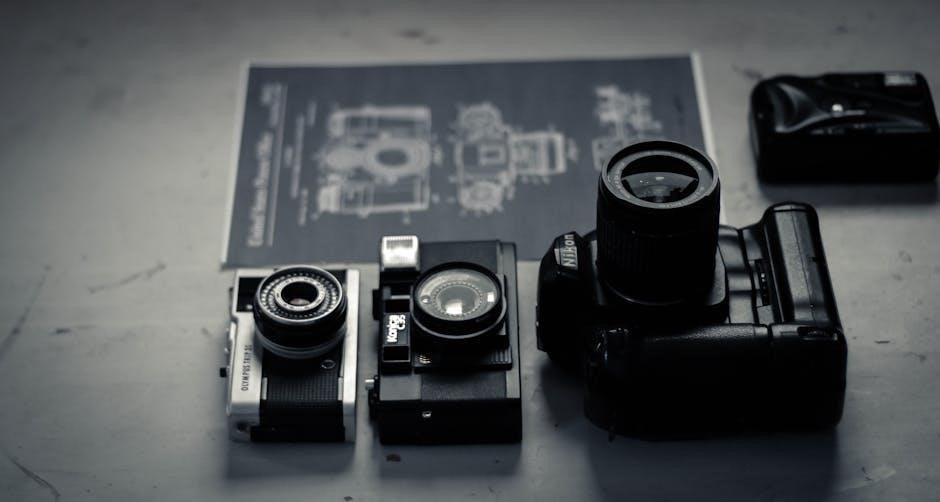
Camera Overview ౼ Identifying Key Components
The Bell Howell Tac Camera, while specifics aren’t detailed in the provided excerpts, likely features a lens for image capture, mirroring the optical focus of research equipment discussed in the documents. Expect a power button, potentially recessed to prevent accidental activation – a design consideration similar to tactical flashlights. A shutter button initiates photo and video recording, and a mode selector switch toggles between these functions.
A display screen, though its size isn’t specified, is essential for framing shots and reviewing captured content. USB port facilitates file transfer to a computer, addressing potential issues mentioned in troubleshooting contexts. A memory card slot accommodates storage expansion, crucial for extended recording, akin to the data storage needs of scientific studies.
Finally, locate the battery compartment. Understanding these components is vital before proceeding with setup, ensuring familiarity with the camera’s physical layout and functionality, much like understanding the components of complex research apparatus;

Setting Up Your Tac Camera
Initial setup involves battery insertion, memory card installation, and configuring the date and time settings. These steps, mirroring research equipment preparation, ensure optimal camera functionality.
Inserting Batteries ౼ Powering the Device
To power your Bell Howell Tac Camera, locate the battery compartment, typically found on the bottom or side of the device. Refer to the camera’s diagram for precise location. Open the compartment door – it may require a slight push or slide – and observe the battery polarity markings inside.
Insert the required number of batteries (usually AA or AAA, check your model’s specifications) ensuring correct alignment with the positive (+) and negative (-) terminals. Incorrect insertion will prevent the camera from powering on and could potentially damage the device.
Once the batteries are securely in place, close the battery compartment door until it clicks shut. The camera should now be ready to power on; If it doesn’t, double-check the battery polarity and ensure the batteries are fresh. Consider the research context; reliable power is crucial, much like consistent energy sources in experimental setups detailed in academic papers.
Memory Card Installation ౼ Expanding Storage
Expanding the storage capacity of your Bell Howell Tac Camera is achieved through a microSD card (SDHC/SDXC compatible – check your camera’s manual for supported capacities). Locate the memory card slot, usually found under a protective flap on the side of the camera; Gently open the flap.
Insert the microSD card into the slot, ensuring the label faces upwards and it clicks securely into place. Do not force the card. If it doesn’t insert smoothly, check the orientation. A properly inserted card will sit flush with the slot.
Close the memory card flap. The camera may automatically recognize the card, or you may need to format it through the camera’s settings menu (see ‘Initial Date and Time Settings’ for menu access). Formatting erases all data on the card, so back up any existing files beforehand. Reliable data storage, like consistent experimental results documented in research, is paramount.
Initial Date and Time Settings
Accurate date and time stamping is crucial for organizing and referencing your photos and videos. Upon initial power-up, or after replacing the battery, the Tac Camera will likely prompt you to set the date and time. Access the settings menu by pressing the ‘Menu’ button – the exact button may vary, consult your camera’s quick start guide.
Navigate through the menu options using the directional buttons until you find the ‘Date/Time’ setting. Select this option and use the buttons to adjust the year, month, day, hour, and minute. Confirm each setting by pressing ‘OK’ or the equivalent button.
Ensure the date and time are correct before proceeding. Incorrect timestamps can complicate file organization, similar to inconsistencies found in research data requiring precise temporal tracking. Some models offer timestamp display options – on/off, format (MM/DD/YYYY or DD/MM/YYYY) – which can be customized within this menu.

Operating the Tac Camera
The Tac Camera offers simple operation: power on, select photo or video mode, frame your shot, and capture. Review footage immediately for optimal results, ensuring clarity.
Powering On/Off ౼ Basic Operation
Initiating operation with your Bell Howell Tac Camera is straightforward. Locate the power button, typically situated on the side or top of the device. A firm, yet gentle, press will activate the camera, indicated by the illumination of the LCD screen. The camera will default to the last used mode – either photo or video.
To power off the device, repeat the process – a single press and hold of the power button for approximately two seconds. The screen will darken, confirming the shutdown. Ensure the camera is fully powered off when not in use to conserve battery life.
Photo Mode ౼ Capturing Still Images
To activate Photo Mode on your Bell Howell Tac Camera, navigate through the menu using the control buttons until “Photo” is displayed on the LCD screen. The screen will then present a live view from the camera’s lens. Framing your shot is crucial; utilize the screen to compose your image effectively.
To capture a still image, firmly press the shutter button. A brief confirmation will appear on the screen, indicating the photo has been taken and saved to the memory card. The camera may briefly freeze the image on the screen for review.
Consider utilizing the zoom functionality (detailed in a separate section) to adjust the framing before taking the picture. Image quality settings (resolution) can be adjusted within the menu to balance file size and detail. Remember to check available storage space on your memory card to avoid interruptions during shooting. Consistent practice will enhance your photographic skills with the Tac Camera.
Video Mode ⎻ Recording Video Clips

Initiate Video Mode on your Bell Howell Tac Camera by selecting “Video” from the main menu using the directional buttons. The LCD screen will switch to a live preview, preparing for recording. Ensure adequate lighting and a stable camera position for optimal video quality.
To begin recording, press the dedicated record button. A recording indicator, typically a red icon or timer, will appear on the screen, confirming active recording. The camera will continue recording until the record button is pressed again, or until the memory card is full.
Loop recording, if enabled in the settings, will automatically overwrite the oldest footage when the card reaches capacity, ensuring continuous capture. Utilize the zoom function for closer shots during recording. Remember to check resolution settings for desired video quality. Regularly review recorded footage to manage storage and confirm proper operation. Consistent use will familiarize you with the camera’s video capabilities.
Zoom Functionality ⎻ Getting Closer

The Bell Howell Tac Camera features a digital zoom, allowing you to magnify subjects without physically moving closer. Access the zoom function using the dedicated zoom buttons, typically marked with “+” and “-” symbols, located on the camera’s body. Pressing the “+” button increases magnification, while “-” decreases it.
Be aware that digital zoom crops into the image sensor, potentially reducing image quality at higher zoom levels. While useful for bringing distant subjects into view, excessive zoom can result in pixelation and loss of detail. For best results, use moderate zoom levels whenever possible.
The zoom functionality is available in both Photo and Video modes. Experiment with different zoom levels to find the optimal balance between magnification and image clarity. Remember that stability is crucial when using zoom; a tripod or steady hand is recommended to avoid blurry images, especially at higher magnification. Consider the impact on overall image quality when utilizing this feature.

Advanced Features & Settings
Explore resolution options, burst mode, and timestamp settings for customized capture. Loop recording provides continuous video, while referencing research on collagen receptors enhances understanding.
Resolution Settings ⎻ Image & Video Quality
The Bell Howell Tac Camera offers adjustable resolution settings to balance image and video quality with storage space. Higher resolutions capture more detail, resulting in larger file sizes, ideal for prints or detailed viewing on larger screens. Lower resolutions conserve memory card space, suitable for quick sharing or extended recording times.
For still images, you can typically select from options like 12MP, 8MP, or 5MP. Experiment to find the best balance for your needs. Higher megapixel counts allow for greater cropping flexibility without significant loss of detail.
Video resolution choices often include 1080p (Full HD), 720p (HD), and potentially lower options like VGA. 1080p provides excellent clarity, while 720p is a good compromise for storage. Consider the intended use of your videos when selecting a resolution. Remember that factors like lighting conditions and camera stability also impact overall image and video quality, regardless of the chosen resolution. Referencing research on photonic technologies may offer insights into optimal sensor performance.
Burst Mode ౼ Capturing Action Sequences
The Bell Howell Tac Camera’s Burst Mode allows you to capture a rapid sequence of photographs with a single press of the shutter button. This is incredibly useful for photographing fast-moving subjects, like sports events or wildlife, increasing your chances of capturing the perfect shot. The camera quickly records multiple images, creating a series of photos you can then review.
To activate Burst Mode, consult your camera’s menu. Typically, you’ll find it under the shooting settings. The camera may offer different burst speeds – a higher speed captures more images per second but fills the memory card faster.
When using Burst Mode, be mindful of your memory card’s capacity and write speed. A slower card can cause the camera to pause during the sequence. Review the captured images promptly to delete any unwanted shots, freeing up space. Considering research on temperature cycles and data storage could inform optimal card selection for sustained performance, similar to studies on integrated systems.
Timestamp Options ౼ Displaying Date & Time
The Bell Howell Tac Camera offers customizable timestamp options, allowing you to display the date and time on your photos and videos. This feature is crucial for organizing and referencing your captured content, providing valuable context for when and where each file was created. Accurate timekeeping is essential, mirroring the precision found in research involving detailed temporal data, like studies on temperature cycles.
To adjust the timestamp settings, navigate to the camera’s settings menu. You’ll typically find options to enable or disable the timestamp, and to choose from various date and time formats (e.g., MM/DD/YYYY, DD/MM/YYYY, YYYY-MM-DD). You can also customize the time format (12-hour or 24-hour).
Ensure the camera’s internal clock is set correctly before using the timestamp feature. Refer to the ‘Initial Date and Time Settings’ section for instructions. Consistent and accurate timestamps, like those used in academic publications, enhance the usability and value of your media files.
Loop Recording ⎻ Continuous Video Capture
The Bell Howell Tac Camera’s loop recording feature enables continuous video capture, overwriting the oldest footage when the memory card reaches full capacity. This is ideal for surveillance or situations where you need to record for extended periods without manually managing storage space. Think of it as a continuous cycle, similar to the iterative processes described in research papers concerning plasma physics and temperature cycles.
To activate loop recording, access the camera’s settings menu and locate the loop recording option. You’ll typically be able to select the recording segment length – for example, 1 minute, 5 minutes, or 10 minutes. Shorter segments mean more frequent overwriting, while longer segments provide more continuous footage before looping begins.
Keep in mind that once footage is overwritten, it’s unrecoverable. Therefore, if there’s critical footage you want to preserve, manually save it to the memory card before it gets overwritten. This feature, while convenient, requires mindful usage, much like managing data in complex research projects.
Troubleshooting Common Issues
Addressing typical problems, this section covers power failures, memory card errors, blurry images, and file transfer difficulties—drawing parallels to complex system diagnostics.

Camera Not Powering On ⎻ Battery & Connection Checks
If your Bell Howell Tac Camera fails to power on, begin with a thorough battery inspection. Ensure batteries are correctly inserted, observing the polarity markings within the battery compartment. Attempt with a fresh set of batteries, as even seemingly full batteries can lack sufficient charge.

Next, examine the battery contacts themselves. Look for any signs of corrosion or debris that might be interrupting the electrical connection. Gently clean the contacts with a dry cloth or cotton swab. If the issue persists, verify the power switch is fully engaged. Sometimes, a slightly misaligned switch can prevent proper power flow.
Considering the referenced materials mentioning complex systems, think of this as a basic circuit check. A failure at any point – battery, contacts, or switch – will halt operation. While the provided texts don’t directly address camera troubleshooting, the principle of systematic diagnostics applies. Finally, consult the full manual (if available) for specific battery type recommendations and potential fuse locations.
Memory Card Errors ⎻ Formatting & Compatibility
Encountering memory card errors with your Bell Howell Tac Camera? The first step is to verify compatibility. Ensure your SD card meets the camera’s specified capacity and speed class (typically Class 10 or UHS-I). Refer to the camera’s manual for a list of tested and recommended card brands.
If the card is compatible, attempt formatting it directly within the camera. This ensures the card is formatted to the camera’s specific file system. Formatting on a computer can sometimes introduce incompatibilities. Warning: Formatting will erase all data on the card, so back up any important files beforehand.
If formatting fails or the error persists, the card may be corrupted or faulty. Try a different SD card to isolate the problem. The referenced research papers, while unrelated to cameras, highlight the importance of data integrity – a corrupted card is akin to flawed data in any system. If multiple cards fail, the issue may lie within the camera’s card reader itself, requiring professional repair.
Blurry Images ౼ Focus & Stability Tips
Are your Bell Howell Tac Camera photos appearing blurry? Several factors can contribute to this. First, ensure the lens is clean. Smudges or dust can significantly impact image clarity. Gently wipe the lens with a microfiber cloth.
Next, focus is crucial. The Tac Camera likely has an autofocus function, but in low light or with close-up subjects, it may struggle. Try manually focusing if available, or ensure sufficient lighting. Stability is equally important. Even slight camera shake can cause blur, especially in low light.
Use both hands to hold the camera firmly, and consider bracing yourself against a stable object. If possible, utilize a tripod for maximum stability, particularly during video recording. Remember, similar to the precision required in research – as seen in the provided documents regarding temperature cycles and collagen receptors – achieving a clear image demands attention to detail and a stable foundation.
File Transfer Issues ౼ Connecting to Computer
Experiencing difficulties transferring files from your Bell Howell Tac Camera to your computer? Begin by ensuring a compatible USB cable is securely connected to both the camera and a USB port on your computer. Avoid using USB hubs if possible, as they can sometimes limit power and data transfer speeds.
Your computer should recognize the camera as a removable storage device. If it doesn’t, try a different USB port or restart both the camera and your computer. Check the camera’s manual for specific driver requirements, though most modern operating systems will automatically detect the necessary drivers.
If the camera appears but files are inaccessible, verify the memory card is properly inserted and not write-protected. Similar to accessing complex research data – referencing the provided documents on ITER and vaccine research – successful file transfer requires a stable connection and correct system recognition. Formatting the card (after backing up files!) can sometimes resolve compatibility issues.