
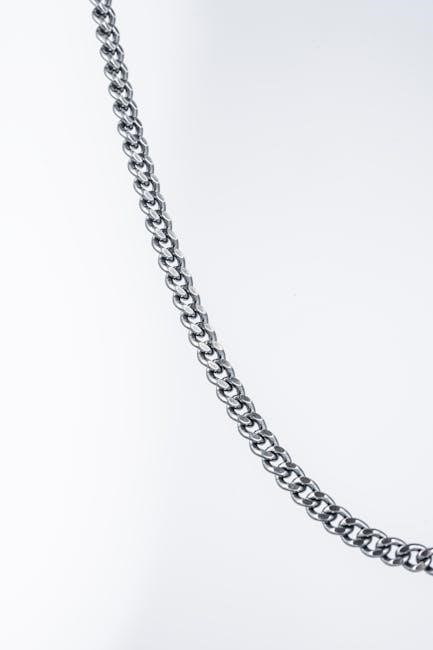
Byzantine chainmaille‚ a captivating ancient art form‚ is experiencing a vibrant modern resurgence in jewelry and artistic expression.
Numerous tutorials‚ like those found on Etsy and YouTube‚ offer accessible byzantine chainmaille instructions for beginners.
Reddit’s chainmailartisans community actively discusses techniques‚ while resources like Weave Got Maille provide patterns for one‚ two‚ and three-color variations.
What is Byzantine Chainmaille?
Byzantine chainmaille is a flexible and intricate weave‚ historically used for armor but now celebrated for its beauty in jewelry and art. It’s characterized by its complex‚ repeating pattern of interlocking rings‚ creating a fluid‚ almost organic texture.
Unlike simpler chainmaille weaves‚ Byzantine features rings passing through multiple other rings‚ resulting in a dense and visually stunning structure. Tutorials‚ such as those available on Etsy‚ break down the process into manageable steps‚ making it accessible even for beginners. The weave’s inherent strength and flexibility contribute to its enduring appeal‚ as demonstrated in both historical applications and contemporary designs.
Essentially‚ it’s a captivating demonstration of how simple elements‚ when skillfully combined‚ can create something truly extraordinary.
Historical Significance of the Byzantine Weave
The Byzantine chainmaille weave boasts a rich history‚ originating not in Byzantium itself‚ but likely with the Avars‚ a nomadic group who influenced Eastern Europe. It was subsequently adopted and refined by the Byzantine Empire‚ becoming a hallmark of their military prowess and artistry.
Historically‚ this weave provided effective protection for soldiers‚ offering flexibility alongside robust defense. Beyond its practical function‚ the intricate pattern signified status and craftsmanship. Today‚ recreating this historical technique through modern byzantine chainmaille instructions allows artisans to connect with a legacy spanning centuries.
The enduring appeal lies in its blend of functionality‚ artistry‚ and historical resonance‚ making it a captivating craft to explore.
Modern Applications: Jewelry and Art
Byzantine chainmaille has transcended its historical military roots‚ flourishing as a popular medium for contemporary jewelry and art. Numerous online platforms‚ offering detailed byzantine chainmaille instructions‚ fuel this creative explosion. Etsy showcases a diverse range of handcrafted pieces‚ from bracelets and necklaces to elaborate sculptures.
The weave’s inherent flexibility and visual complexity lend themselves beautifully to wearable art. Artisans experiment with diverse materials – stainless steel‚ aluminum – and color combinations‚ guided by tutorials found on YouTube and specialized sites like Weave Got Maille.
This ancient technique‚ revitalized through modern instruction‚ continues to inspire innovation and artistic expression.
Materials and Tools
Byzantine chainmaille instructions require jump rings in varying materials and gauges‚ alongside essential tools like pliers and a jump ring opener for efficient creation.
Choosing the Right Jump Rings
Selecting appropriate jump rings is crucial when following byzantine chainmaille instructions. Ring material options are diverse‚ including stainless steel for durability and aluminum for lightweight creations. Consider the project’s aesthetic and intended use when deciding.
Ring gauge‚ indicating wire thickness‚ and inner diameter significantly impact the weave’s flexibility and appearance. Lower gauges (thicker wire) create sturdier‚ less flexible pieces‚ while higher gauges offer more drape. Bulk jump rings‚ pre-sorted‚ can expedite the process‚ as suggested by The Bead Man.
Experimentation is key to finding the ideal combination for your desired result‚ ensuring a smooth and visually appealing finished product.
Ring Material Options (Stainless Steel‚ Aluminum‚ etc.)
When embarking on byzantine chainmaille instructions‚ material choice impacts both aesthetics and functionality. Stainless steel offers exceptional durability and resistance to tarnishing‚ ideal for pieces intended for frequent wear. Aluminum provides a lightweight alternative‚ perfect for larger or more delicate designs.
Other options include copper‚ brass‚ and even precious metals like silver and gold‚ each lending a unique character. Consider the color‚ weight‚ and cost when selecting your material. Weave Got Maille recommends any metal type for beginners.
Experimenting with different materials allows for creative expression and personalized chainmaille creations.
Ring Gauge and Inner Diameter Considerations
Following byzantine chainmaille instructions requires careful attention to ring size. Ring gauge refers to the wire thickness‚ with lower numbers indicating thicker wire. Inner diameter (ID) determines the ring’s interior space‚ influencing the weave’s flexibility and drape.
Bulk Jump Rings suggests various sizes are suitable for Byzantine weaves. A common starting point is 16-gauge wire with a 5.5mm ID. Thicker gauges create sturdier‚ less flexible weaves‚ while thinner gauges offer greater fluidity.
Consistent ring size is crucial for a smooth‚ even weave. Ensure all rings are precisely the same gauge and ID to avoid distortion and frustration.
Essential Tools for Chainmaille
Successfully following byzantine chainmaille instructions relies on having the right tools. Two pairs of pliers are fundamental: flat nose pliers for gripping and manipulating rings‚ and round nose pliers for precise opening and closing. A dedicated jump ring opener significantly speeds up the process and minimizes hand strain.
A smooth‚ stable work surface is essential‚ preventing rings from rolling away. Consider using a bead board or a towel to contain the rings. Organization is key; separate piles of open and closed rings streamline the weaving process.
Investing in quality tools enhances the experience and results.
Two-Pair of Pliers (Flat Nose and Round Nose)

When embarking on byzantine chainmaille instructions‚ a dual-plier approach is crucial. Flat nose pliers provide a firm grip‚ ideal for holding rings in place during weaving and ensuring alignment. Their flat jaws offer excellent control when manipulating multiple rings simultaneously.
Round nose pliers are indispensable for opening and closing jump rings correctly. They create a smooth‚ even opening‚ minimizing distortion. Mastering the coordinated use of both pliers – one to hold‚ one to manipulate – is fundamental to efficient and aesthetically pleasing chainmaille work.
Quality pliers are a worthwhile investment.
Jump Ring Opener
A dedicated jump ring opener is a game-changer when following byzantine chainmaille instructions. Unlike pliers that can twist and weaken rings‚ a jump ring opener gently separates the coil‚ preserving the ring’s circular integrity. This is vital for a fluid‚ professional-looking weave.
Using a jump ring opener effectively minimizes hand fatigue and speeds up the process considerably. It’s particularly beneficial when working with larger quantities of rings‚ as often required for Byzantine weaves. Avoiding distortion ensures a consistent appearance throughout your project.
Consider this tool essential for quality results.
Work Surface and Organization
Successfully navigating byzantine chainmaille instructions demands a well-prepared workspace. A soft‚ non-slip surface – like a felt pad – prevents rings from rolling away and protects your table. Organization is paramount; small containers or trays to separate opened and unopened rings streamline the weaving process.
Pre-sorting rings into piles of six‚ as suggested by Bulk Jump Rings‚ can significantly accelerate construction. Maintaining order minimizes frustration and allows for focused attention on the intricate weave. A tidy workspace directly translates to a cleaner‚ more precise final product.
Efficiency is key!

Basic Techniques
Byzantine chainmaille instructions begin with mastering jump ring manipulation: opening‚ closing‚ and utilizing a jump ring opener effectively to avoid distortion.
Understanding the core four-ring structure is fundamental.
Opening and Closing Jump Rings
Proper techniques are crucial when working with jump rings for byzantine chainmaille instructions. Avoid pulling directly apart‚ as this weakens and distorts the ring’s shape. Instead‚ gently twist the ends sideways‚ creating an opening.
Utilizing a jump ring opener significantly eases this process‚ providing leverage and minimizing stress on the metal.
When closing‚ reverse the motion – gently twist the ends back together until they meet flush‚ ensuring a secure connection.
Consistent practice is key to achieving clean‚ even openings and closures‚ vital for a fluid and aesthetically pleasing weave.
Distorted rings compromise the integrity and appearance of the finished piece.
Proper Techniques to Avoid Distortion
Maintaining ring integrity is paramount when following byzantine chainmaille instructions. Never pull jump rings apart; this creates weak points and alters their circular form. Instead‚ employ a twisting motion – gently rotate the ends sideways to create a gap.
Avoid excessive force‚ which can lead to ovalization or bending. A quality jump ring opener is invaluable‚ providing controlled leverage.
When closing‚ mirror the twisting motion‚ bringing the ends together smoothly and evenly.
Consistent‚ gentle manipulation prevents metal fatigue and ensures a professional finish.
Prioritizing these techniques safeguards the beauty and durability of your chainmaille work.
Using a Jump Ring Opener Effectively
A dedicated jump ring opener is crucial for successful byzantine chainmaille instructions. Position the ring on the tool’s jaws‚ ensuring a secure but gentle grip. Avoid placing the ring directly on the hinge‚ which can damage the tool.
Apply steady‚ controlled pressure – don’t force the ring open. A smooth‚ rocking motion is more effective than brute strength.
Open rings just enough to pass another ring through; excessive opening weakens them.
Practice makes perfect! Familiarize yourself with your tool’s mechanics for optimal control and efficiency.
Proper use minimizes distortion and maximizes the lifespan of both your rings and your opener.
Understanding the Weave Pattern
The beauty of byzantine chainmaille instructions lies in its repeating structure. At its core is a four-ring unit‚ the foundation upon which the entire weave is built. Visualizing this unit is key to mastering the technique.
Imagine each ring interlocked with its neighbors‚ creating a flowing‚ almost organic pattern.
This repeating unit expands outwards as you add more rings‚ forming rows and eventually the complete chainmaille piece.
Understanding how each ring interacts with the others allows for seamless construction and a fluid‚ consistent weave.
Focus on recognizing this core structure to simplify the learning process.
The Core Four-Ring Structure
Byzantine chainmaille instructions begin with mastering the fundamental four-ring cluster. This isn’t just a starting point; it’s the building block repeated throughout the entire weave.
Visualize four jump rings linked together – two passing through the other two‚ creating a stable‚ interconnected unit.
This structure provides the initial stability and dictates the flow of the subsequent rings.
Properly forming this core is crucial; any distortion here will propagate through the entire piece.
Focus on ensuring each ring lies flat and interlocks smoothly with its neighbors‚ establishing a solid foundation for expansion.
Visualizing the Repeating Unit
Understanding the repeating unit is key to successful byzantine chainmaille instructions. Beyond the initial four-ring cluster‚ the pattern expands through consistent replication.
Imagine this core unit as a cell; each new ring added builds upon this foundation‚ extending the weave in all directions.
Focus on recognizing how rings are woven through existing structures‚ not simply added side-by-side.
This creates the characteristic dense‚ flowing appearance of Byzantine.
Mentally tracing this repeating pattern helps anticipate the next steps and maintain consistent tension‚ preventing distortion and ensuring a fluid connection between rows.

Step-by-Step Byzantine Chainmaille Instructions
Byzantine chainmaille instructions begin with creating the initial four-ring cluster‚ then building subsequent rows by carefully adding rings and weaving them together.
Maintaining tension is crucial!
Starting the First Row
Creating the initial four-ring cluster is the foundation of Byzantine chainmaille; Begin by opening four jump rings – ensuring they are fully open‚ not twisted – and linking them together to form a square or diamond shape. This initial cluster serves as the core from which the entire weave will expand.
Many tutorials suggest attaching a small wire “handle” to this initial cluster for easier manipulation during the early stages of construction. Remember to close each ring securely after linking‚ using pliers to avoid gaps or distortion. This first row establishes the repeating pattern and dictates the overall structure of the finished piece‚ so precision is key.
Organizing additional rings in piles of six will speed up the process.
Creating the Initial Four-Ring Cluster
Begin with four open jump rings. Carefully interlock them‚ passing each open ring through two others‚ forming a central connection point. Ensure each ring lies flat and isn’t twisted during this process. Close the first ring securely with pliers‚ avoiding any gaps. Repeat this for the remaining three rings‚ building a square-like structure.
This initial cluster is crucial; it establishes the foundation for the entire Byzantine weave. Maintaining consistent tension is vital – rings shouldn’t be overly tight or loose. Some crafters attach a temporary wire “handle” to this cluster for easier handling as they build subsequent rows.
Properly closed rings are essential for a strong‚ fluid weave.
Building Subsequent Rows
To expand the weave‚ add new open jump rings to the existing four-ring cluster. Pass each new ring through two rings of the initial row‚ mirroring the initial interlocking pattern. Continue adding rings‚ working systematically across the row‚ ensuring each new ring contributes to the expanding structure.
Maintaining consistent tension is paramount. Avoid over-tightening or leaving rings loose‚ as this will affect the overall fluidity of the chainmaille. Organizing jump rings into piles of six can speed up the process. Focus on creating a uniform appearance as you build each row‚ preparing for the crucial row connections.
Adding Rings to Expand the Weave
Expanding the Byzantine weave involves strategically adding open jump rings to the established structure. Each new ring is woven through two rings of the preceding row‚ maintaining the characteristic interlocking pattern. This process is repeated sequentially across the row‚ gradually increasing the chainmaille’s width and length.
Focus on consistent placement; ensure each ring sits flush against its neighbors. Pre-opening rings and organizing them into convenient piles‚ as suggested by various tutorials‚ streamlines this step. Careful attention to detail at this stage is crucial for a smooth‚ even final product.
Maintaining Consistent Tension
Consistent tension is paramount when constructing Byzantine chainmaille. Uneven tension leads to a distorted‚ inflexible weave. Aim for a balance – rings should be snug but not overly tight‚ allowing for fluid movement. Avoid stretching or compressing the rings excessively during the weaving process.
Practice makes perfect; beginners often struggle with this aspect. Regularly check the weave’s overall appearance‚ ensuring rings lie flat and maintain a uniform spacing. Tutorials emphasize the importance of gentle manipulation and avoiding forceful adjustments that can warp the ring’s shape‚ impacting the final result.
Connecting Rows – The Key to Byzantine
Connecting rows is the defining characteristic of the Byzantine weave‚ transforming individual structures into a cohesive whole. This involves carefully weaving jump rings through existing rings in adjacent rows‚ creating the interlocking pattern. Tutorials highlight this as the most crucial step for achieving a smooth‚ fluid connection.
Proper technique ensures the weave doesn’t become rigid or bunched. Gently manipulate the rings‚ avoiding forceful pulling or twisting. Maintaining consistent tension during this process is vital. The goal is a seamless integration where each ring contributes to the overall flexibility and aesthetic appeal of the finished piece.
Weaving Rings Through Existing Structures

Weaving rings through existing structures demands precision. Begin by selecting an open jump ring and carefully pass it through four rings of the adjacent row‚ forming a new connection point. This isn’t simply threading; it’s about creating an interwoven link that contributes to the weave’s strength and fluidity.
Tutorials emphasize visualizing how each new ring integrates with the established pattern. Ensure the ring sits correctly‚ avoiding twists or kinks. Consistent practice refines this skill‚ allowing for faster and more accurate weaving. This step is fundamental to building the characteristic Byzantine pattern.

Ensuring a Smooth‚ Fluid Connection
Ensuring a smooth‚ fluid connection is vital for a beautiful Byzantine weave. Avoid tight bends or distortions when closing jump rings‚ as these disrupt the flow. Maintaining consistent tension throughout the process prevents unevenness and ensures the chainmaille drapes gracefully.
Experienced artisans suggest gently manipulating the rings after closure to refine their alignment. Resources like YouTube tutorials demonstrate techniques for achieving a seamless look. A fluid connection isn’t just aesthetic; it contributes to the overall structural integrity of the piece‚ preventing snagging or breakage.

Variations and Advanced Techniques
Byzantine chainmaille expands beyond the basic weave with exciting variations! Explore one-color‚ two-color‚ and intricate three-color designs for unique artistic expression.
Weave Got Maille offers patterns for these colorful techniques.
One-Color Byzantine
One-Color Byzantine is the foundational technique‚ perfect for mastering the core weave before exploring more complex variations. It utilizes jump rings of a single material and color‚ allowing focus on the intricate pattern itself.
Beginners often start with this method‚ as demonstrated in numerous tutorials available on platforms like Etsy and YouTube. The simplicity allows for a clear understanding of how rings interlock and create the characteristic flowing structure.
Successfully completing a one-color piece builds confidence and provides a solid base for tackling two or three-color designs. Consistent tension and accurate ring closures are crucial for a polished final product.
Many resources emphasize practicing this basic form to achieve a fluid and visually appealing result.
Two-Color Byzantine
Two-Color Byzantine introduces a new layer of visual complexity‚ building upon the foundation of the one-color weave. This technique involves alternating between two distinct ring colors during construction‚ creating captivating patterns and highlights.
Tutorials‚ such as those offered by Weave Got Maille‚ specifically guide artisans through creating two-color bracelets. Careful planning is essential to ensure a balanced and aesthetically pleasing distribution of colors throughout the piece;
The contrast between the colors emphasizes the weave’s intricate structure‚ making it a popular choice for jewelry and artistic applications. Maintaining consistent tension remains vital‚ alongside mindful color placement.
This variation offers a stepping stone towards the more elaborate three-color designs.
Three-Color Byzantine
Three-Color Byzantine represents a significant advancement in complexity‚ demanding meticulous planning and execution. This technique expands upon the two-color method‚ incorporating a third ring color to generate dynamic and visually striking patterns.
Weave Got Maille provides comprehensive tutorials covering this advanced variation‚ offering patterns for bracelets showcasing the full potential of three-color designs. Achieving a harmonious balance between the colors is crucial for an aesthetically pleasing result.
Strategic color placement allows artisans to create intricate motifs and emphasize the weave’s inherent geometry. Consistent tension and careful ring manipulation are paramount for success.
This technique is ideal for those seeking a challenging and rewarding chainmaille project.
Creating Patterns with Different Ring Colors
Pattern creation with varied ring colors in Byzantine chainmaille unlocks a realm of artistic possibilities. Beyond simple alternating schemes‚ artisans can design complex motifs by strategically placing rings of different hues.
The three-color Byzantine technique‚ detailed by Weave Got Maille‚ exemplifies this potential‚ allowing for intricate designs. Consider repeating sequences or symmetrical arrangements to form recognizable shapes or abstract patterns.
Planning is key; sketching the desired pattern beforehand can guide ring placement. Experimentation is encouraged‚ as unexpected color combinations can yield stunning results.
Consistent ring size and careful weaving ensure the pattern remains defined and visually appealing.
Troubleshooting and Tips
Addressing challenges like twisted rings or weave errors is common. Maintaining consistent ring size‚ using proper opening techniques‚ and patience are crucial for success!
Dealing with Twisted Rings
Twisted rings are a frequent frustration in Byzantine chainmaille. They occur from improper opening and closing techniques‚ often due to excessive force or incorrect plier placement. Gently attempt to reshape the ring back to its original circular form using round-nose pliers‚ applying minimal pressure.
If the twist is severe‚ it’s often best to discard the ring and replace it with a fresh one. Continuously using twisted rings compromises the fluidity and aesthetic of the weave. Prioritize careful ring manipulation and consistent tension to prevent twisting in the first place. Remember‚ patience is key!
Avoid overworking a single ring‚ as this exacerbates the problem.
Fixing Mistakes in the Weave
Mistakes are inevitable when learning Byzantine chainmaille! Don’t be discouraged. Carefully analyze the error – often‚ it involves a misplaced or incorrectly oriented ring. Gently open the affected rings using your jump ring opener‚ and carefully reposition them to align with the weave pattern.
Avoid forcefully pulling or twisting rings‚ as this can damage the entire structure. Work slowly and methodically‚ and don’t hesitate to undo several rows if necessary to correct a significant error. Remember to maintain consistent tension as you re-weave‚ ensuring a smooth and fluid connection.
Practice makes perfect!
Maintaining Consistent Ring Size and Shape
Consistency is paramount in Byzantine chainmaille. Variations in ring size or shape disrupt the weave’s flow and aesthetic. Always use a reliable jump ring opener to avoid distorting the rings during opening and closing. Ensure each ring is fully closed after placement‚ maintaining a circular form.
Periodically check your rings throughout the project. If you notice any becoming misshapen‚ gently reshape them with pliers. Organizing rings in piles of six‚ as suggested by Bulk Jump Rings‚ streamlines the process and aids consistency.
Uniformity yields a professional finish!