
Craftsman Lawn Tractor Manual: A Comprehensive Guide
This guide offers detailed instructions for Craftsman lawn tractors, including models like the 12 Hp 38 and 917.276630, ensuring optimal performance and longevity.
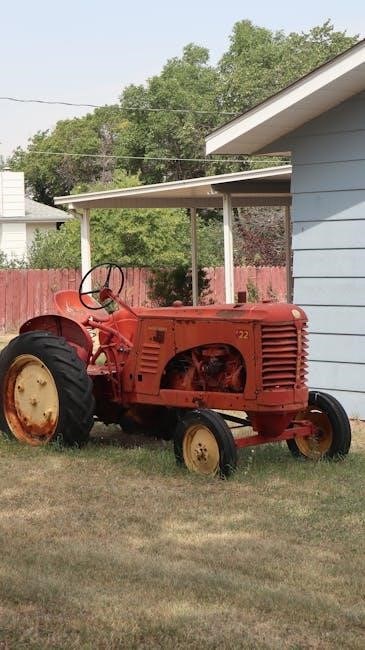
Craftsman lawn tractors represent a long-standing tradition of American-made quality and durability, designed to tackle various lawn care needs. From compact models ideal for smaller yards to robust machines capable of handling acreage, Craftsman offers a diverse range.
Understanding your tractor’s capabilities begins with identifying its specific model number – crucial for accessing the correct documentation. These tractors are known for their user-friendly operation and readily available parts, making maintenance accessible to both seasoned DIYers and first-time owners. Resources like Sears publications and online manuals (Manualzz) provide valuable insights into operation and repair. Proper utilization and consistent upkeep will ensure years of reliable service from your Craftsman machine.
Understanding Your Tractor Model Number
Your Craftsman lawn tractor’s model number is the key to unlocking specific information about its features, parts, and maintenance requirements. Typically found on a decal located on the tractor’s frame – often under the seat or near the steering column – this number is essential when searching for manuals or replacement parts.
For example, numbers like 917.276630 (from Sears publications) pinpoint the exact specifications of your machine. Knowing this number allows you to download the correct owner’s manual from online resources like Manualzz, ensuring you have accurate guidance for operation and repair. Without the correct model number, finding compatible parts or troubleshooting effectively can be significantly more challenging, potentially leading to incorrect repairs or wasted resources.
Locating Your Craftsman Tractor Manual
Finding your Craftsman tractor manual is crucial for safe operation and effective maintenance. Several avenues exist for locating this vital resource. Firstly, check online databases like Manualzz, which hosts a collection of Craftsman manuals, including the 917.270822 model. Alternatively, the Sears Publication archive (dating back to 2006, as seen with model 917.276630) may contain a digital copy.
If you prefer a physical copy, contacting Sears directly or searching online marketplaces can yield results. Remember to have your tractor’s model number handy – this significantly narrows the search and ensures you obtain the correct manual for your specific machine. Accessing the manual provides detailed instructions, safety guidelines, and troubleshooting tips, maximizing your tractor’s lifespan.

Safety First: Operating Procedures
Prioritize safety by thoroughly understanding your Craftsman tractor’s manual before each use, ensuring proper pre-operation checks and adherence to safe operating techniques.
Pre-Operation Safety Checks
Before each use, a meticulous inspection is crucial for safe operation. Always verify the oil level, ensuring it’s within the recommended range, and check the fuel level for adequate supply. Inspect the blades, confirming they are securely attached and in good condition – dull or damaged blades pose a significant hazard.
Furthermore, examine the tires for proper inflation and any signs of wear or damage. Check all safety shields and guards, ensuring they are in place and functioning correctly. Confirm the parking brake engages firmly, preventing unintended movement. Finally, clear the mowing area of any obstacles – stones, toys, or debris – that could be thrown by the blades, potentially causing injury or damage.
Starting and Stopping the Engine
To start the engine, ensure the parking brake is engaged and the blades are disengaged. Turn the ignition key to the “on” position, and if equipped, depress the safety interlock switch. Engage the choke, especially in cold weather, and slowly turn the key to the “start” position, holding it until the engine ignites. Release the choke gradually as the engine warms up.
To stop the engine, disengage the blades and slowly move the throttle to the “idle” position. Turn the ignition key to the “off” position. Allow the engine to come to a complete stop before dismounting. Never abruptly shut off the engine while under load, as this can cause damage to the engine components.
Safe Operating Speeds and Techniques
Always operate the Craftsman lawn tractor at a safe and comfortable speed, adjusting to terrain conditions. Avoid sudden starts, stops, and sharp turns, which can lead to loss of control. Maintain a firm grip on the steering wheel and be aware of your surroundings, including people, pets, and obstacles.
When mowing, overlap each pass slightly to prevent scalping and ensure a uniform cut. Reduce speed when turning or operating on slopes. Never allow passengers on the tractor, and keep children and pets away from the mowing area. Exercise caution when operating near roadways or traffic.

Maintenance: Keeping Your Tractor Running
Regular upkeep, including oil changes, filter cleaning, and spark plug checks, is vital for a long-lasting and efficiently operating Craftsman lawn tractor.
Regular Maintenance Schedule
Establishing a consistent maintenance schedule is crucial for preserving the performance and extending the lifespan of your Craftsman lawn tractor. After each use, inspect for loose fasteners and debris. Every 25 hours of operation, check the tire pressure and blade sharpness.
A more thorough inspection should occur every 50 hours, including lubricating moving parts and cleaning the mowing deck. Annually, or every 100 hours, perform an oil and filter change, inspect the belts and hoses, and check the spark plug condition. Don’t forget to address the air filter – cleaning it frequently and replacing it as needed; Following this schedule will minimize downtime and ensure reliable operation season after season.
Oil Change Procedures
Performing regular oil changes is vital for engine health. First, warm up the engine slightly for easier oil flow. Locate the oil drain plug underneath the tractor and position a drain pan. Carefully remove the plug, allowing the old oil to drain completely;
Once drained, replace the plug and tighten securely. Next, locate the oil fill cap and add the recommended oil type and quantity, as specified in your tractor’s manual; Avoid overfilling. Finally, check the oil level with the dipstick, ensuring it’s within the safe range. Dispose of the used oil responsibly at a recycling center.
Air Filter Cleaning and Replacement
Maintaining a clean air filter is crucial for optimal engine performance. Regularly inspect the air filter for dirt and debris. If the filter is slightly dirty, gently tap it to remove loose particles, or use low-pressure compressed air, blowing from the inside out.
For heavily soiled or damaged filters, replacement is necessary. Locate the air filter housing, usually near the engine. Remove the cover and carefully take out the old filter. Install the new filter, ensuring a proper seal. Reattach the cover securely. A clean air filter ensures efficient airflow to the engine.
Spark Plug Inspection and Replacement
Regularly inspecting spark plugs is vital for efficient engine operation. Disconnect the spark plug wire before inspection to prevent accidental starting. Remove the spark plug using a socket wrench, checking for fouling, wear, or damage. A properly gapped spark plug ensures optimal combustion.
If the spark plug is worn or fouled, replace it with a new one of the correct type. Consult your owner’s manual for the correct spark plug specification. Gap the new spark plug according to the manual’s instructions. Reinstall the spark plug and tighten it to the specified torque. Reconnect the spark plug wire securely.

Blade Care and Maintenance
Maintaining sharp, balanced blades is crucial for a clean cut and tractor health. Regular sharpening and inspection prevent damage and ensure optimal mowing performance.
Blade Sharpening Techniques
Achieving a sharp blade edge is vital for a quality cut and healthy lawn. Begin by disconnecting the spark plug for safety, then carefully remove the blade. Utilize a metal file or bench grinder, maintaining the original blade angle – typically around 30-45 degrees.
Ensure even sharpening across the entire blade length, avoiding overheating which can weaken the metal. Alternatively, professional sharpening services offer precise results. After sharpening, balance the blade using a blade balancer; an unbalanced blade causes vibration and potential damage. Finally, reinstall the blade securely, tightening the bolt to the manufacturer’s specified torque.
Remember to wear safety glasses and gloves during the sharpening process. Consistent blade sharpening extends blade life and improves mowing efficiency.
Blade Installation and Removal
Prior to any blade work, always disconnect the spark plug wire to prevent accidental starting. Securely block the wheels for added safety. To remove the blade, use a wrench to hold the blade adapter while loosening the blade bolt – noting the bolt’s orientation for correct reinstallation.
Carefully remove the blade, inspecting it for damage. Installation involves reversing the removal process, ensuring the blade is positioned correctly with the cutting edge facing upwards. Tighten the blade bolt to the manufacturer’s specified torque, crucial for safe operation.
Double-check the tightness after initial use. Proper installation prevents blade wobble and ensures a clean, even cut. Consult your owner’s manual for specific torque specifications for your Craftsman model.
Checking Blade Balance

Maintaining blade balance is essential for minimizing vibration and preventing damage to the mower deck. After sharpening, or if a blade feels loose, check its balance using a blade balancer – a simple, inexpensive tool. Place the blade horizontally on the balancer’s fulcrum.
If the blade tips downward on one side, it’s unbalanced. Remove material from the heavier side, usually by filing, until the blade remains level. Repeat this process until perfect balance is achieved. An unbalanced blade causes excessive wear and tear, and can lead to safety hazards.
Always prioritize a balanced blade for smooth operation and a professional-quality cut. Refer to your Craftsman tractor manual for specific recommendations regarding blade balancing procedures.
Drive System Maintenance
Proper drive system upkeep, including belt checks and transmission fluid maintenance, is crucial for smooth operation and longevity of your Craftsman tractor.
Belt Inspection and Replacement
Regularly inspect the drive belt for cracks, fraying, or excessive wear. A damaged belt will compromise the tractor’s ability to propel forward or engage the mowing deck effectively. Before inspection, always disconnect the spark plug wire to prevent accidental starting.
To replace the belt, consult your specific model’s manual for the correct routing diagram. Typically, this involves releasing tension on the belt tensioner, removing the old belt, and carefully installing the new one, ensuring it’s seated correctly in all pulleys. Verify proper alignment and tension after installation. A loose belt will slip, while an overly tight belt can damage bearings. Always use a replacement belt specified for your Craftsman tractor model.
Transmission Fluid Check and Change
Maintaining the correct transmission fluid level is crucial for smooth operation and longevity. Check the fluid level using the dipstick, following the instructions in your owner’s manual – typically, with the engine off and on level ground. Fluid should be a clear red color; dark or cloudy fluid indicates contamination.
To change the fluid, warm up the engine briefly, then shut it off and disconnect the spark plug. Locate the drain plug on the transmission and position a drain pan underneath. Remove the plug and allow the fluid to drain completely. Reinstall the plug and refill with the manufacturer-recommended transmission fluid, checking the level with the dipstick. Dispose of the old fluid responsibly.
Differential Maintenance
The differential allows your Craftsman tractor to turn smoothly without wheel slippage. Regular maintenance ensures optimal performance. Check the differential fluid level periodically, typically using a fill plug or dipstick – consult your specific model’s manual. Fluid should be clean and at the proper level.
To change the differential fluid, warm the engine briefly, then shut it off and disconnect the spark plug. Locate the drain and fill plugs on the differential housing. Drain the old fluid completely into a suitable container. Reinstall the drain plug and fill with the recommended gear oil, checking the level as you go. Proper fluid type is critical; refer to your manual.

Electrical System Troubleshooting
Addressing electrical issues involves battery checks, fuse replacements, and understanding wiring diagrams for your Craftsman tractor, ensuring safe and effective repairs.
Battery Maintenance and Charging

Maintaining your Craftsman lawn tractor’s battery is crucial for reliable starting. Regularly inspect the battery terminals for corrosion, cleaning them with a wire brush and baking soda solution if necessary. Ensure connections are tight for optimal conductivity.
For charging, use a compatible battery charger, following the manufacturer’s instructions carefully to avoid overcharging, which can damage the battery. A trickle charger is ideal for off-season storage, preventing sulfation and extending battery life.
Always disconnect the negative terminal first when removing the battery and reconnect it last during installation. Check the battery’s voltage with a multimeter to assess its condition; a fully charged 12-volt battery should read around 12.6 volts. Replace the battery if it consistently fails to hold a charge.
Fuse Replacement Procedures
Protecting your Craftsman lawn tractor’s electrical system requires understanding fuse replacement. Before replacing any fuse, always disconnect the battery to prevent short circuits. Locate the fuse box, typically found under the seat or near the electrical components.
Identify the blown fuse – it will have a broken filament. Note the fuse’s amperage rating (printed on the fuse itself) and always replace it with a fuse of the exact same rating. Using a higher amperage fuse can cause severe damage;
Remove the blown fuse using a fuse puller (often included in the tractor’s tool kit) and insert the new fuse firmly. Reconnect the battery and test the affected system. If the fuse blows again immediately, there’s likely a short circuit requiring professional diagnosis.
Wiring Diagram Overview (General)
Understanding a Craftsman lawn tractor’s wiring diagram is crucial for electrical troubleshooting. Generally, diagrams depict components with symbols, connected by lines representing wires. Color-coding is standard: each wire has a specific color for easy identification.
Key components shown include the battery, ignition switch, starter solenoid, lights, and safety switches. Grounding points are vital – often indicated by a chassis symbol. Follow the lines to trace circuits and identify potential breakages or shorts.
Remember that diagrams vary by model; consult your specific tractor’s manual. Online resources and Sears publications often provide detailed schematics. Carefully interpret the diagram before attempting any electrical repairs, and always disconnect the battery first.

Troubleshooting Common Issues
Addressing engine failures, power loss, unusual noises, and mowing deck problems are covered, providing solutions for a smooth and efficient operation.
Engine Won’t Start
If your Craftsman lawn tractor engine fails to start, several factors could be at play. First, check the fuel level and ensure the fuel shut-off valve is open. Next, inspect the battery connections for corrosion and confirm a full charge; a weak battery is a common culprit.
Also, examine the spark plug – a fouled or damaged plug won’t ignite the fuel. Consider checking the safety interlock switches, such as the seat switch or blade engagement lever, as these must be engaged for the engine to start. Finally, if these checks don’t resolve the issue, the carburetor may require cleaning or professional attention.
Remember to consult your specific model’s manual for detailed diagrams and troubleshooting steps, as procedures can vary.
Loss of Power During Operation
Experiencing a loss of power while mowing with your Craftsman tractor can be frustrating. Often, this indicates a clogged air filter, restricting airflow to the engine. Inspect and clean or replace the air filter as needed; Another common cause is fuel-related; check the fuel filter for obstructions and ensure sufficient fuel is reaching the carburetor.
Furthermore, a dirty spark plug or worn engine belts can contribute to power loss. Examine the spark plug and replace it if necessary. Inspect the drive belt and ensure it’s in good condition and properly tensioned. Consider a possible issue with the carburetor if the problem persists.
Always refer to your tractor’s manual for specific troubleshooting guidance.
Unusual Noises
Hearing strange sounds during operation signals a potential problem with your Craftsman tractor. Clicking or rattling noises could indicate loose bolts or components – thoroughly inspect all fasteners. A whining sound often points to issues within the transmission or drive system, potentially requiring fluid checks or belt replacements.
Grinding noises during blade engagement suggest problems with the blade spindle or bearings. Immediately stop the tractor and investigate. Loud knocking sounds from the engine are serious and may indicate internal engine damage, necessitating professional repair.
Consult your owner’s manual for a detailed noise diagnostic chart and safety precautions.
Mowing Deck Problems
Experiencing issues with your Craftsman tractor’s mowing deck impacts cut quality and efficiency. Uneven cutting often stems from dull, damaged, or improperly installed blades – sharpening or replacing them is crucial. A deck that vibrates excessively may have loose or worn components, requiring inspection and tightening.
Clogging under the deck, especially with wet grass, can reduce performance; regular cleaning is essential. Listen for unusual noises from the deck, which could indicate bearing failure or spindle damage. Ensure the deck is level for a consistent cut, adjusting as needed.
Refer to your manual for specific deck adjustment and maintenance procedures.