
Welcome! This manual guides you through setup‚ operation‚ and maintenance of your KRUPS espresso machine‚ ensuring delightful coffee experiences.
Included are the user manual‚ quick start guide‚ and safety instructions for optimal performance and longevity of your new appliance.
Understanding the Components
Your KRUPS espresso machine boasts several key components. The water tank provides a reservoir for fresh water‚ crucial for brewing. The bean container securely holds your favorite coffee beans‚ feeding them into the integrated grinder. This grinder ensures freshly ground coffee for each cup‚ maximizing flavor.
The brew group is the heart of the machine‚ responsible for extracting espresso. The steam wand allows for milk frothing‚ creating lattes and cappuccinos. Control panels feature buttons for selecting drink options and adjusting settings. A drip tray collects any spills‚ maintaining cleanliness. Familiarizing yourself with these parts will enhance your brewing experience and simplify maintenance procedures‚ as detailed in this instruction manual.
Initial Setup and Preparation
Before your first brew‚ proper setup is essential. Begin by removing all packaging materials and thoroughly cleaning the water tank and drip tray. Fill the water tank with fresh‚ filtered water. Next‚ fill the bean container with your preferred coffee beans; Ensure the machine is placed on a stable‚ level surface.
Perform an initial rinse cycle by running water through the system without coffee grounds – consult the manual for specific instructions. This cleans the internal components. It’s also vital to read the safety instructions booklet before operation. Proper preparation guarantees optimal performance and prevents potential issues‚ extending the life of your KRUPS machine.

Operating Your Krups Espresso Machine
Enjoy effortless brewing! This section details powering on‚ grinding beans‚ and crafting perfect espresso shots with your KRUPS machine for daily enjoyment.
Powering On and Basic Functions
Initial Power-Up: To begin‚ ensure the water tank is filled and correctly positioned. Connect the machine to a grounded electrical outlet. Press the power button; the display will illuminate‚ indicating the machine is initializing. Allow a brief warm-up period as the system prepares for operation.
Control Panel Overview: Familiarize yourself with the control panel. Buttons typically include options for espresso‚ coffee‚ steam‚ and menu navigation. The display provides information on selected settings and machine status. Use the selector knob or buttons to navigate through the menu options.
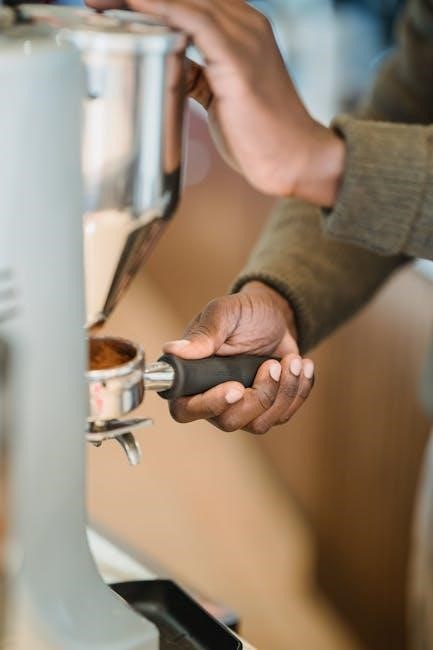
Basic Operation: For a single espresso‚ select the espresso function and desired cup size. The machine will automatically grind the beans‚ tamp the grounds‚ and brew the espresso. Always follow the on-screen prompts for optimal results.
Grinding Coffee Beans
Bean Hopper: Your KRUPS machine features an integrated grinder. Ensure the bean hopper is filled with fresh‚ whole coffee beans. Avoid using pre-ground coffee‚ as it compromises flavor and aroma. The hopper capacity varies by model‚ so refer to your specific manual.
Grind Adjustment: The grind size significantly impacts espresso quality. Use the grind adjustment knob to select the appropriate setting. Finer grinds are suitable for espresso‚ while coarser grinds are better for coffee. Experiment to find your preferred taste.
Grinding Process: When brewing‚ the machine automatically grinds the required amount of beans. The grinder operates quietly and efficiently‚ delivering freshly ground coffee directly to the brew group.
Brewing Espresso
Preparation: Ensure the water tank is filled with fresh‚ filtered water. Select your desired coffee strength and cup size using the machine’s control panel. The machine will automatically grind the beans and tamp the coffee grounds.
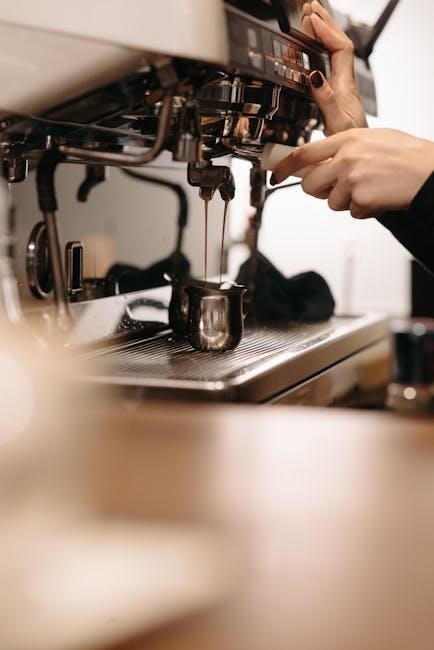
Brewing Process: Initiate the brewing cycle by pressing the espresso button. The machine will extract the espresso‚ delivering a rich‚ flavorful shot directly into your cup. Brewing time and volume are adjustable.
Espresso Quality: Monitor the espresso flow. A slow‚ steady stream indicates a proper extraction. Adjust the grind size if the flow is too fast or too slow to achieve optimal results. Enjoy your freshly brewed espresso!
Milk Frothing and Cappuccino Creation
Enhance your beverages! Utilize the steam wand to froth milk for lattes and cappuccinos‚ creating a creamy texture for delightful coffee creations.
Using the Steam Wand
Preparing to Froth: Before use‚ ensure the machine has built sufficient steam pressure. Purge the steam wand by briefly opening it to release any condensed water. This ensures dry steam for optimal milk frothing.
Frothing Technique: Submerge the steam wand tip just below the surface of the cold milk. Open the steam valve fully. Gradually lower the pitcher to introduce air‚ creating microfoam – small‚ velvety bubbles.
Texturing the Milk: Once the milk volume increases by about 50%‚ submerge the wand deeper to create a whirlpool effect‚ heating and texturing the milk evenly.
Finishing Up: Close the steam valve and remove the pitcher. Immediately wipe the steam wand with a damp cloth to prevent milk residue buildup. Be cautious‚ as the wand will be hot!
Adjusting Milk Froth Texture
For Latte Art: Achieve a silky‚ microfoam texture by keeping the steam wand tip near the milk surface during the initial frothing stage. This creates tiny bubbles essential for detailed latte art designs.
For Cappuccino: For a thicker‚ more voluminous froth‚ introduce more air initially by keeping the wand closer to the surface for a longer duration. This results in a lighter‚ airier texture perfect for cappuccinos.
Temperature Control: Avoid overheating the milk‚ as this can scald it and affect the taste. Aim for a temperature between 140-160°F (60-70°C).
Practice Makes Perfect: Experiment with wand positioning and milk aeration to find the froth texture that best suits your preferences and desired beverage.

Maintenance and Cleaning
Regular cleaning is vital! Descale frequently‚ clean the brew group‚ and maintain the milk system to ensure optimal performance and longevity of your KRUPS machine.
Descaling the Machine
Why Descale? Over time‚ mineral deposits from water accumulate inside your KRUPS espresso machine‚ impacting performance and coffee taste. Descaling removes these deposits‚ ensuring optimal brewing temperature and preventing damage. The warranty may be voided if descaling is neglected!
Descaling Procedure: Use a commercially available descaling solution specifically designed for espresso machines‚ following the product’s instructions carefully. Typically‚ you’ll dilute the solution with water and pour it into the water tank. Run the machine through a full brewing cycle (without coffee)‚ then repeat with fresh water several times to rinse thoroughly; Refer to your machine’s specific manual for detailed descaling instructions and recommended frequency‚ as it varies by water hardness.
Cleaning the Brew Group
Importance of Cleaning: The brew group is the heart of your espresso machine‚ and regular cleaning is crucial for maintaining coffee quality and machine longevity. Coffee oils and grounds can build up‚ affecting extraction and potentially causing blockages.
Cleaning Process: Remove the brew group according to your machine’s instructions. Rinse it thoroughly under running water‚ removing any visible coffee residue. Some models allow for dishwasher cleaning of the brew group components – check your manual. Periodically‚ use a dedicated brew group cleaning tablet (following package directions) to eliminate stubborn oils. Reinstall the brew group carefully‚ ensuring it’s securely in place before operation.
Cleaning the Milk System
Essential for Hygiene: Thoroughly cleaning the milk system after each use prevents milk residue buildup‚ which can harbor bacteria and affect the taste of your beverages. This ensures optimal frothing performance and hygiene.
Cleaning Procedure: Immediately after frothing‚ purge the steam wand by briefly releasing steam into a drip tray. Wipe down the wand with a damp cloth. For deeper cleaning‚ disassemble any removable parts of the milk system (following your manual’s guidance) and wash them with warm‚ soapy water. Periodically‚ use a dedicated milk system cleaner to remove stubborn residue and sanitize the components. Rinse thoroughly before reassembling.

Troubleshooting Common Issues
Quick Solutions: This section addresses frequent problems like power failures‚ brewing issues‚ and steam wand malfunctions‚ offering simple fixes for continued enjoyment.
Machine Not Powering On
Initial Checks: First‚ ensure the power cord is securely plugged into both the machine and a functioning wall outlet. Verify the outlet is receiving power by testing it with another device.
Power Button: Confirm the power button has been firmly pressed. Some models have a separate on/off switch; ensure it’s in the ‘on’ position. If the machine still doesn’t respond‚ check the circuit breaker or fuse box for a tripped breaker or blown fuse.
Internal Reset: In rare cases‚ an internal reset might be necessary. Unplug the machine for several minutes‚ then plug it back in and attempt to power it on. If these steps fail‚ contact KRUPS customer support for assistance‚ as internal components may require professional attention.
Coffee Not Brewing Properly
Grinder Issues: If your machine has a built-in grinder‚ check for bean jams. Ensure beans are fresh and dry‚ and the grinder setting isn’t too fine‚ causing blockage. Clean the grinder burrs regularly.
Water Supply: Verify the water tank is filled and properly seated. Check for kinks in the water line if applicable. Insufficient water pressure can hinder brewing.
Brew Group: A clogged brew group is a common culprit. Run a cleaning cycle‚ or manually clean the brew group according to the manual’s instructions. Descale the machine regularly to prevent mineral buildup affecting water flow and brewing quality.
Steam Wand Malfunctions
Blockages: The most frequent issue is milk residue clogging the steam wand. Immediately after each use‚ purge the wand by briefly opening the steam valve to clear any remaining milk. Regularly disassemble and thoroughly clean the wand with a damp cloth and a small cleaning brush.
Insufficient Steam: Ensure the machine has fully heated up before attempting to use the steam wand. Check the water level; low water can prevent steam generation. Descaling the machine is crucial‚ as mineral buildup restricts water flow.
No Steam: If no steam is produced‚ verify the steam valve is fully open and that there are no kinks in any connecting tubes.

Advanced Features and Customization
Personalize your brew! Adjust coffee strength and program user profiles to save preferred settings for a consistently perfect‚ customized espresso experience.
Adjusting Coffee Strength
Tailoring Your Taste: Your KRUPS espresso machine allows for precise control over coffee strength‚ ensuring each cup perfectly matches your preference. Access the settings menu through the machine’s interface. Typically‚ you’ll find options to adjust the amount of ground coffee used per brew.
Increasing the coffee quantity results in a bolder‚ more intense flavor‚ while decreasing it yields a milder brew. Some models also offer adjustable brewing temperature‚ further influencing the strength and extraction. Experiment with different settings to discover your ideal balance. Remember to note your preferred adjustments for consistent results.
Consult your specific model’s manual for detailed instructions on navigating these settings‚ as the interface may vary.
Programming User Profiles
Personalized Coffee Experience: Advanced KRUPS models feature user profile programming‚ allowing multiple individuals to save their preferred coffee settings. Access the profile settings through the machine’s menu‚ usually found within the ‘Settings’ or ‘User’ section.
You can typically store details like coffee strength‚ volume‚ temperature‚ and even milk preferences for each profile. This eliminates the need to repeatedly adjust settings each time a different person uses the machine. Assign a unique name to each profile for easy identification.
Refer to your specific model’s manual for detailed instructions‚ as the programming process varies. Enjoy customized coffee at the touch of a button!

Safety Precautions
Important Safety First! Always observe electrical safety guidelines and be cautious of hot surfaces during and after operation to prevent injuries.
Electrical Safety
Crucial Electrical Guidelines: To ensure safe operation‚ always verify your outlet voltage matches the machine’s specifications. Never operate the espresso machine with a damaged cord or plug; immediate replacement is vital. Avoid using extension cords‚ and if absolutely necessary‚ choose one rated for the appliance’s wattage.
Do not immerse the machine‚ cord‚ or plug in water or any other liquid. This prevents electric shock. Always unplug the machine from the outlet when not in use‚ before cleaning‚ and during maintenance. Never pull the cord to disconnect; grasp the plug instead.
Avoid operating the machine in damp environments. If the power cord is damaged‚ it must be replaced by the manufacturer‚ its service agent‚ or similarly qualified persons to avoid hazard.
Hot Surface Warnings
Caution: Hot Surfaces! During and immediately after operation‚ many parts of your KRUPS espresso machine become extremely hot. These include the brew group‚ steam wand‚ and areas surrounding the coffee outlet. Avoid touching these components to prevent burns.
Use caution when operating the steam wand‚ as it generates high-temperature steam. Keep hands and face at a safe distance. Allow the machine to cool down completely before cleaning or performing maintenance.
The machine’s exterior may also become warm during use. Exercise care when handling. Keep children and pets away from the machine while it is in operation or cooling down to prevent accidental burns.

Warranty Information
Coverage & Claims: Your KRUPS espresso machine is covered by a warranty; however‚ failure to descale voids it. Review details and the claim process carefully.
Coverage Details
Your KRUPS espresso machine warranty provides coverage for defects in materials and workmanship under normal household use‚ beginning from the original purchase date. This warranty typically covers the machine’s functionality‚ including the grinder and brewing components. However‚ it’s crucial to understand exclusions.
Specifically‚ the warranty does not cover damage resulting from misuse‚ accidents‚ improper maintenance‚ or failure to follow the instruction manual’s guidelines. A significant exclusion is damage caused by scale buildup; regular descaling is essential‚ and neglecting this voids the warranty. Unauthorized repairs or modifications also invalidate coverage.
Proof of purchase is required for all warranty claims. Keep your receipt or other documentation readily available. The warranty period varies depending on the model and region‚ so consult your specific warranty card for details.
Claim Process
To initiate a warranty claim for your KRUPS espresso machine‚ first gather your proof of purchase and a detailed description of the issue; Contact KRUPS customer service through their official website or phone number – details are in your manual. They will likely provide a case number and initial troubleshooting steps.
If the issue persists‚ you may be asked to ship the machine to an authorized KRUPS service center for inspection. Ensure the machine is securely packaged to prevent further damage during transit. KRUPS will cover shipping costs if the claim is approved.
Upon inspection‚ KRUPS will determine if the issue is covered under warranty. If so‚ they will either repair the machine or provide a replacement‚ at their discretion. Allow sufficient time for processing and return shipping.