
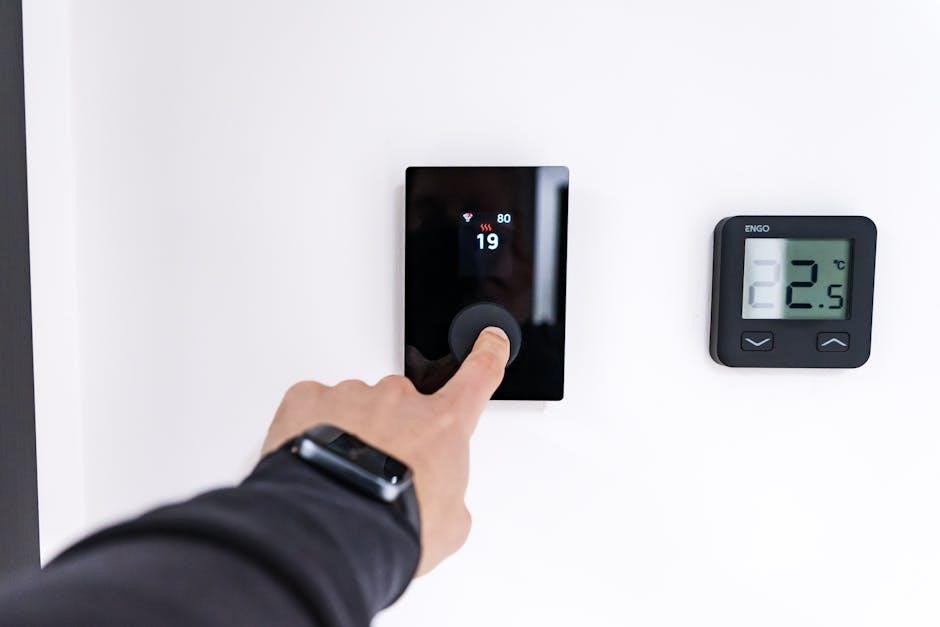
Pro T721 Thermostat Installation Manual: An Overview
Pro signifies a professional-grade device, often more advanced. This manual details the installation of the T721, a high-performance thermostat for optimal climate control.
Understanding the “Pro” Designation
The “Pro” designation, commonly seen across various tech products like the iPhone Pro or Xiaomi 15 Pro, generally indicates a professional or higher-tier version. It suggests enhanced features, improved performance, and a focus on demanding users. In the context of the T721 thermostat, “Pro” signifies advanced capabilities beyond standard models.
This includes potentially more precise temperature control, sophisticated scheduling options, smart home integration, and robust connectivity. Unlike some brands where “Pro” simply denotes a larger screen, here it represents a commitment to professional-grade functionality. The T721 Pro is designed for users seeking a comprehensive and reliable climate management solution, offering a step up in both features and performance.
Decoding the T721 Model Number
The T721 model number provides key insights into the thermostat’s specifications and features. While a definitive breakdown isn’t publicly available, the structure likely follows a logical pattern. “T” likely signifies “Thermostat,” indicating the product category. The “721” portion likely denotes a specific generation or series within the Pro line, potentially referencing features or capabilities.
Higher numbers often correlate with newer models or advanced functionalities. Understanding this numbering system can help differentiate between various Pro thermostat options. It’s crucial to refer to the official product documentation for a precise interpretation of each digit, ensuring compatibility and feature alignment with your needs. This allows informed decision-making when selecting the right thermostat.

Pre-Installation Checklist
Before starting, verify tool availability, HVAC system compatibility, and understand safety precautions. Proper preparation ensures a smooth and secure Pro T721 thermostat installation process.
Tools Required for Installation
Successful Pro T721 installation demands specific tools for safety and efficiency. A Phillips head screwdriver is essential for removing the old thermostat and securing the backplate. A flathead screwdriver may be needed for certain wiring terminals. Wire strippers are crucial for preparing wires for connection, ensuring a clean and reliable contact.
A voltage tester is paramount for confirming power is off before handling wires, preventing electrical shock. Pliers can assist with bending or manipulating wires within the wall. A level ensures the thermostat is mounted straight for aesthetic appeal and accurate readings. Finally, a digital multimeter can be helpful for troubleshooting, verifying voltage, and confirming continuity. Having these tools readily available streamlines the installation process.
Safety Precautions
Prioritize safety during Pro T721 installation. Always disconnect power to your HVAC system at the breaker box before commencing work – verify with a voltage tester. Incorrect wiring can cause electrical shock or damage equipment. If unsure about any step, consult a qualified HVAC technician.
Wear appropriate eye protection to shield against debris. Be mindful of potential asbestos in older homes when removing the existing thermostat; take necessary precautions. Avoid touching bare wires. Keep children and pets away from the work area. Follow all local electrical codes. Proper grounding is essential. Disconnect power before touching any wires!
Compatibility Check: HVAC Systems
Ensure compatibility before installing the Pro T721. This thermostat supports most 24V heating and cooling systems, including furnaces, heat pumps, and air conditioners. It’s not compatible with line voltage (110V/220V) systems.
Verify your system doesn’t require a “C-wire” (common wire) for constant power; if absent, a C-wire adapter may be needed. Confirm your HVAC system isn’t a proprietary system requiring a specific thermostat. Check for compatibility with multi-stage heating/cooling and zoning systems. Consult the Pro T721 documentation or manufacturer’s website for a detailed compatibility list.
Installation Steps
Follow these steps carefully for a successful installation. Power down your HVAC system, remove the old thermostat, and identify existing wiring before proceeding with the Pro T721.
Step 1: Powering Down the HVAC System
Before commencing any wiring or installation procedures, completely disconnect power to your heating, ventilation, and air conditioning (HVAC) system. This is a crucial safety precaution to prevent electrical shock and potential damage to both the thermostat and your HVAC equipment. Locate the circuit breaker that controls your HVAC system – it’s typically labeled – and switch it to the ‘OFF’ position.
Double-check that the power is indeed off by attempting to operate the HVAC system from its usual control point. Confirm no fan movement or heating/cooling activation occurs. For added safety, consider turning off the power at the furnace or air handler itself, if accessible. This ensures a completely de-energized environment for a secure installation process.
Step 2: Removing the Old Thermostat
Carefully remove the cover of your existing thermostat. This often involves gently prying it off or releasing clips. Once the cover is removed, you’ll see the wiring connections. Before disconnecting any wires, it’s highly recommended to take a clear photograph of the existing wiring configuration. This photo will serve as a vital reference during the installation of your Pro T721 thermostat.
Label each wire with the corresponding terminal designation as you disconnect it. Use the provided wire labels or masking tape and a pen. Disconnect each wire individually, ensuring it doesn’t slip back into the wall. Once all wires are disconnected, carefully remove the old thermostat’s baseplate from the wall.
Step 3: Identifying Wiring Terminals
Locate the wiring diagram included with your Pro T721 thermostat. Common terminals include R (power), C (common – often blue), W (heating), Y (cooling), G (fan), and potentially others for auxiliary heat or specific HVAC configurations. Compare these terminals to the labels you applied to the wires during the removal of your old thermostat.
If you’re unsure about any wire’s function, refer to the photograph you took earlier. A ‘C-wire’ is crucial for powering the Pro T721; its absence may require professional assistance. Carefully note the color coding of the wires, but always rely on the terminal labels for accurate identification, as color conventions can vary.
Wiring the Pro T721 Thermostat
Connect the identified wires to the corresponding terminals on the Pro T721 baseplate, ensuring a secure fit. Double-check all connections before proceeding.
Connecting the Power Supply (C-Wire)
The C-wire, or common wire, provides continuous power to the Pro T721 thermostat, enabling its smart features and display functionality. Locate the C-terminal on both your old thermostat and the Pro T721 backplate – it’s often blue, but verify with your wiring diagram. Carefully connect the C-wire from your HVAC system to the C-terminal on the Pro T721 base.
If your existing system lacks a C-wire, a C-wire adapter may be necessary. These adapters repurpose existing wires to provide the required power. Consult a qualified HVAC technician for assistance with C-wire adapter installation, as incorrect wiring can damage your system. A stable power connection is crucial for optimal thermostat performance.
Connecting Heating and Cooling Wires
Identify the heating (often red) and cooling (often yellow) wires from your old thermostat. Refer to your HVAC system’s wiring diagram to confirm wire functions. Connect the red wire to the ‘W’ terminal on the Pro T721 backplate for heating, and the yellow wire to the ‘Y’ terminal for cooling.
For heat pump systems, additional wiring may be required, such as an ‘O/B’ wire for reversing valve control. Carefully match the wire colors and terminal designations to ensure proper operation. Incorrect connections can lead to inefficient heating or cooling, or even system damage. Double-check all connections before proceeding.
Connecting Fan and Other Auxiliary Wires
Locate the fan wire, typically blue, and connect it to the ‘G’ terminal on the Pro T721 backplate. This controls the circulation fan independent of heating or cooling. If your system has auxiliary heat, connect the corresponding wire – often orange – to the ‘Aux’ or ‘E’ terminal.
Some systems may include a common wire (C-wire) for continuous power, essential for Wi-Fi connectivity and advanced features. Ensure all wires are securely fastened to their respective terminals. Loose connections can cause intermittent operation or system failures. Consult your HVAC documentation for specific wiring configurations.
Mounting the Thermostat
Securely attach the backplate to the wall using the provided screws. Then, carefully align and snap the Pro T721 thermostat onto the mounted backplate.
Attaching the Backplate
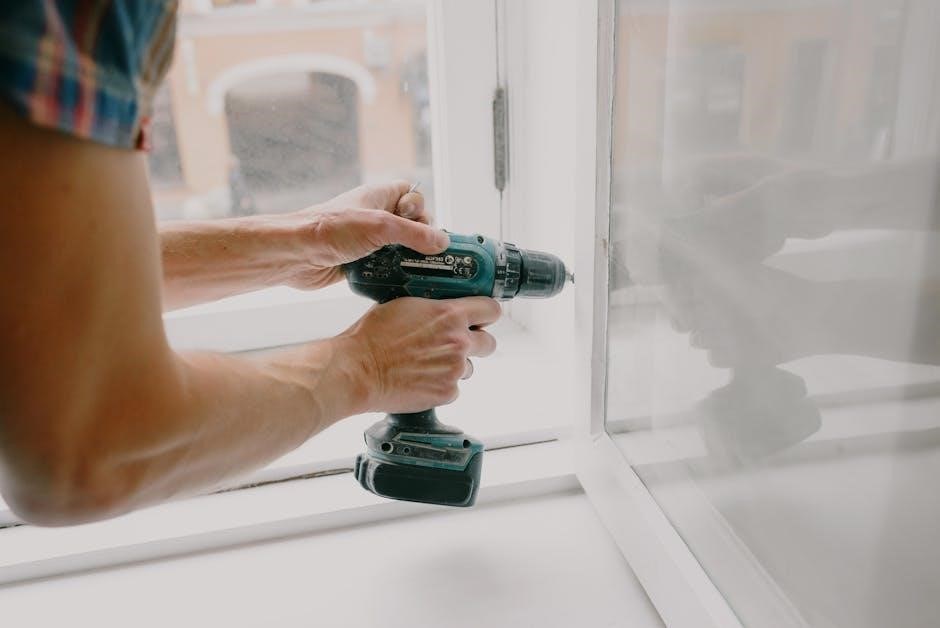
Begin by carefully positioning the Pro T721 backplate on the wall where you intend to install the thermostat. Utilize a level to ensure it’s perfectly straight for an aesthetically pleasing and accurate installation. Mark the screw holes with a pencil, then pre-drill pilot holes if necessary, especially for hard surfaces like plaster or tile.
Next, using the screws provided in the installation kit, securely fasten the backplate to the wall. Ensure the screws are tightened firmly, but avoid over-tightening, which could damage the backplate or the wall. Double-check that the backplate is stable and doesn’t wobble. A properly secured backplate is crucial for the reliable operation and longevity of your Pro T721 thermostat.
Securing the Thermostat to the Backplate
Carefully align the Pro T721 thermostat with the mounted backplate. Gently push the thermostat onto the backplate, ensuring that all the clips or locking mechanisms engage securely. You should hear or feel a distinct click, confirming a proper connection. Avoid forcing the thermostat, as this could damage the internal components or the locking mechanism.
Once the thermostat is attached, lightly tug on it to verify it’s firmly secured to the backplate. If it feels loose, re-align and re-engage the locking mechanisms. A secure attachment is vital to prevent accidental dislodgement and ensure consistent operation of your new thermostat. This step completes the physical installation process.
Initial Setup and Configuration
Power on the Pro T721, follow the on-screen prompts for Wi-Fi connection, and accurately set the date and time for optimal scheduling features.
Powering On and Initial Boot-Up
Before initiating the Pro T721’s boot-up sequence, ensure your HVAC system is completely powered down at the breaker box. This crucial safety step prevents electrical hazards during installation. Locate the breaker controlling your furnace and air conditioner, and switch it to the ‘off’ position. Confirm power is off at the thermostat by attempting to operate the system – nothing should happen. Once verified, proceed with removing the old thermostat. A complete power disconnection safeguards both you and the sensitive electronic components of the new thermostat. Double-check the breaker position before touching any wiring.
Connecting to Wi-Fi
To unlock the Pro T721’s smart features, connect it to your home Wi-Fi network. On the thermostat’s touchscreen, navigate to the ‘Settings’ menu and select ‘Wi-Fi’. The thermostat will scan for available networks. Choose your network from the list and enter your password using the on-screen keyboard. Ensure your Wi-Fi signal strength is strong for a stable connection. A successful connection is indicated by a Wi-Fi symbol appearing on the display. This enables remote control, software updates, and integration with other smart home devices, enhancing your overall climate control experience;
Setting Date and Time
Accurate date and time settings are crucial for scheduling and proper thermostat operation. Access the ‘Settings’ menu on the Pro T721’s touchscreen and select ‘Date & Time’. You can choose to set the date and time manually or enable automatic synchronization via your Wi-Fi connection. Automatic synchronization ensures the thermostat always displays the correct time, especially after power outages or daylight saving time changes. Verify the time zone is correctly configured for your location. Correct settings guarantee accurate scheduling and reliable performance of all programmed features.
Programming and Features
The Pro T721 offers customizable temperature schedules, smart features for energy savings, and a comprehensive error code system for easy troubleshooting and optimal comfort.
Setting Temperature Schedules
The Pro T721 thermostat empowers users with granular control over their home’s climate through customizable temperature schedules. Access the scheduling menu via the thermostat’s touchscreen interface or the companion mobile application. You can define unique temperature settings for different times of the day and days of the week, optimizing comfort and energy efficiency.
Create multiple schedules to accommodate varying lifestyles – for example, a weekday schedule with lower temperatures during work hours and a weekend schedule with more comfortable settings. The system supports distinct periods like ‘Wake,’ ‘Leave,’ ‘Return,’ and ‘Sleep.’ Precise adjustments ensure consistent temperatures, reducing energy waste and maximizing savings. Explore advanced options like hold durations and temporary overrides for added flexibility.
Utilizing Smart Features (If Applicable)
The Pro T721 thermostat boasts intelligent features designed to enhance convenience and energy savings. If your model supports it, leverage geofencing to automatically adjust temperatures based on your location, ensuring comfort upon arrival and minimizing energy use when away. Smart learning algorithms analyze your heating and cooling patterns, proactively optimizing schedules for peak efficiency.
Voice control integration with popular assistants like Alexa or Google Assistant allows hands-free operation. Remote access via the mobile app provides control from anywhere with an internet connection. Explore energy reports to monitor consumption and identify potential savings. These smart capabilities transform the T721 into a truly intelligent climate control solution.
Understanding Error Codes
The Pro T721 thermostat utilizes error codes to diagnose system issues. A “C-Wire” error indicates insufficient power; verify proper C-wire connection. “E1” suggests a sensor malfunction, requiring professional inspection. “E2” signals a communication failure between the thermostat and HVAC unit – check wiring connections. “E3” often points to a heating or cooling system lockout, potentially due to safety switches.
Refer to the complete error code list in the appendix for detailed explanations and troubleshooting steps. Ignoring error codes can lead to system damage or inefficient operation. If an error persists after attempting basic troubleshooting, contact qualified HVAC support for assistance. Prompt attention to error messages ensures optimal performance.

Troubleshooting Common Issues
Addressing typical problems like power failures, inaccurate readings, and connectivity issues is crucial. This section provides solutions for a smoothly functioning Pro T721 thermostat.
Thermostat Not Powering On
If your Pro T721 thermostat fails to power on, begin by verifying the circuit breaker controlling the HVAC system hasn’t tripped. Confirm the thermostat is securely attached to the backplate, ensuring a solid electrical connection. Critically, check the C-wire connection – a missing or loose C-wire is a frequent cause of power issues.
Inspect the wiring terminals for any loose or disconnected wires. Use a multimeter to confirm voltage is reaching the thermostat. If voltage is present but the unit remains unresponsive, a faulty thermostat may be the culprit, requiring replacement. Consult a qualified HVAC technician if you are uncomfortable performing these checks or if the problem persists.
Incorrect Temperature Readings
If the Pro T721 displays inaccurate temperature readings, first ensure the thermostat isn’t directly exposed to sunlight, drafts, or heat-generating appliances. These external factors can significantly skew temperature sensing. Verify the thermostat is level; an unlevel installation can affect accuracy.
Explore the calibration options within the thermostat’s settings menu. Many models allow for temperature offset adjustments. If calibration doesn’t resolve the issue, confirm the thermostat’s location isn’t a “cold spot” or “hot spot” within the home. Consider relocating the thermostat to a more representative location. Contact support if discrepancies persist after these steps.
Connectivity Problems
Experiencing Wi-Fi connection issues with your Pro T721? First, confirm your home network is functioning correctly and that the thermostat is within range of your router. Restart both the thermostat and your router – a simple reboot often resolves temporary glitches.
Double-check the Wi-Fi password entered during setup. Ensure it’s accurate and case-sensitive. If problems continue, try temporarily disabling any firewall settings on your router that might be blocking the thermostat’s connection. Consult your router’s manual for instructions. Finally, contact customer support for advanced troubleshooting assistance if these steps fail.
Advanced Settings and Customization
Unlock personalized comfort! Explore calibration options, display settings, and user profiles within the Pro T721 to tailor the thermostat to your specific needs.
Calibration Options
The Pro T721 thermostat offers several calibration features to ensure accurate temperature readings. If you suspect a discrepancy between the displayed temperature and a trusted thermometer, utilize the temperature offset calibration. This allows for minor adjustments, typically within a range of +/- 4°F, to align the thermostat’s readings.
Furthermore, consider humidity calibration if your unit includes a humidity sensor. Accurate humidity levels contribute to overall comfort. The thermostat may also feature a sensor location calibration, allowing you to compensate for drafts or direct sunlight affecting the sensor; Regularly checking and calibrating these settings guarantees optimal performance and a consistently comfortable indoor environment. Remember to document any calibration changes made for future reference.
Display Settings
The Pro T721 thermostat provides customizable display settings to enhance user experience. Adjust the screen brightness to suit ambient lighting conditions, ensuring readability without causing glare. You can select your preferred temperature unit – Fahrenheit or Celsius – within the settings menu.
Additionally, personalize the display with various themes or color schemes. Configure the screen timeout duration to conserve energy when the thermostat is inactive. Some models offer a rotating display feature, cycling through temperature, humidity, and time. Explore options to display outdoor temperature if a remote sensor is connected. These settings allow you to tailor the thermostat’s interface to your preferences.
User Profiles
The Pro T721 thermostat supports multiple user profiles, allowing personalized comfort settings for each household member. Each profile can store individual temperature preferences, schedules, and access permissions. This feature is ideal for families with differing heating and cooling needs.
Creating profiles is straightforward through the thermostat’s interface or mobile app. Assign unique names and set preferred temperatures for each user. Utilize access control to restrict certain settings for specific profiles, ensuring energy conservation. Switching between profiles is seamless, automatically adjusting the thermostat to the selected user’s preferences. This enhances convenience and optimizes energy usage.
Warranty Information and Support
Register your Pro T721 for warranty coverage and access dedicated customer support. Contact information and registration details are available online and within this manual.
Registering Your Pro T721
To activate your Pro T721’s warranty and unlock exclusive support benefits, immediate registration is highly recommended. Visit our official website at [insert website address here] and navigate to the ‘Product Registration’ section. You will need your thermostat’s serial number, found on the device itself or the original packaging.
Provide accurate contact information, including your name, address, email, and phone number. This ensures we can efficiently assist you with any inquiries or warranty claims. Registration confirms your purchase date and eligibility for potential software updates and promotional offers. Keep your registration confirmation email for your records. Failure to register may limit your access to full warranty coverage and support services.
Contacting Customer Support
For any questions, concerns, or technical assistance regarding your Pro T721 thermostat, our dedicated customer support team is readily available. You can reach us via several convenient channels. Our toll-free hotline is open Monday-Friday, 9 AM to 5 PM EST, at [insert phone number here].
Alternatively, email us at [insert email address here] and expect a response within 24-48 hours. Visit our comprehensive online support portal at [insert website address here] for FAQs, troubleshooting guides, and downloadable resources. Live chat support is also available during business hours. Please have your thermostat model number and serial number ready when contacting support to expedite the assistance process.