
Schwinn Sidewinder Service Manual: A Comprehensive Guide
Today‚ February 13th‚ 2026‚ this manual unlocks your Sidewinder’s potential‚ offering a clear path to successful operation and diligent parts maintenance.
Welcome to the world of the Schwinn Sidewinder! This bicycle represents a blend of classic Schwinn durability and innovative design‚ offering a unique riding experience. This service manual is meticulously crafted to empower both seasoned cyclists and newcomers alike with the knowledge to confidently maintain and repair their Sidewinder.
Whether you’re tackling daily commutes or weekend adventures‚ understanding your Sidewinder’s components and proper maintenance procedures is crucial for optimal performance and longevity. This guide provides a detailed exploration of the bicycle’s features‚ from its distinctive frame geometry to its responsive drivetrain.

Consider this manual your essential roadmap‚ ensuring years of enjoyable and trouble-free cycling. It’s compatible with a variety of devices‚ making information readily accessible whenever and wherever you need it. Let’s begin your journey towards mastering the Schwinn Sidewinder!
Understanding the Sidewinder’s Unique Features
The Schwinn Sidewinder distinguishes itself through several key design elements. Its frame geometry prioritizes both comfort and control‚ making it suitable for a diverse range of riders and terrains. A notable feature is its robust construction‚ built to withstand the rigors of regular use.
The Sidewinder’s drivetrain is engineered for smooth and reliable gear shifting‚ enhancing your pedaling efficiency. Furthermore‚ the braking system provides responsive stopping power‚ ensuring your safety on every ride. This bicycle isn’t merely a mode of transport; it’s a carefully considered machine.
Understanding these unique attributes is paramount for effective maintenance and repair. This manual will delve into each feature‚ providing insights into its function and how to keep it operating at its peak. Prepare to unlock the full potential of your Sidewinder!
Component Breakdown & Identification
Detailed diagrams and descriptions will guide you through identifying each part of your Schwinn Sidewinder‚ crucial for repairs and upgrades.
Frame and Fork Assembly
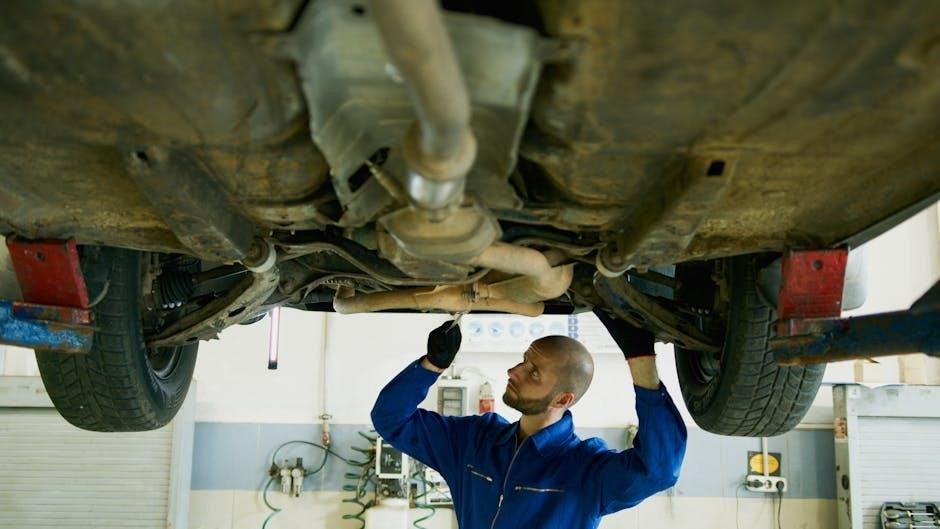
The Schwinn Sidewinder’s frame is the foundational element‚ demanding careful inspection for cracks‚ dents‚ or corrosion‚ especially at weld points. Regularly check the headset for smooth rotation and proper adjustment; looseness indicates potential bearing wear. Fork alignment is critical – ensure it’s straight and free from bends‚ impacting steering precision. Inspect the fork’s crown race and bearings for damage.
Pay close attention to the bottom bracket shell‚ verifying its integrity and ensuring the bearings spin freely. Examine the dropouts for wear‚ as they secure the wheels. Proper torque specifications are vital when tightening frame and fork components; over-tightening can cause damage‚ while under-tightening compromises safety. A visual inspection‚ combined with tactile assessment‚ will reveal most issues.
Handlebar and Stem Configuration
The handlebar and stem assembly directly influences steering control and rider comfort on the Schwinn Sidewinder. Regularly inspect the stem bolts for proper torque‚ ensuring they are securely fastened but not over-tightened‚ which can damage the stem or fork steerer tube; Check for any stem slippage during rides‚ indicating a potential loosening issue. Examine the handlebars themselves for cracks‚ particularly around the clamp area.
Grips should be firm and secure‚ providing a confident hold. Inspect the brake and shifter levers for proper function and alignment. Ensure all cables are routed correctly and aren’t frayed or damaged. Adjust handlebar position for optimal ergonomics and riding style. A loose or improperly adjusted handlebar/stem can significantly impact handling and safety.
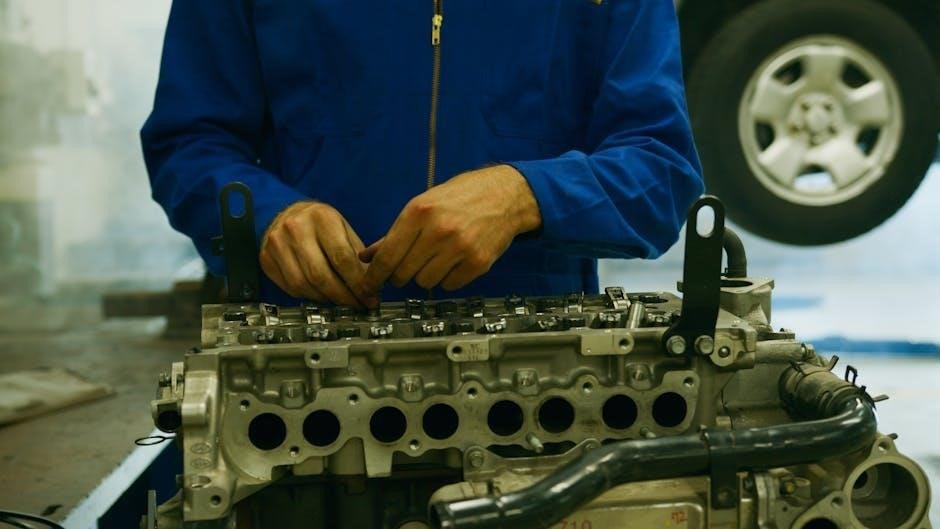
Drivetrain System – Gears‚ Chain & Cranks
The Sidewinder’s drivetrain – encompassing gears‚ chain‚ and cranks – is crucial for efficient power transfer. Regularly inspect the chain for wear‚ rust‚ and proper lubrication. A dry or worn chain reduces efficiency and accelerates component wear. Check the chain’s stretch using a chain wear indicator tool; replace if necessary. Examine the front and rear derailleurs for smooth‚ precise shifting.
Adjust derailleur cable tension to eliminate hesitation or difficulty shifting. Inspect the chainrings and cassette for worn or damaged teeth. Ensure the cranks are securely attached to the bottom bracket and spin freely. Proper drivetrain maintenance maximizes performance and extends the lifespan of these vital components.
Braking System – Calipers‚ Levers & Cables
A fully functional braking system is paramount for safety. Regularly inspect brake calipers for proper alignment and pad wear. Ensure brake pads have sufficient material remaining and are free from contamination. Check brake levers for smooth operation and responsive feel; adjust cable tension as needed. Inspect brake cables for fraying‚ kinks‚ or rust – replace immediately if compromised.
Properly adjusted brakes provide consistent stopping power. Test brake performance frequently‚ and address any issues promptly. Lubricate pivot points to maintain smooth lever action. Regularly clean calipers to prevent sticking and ensure optimal braking efficiency. Prioritize brake maintenance for a safe and enjoyable riding experience.
Maintenance Procedures
Consistent upkeep extends your Sidewinder’s life and performance. Follow these procedures diligently for optimal functionality‚ ensuring safe and enjoyable rides every time.
Routine Inspection Checklist
Before each ride‚ a quick inspection is crucial for safety and performance. Begin by visually checking the tire pressure – ensure they are inflated to the recommended PSI (printed on the sidewall). Inspect tire tread for wear and tear‚ replacing if necessary. Next‚ examine the brake levers; they should feel firm and responsive‚ not spongy. Brake pads should have sufficient material remaining.
Check the chain for rust‚ kinks‚ or excessive slack; lubrication is key. Verify that all bolts and fasteners are tightened securely‚ paying close attention to the stem‚ handlebars‚ and seatpost. A quick spin of the wheels will reveal any obvious wheel wobble or bearing issues. Finally‚ listen for any unusual creaking sounds while gently rocking the bike – these could indicate a loose component needing attention. Regular adherence to this checklist will proactively prevent more significant issues down the road.
Tire Inflation and Replacement
Maintaining proper tire inflation is paramount for a smooth ride and preventing pinch flats. Locate the recommended PSI (pounds per square inch) printed on the tire sidewall – never exceed this limit. Use a reliable tire pump with a pressure gauge for accurate inflation. Regularly check pressure‚ as tires naturally lose air over time.
When replacing tires‚ ensure the new tire size matches the original specifications. Use tire levers carefully to remove the old tire‚ avoiding damage to the rim. Inspect the inner tube for punctures before installing the new tire. Properly seat the tire bead within the rim‚ ensuring it’s even on both sides. Finally‚ inflate to the recommended PSI and verify proper seating before riding. A well-maintained tire significantly enhances safety and performance.
Brake Adjustment and Repair
Brake performance is critical for safety. Begin by inspecting brake pads for wear; replace if they’re worn below the wear line. Adjust brake cable tension using the barrel adjuster on the brake lever or caliper. Ensure even pad contact with the rim or rotor – loose or uneven contact reduces stopping power.
For brake repair‚ check cable routing for kinks or fraying. Replace damaged cables immediately. If calipers feel spongy‚ bleed the brake system to remove air bubbles (hydraulic brakes only). Regularly clean brake surfaces to remove dirt and grime. Proper adjustment and maintenance guarantee responsive and reliable braking‚ essential for a safe cycling experience. Always test brakes before each ride!
Chain Cleaning and Lubrication
A clean and lubricated chain significantly extends drivetrain life and improves shifting performance. Begin by removing dirt and grime using a chain cleaning tool or a brush with degreaser. Rinse thoroughly with water and allow the chain to dry completely.
Apply chain lubricant sparingly‚ focusing on the rollers. Wipe off excess lubricant to prevent dirt accumulation. Regular cleaning and lubrication minimize friction‚ reduce wear‚ and ensure smooth‚ efficient power transfer. Inspect the chain for wear using a chain checker tool; replace if stretched beyond acceptable limits. Consistent maintenance prevents costly repairs and enhances your riding enjoyment.

Troubleshooting Common Issues
Diagnose and resolve frequent Sidewinder problems efficiently with this section‚ covering gear shifts‚ brake failures‚ wheel wobbles‚ and irritating creaking sounds.
Dealing with Gear Shifting Problems
Experiencing difficulty with smooth gear transitions on your Schwinn Sidewinder? Several factors could be at play. First‚ inspect the derailleur cable for fraying or kinks‚ as these impede precise shifting. Ensure the cable is properly lubricated for optimal performance.
Next‚ examine the derailleur alignment; a bent derailleur hanger will cause inaccurate shifts. Carefully straighten it if necessary. Check the limit screws on both front and rear derailleurs – these prevent the chain from falling off the cassette or chainrings.
Verify that the chain is correctly seated on all gears and that the cassette and chainrings aren’t excessively worn. A stretched chain or worn teeth will hinder shifting. Finally‚ confirm proper indexing by adjusting the barrel adjusters on the shifters or derailleurs until smooth‚ crisp shifts are achieved across the entire gear range.
Addressing Brake Failure
Sudden brake failure on your Schwinn Sidewinder demands immediate attention. Begin by inspecting the brake levers for proper function and sufficient cable tension. A spongy feel often indicates air in the hydraulic lines (if applicable) or worn brake pads.
Visually examine the brake pads for wear; replace them if they’re thin or contaminated. Check the brake cables for fraying‚ kinks‚ or corrosion‚ replacing them if necessary. Ensure the brake calipers are properly aligned with the rotors or rims.
If using rim brakes‚ verify the rims are clean and free of debris. For disc brakes‚ confirm the rotors are clean and true. Bleeding hydraulic brakes may be required to remove air bubbles and restore optimal braking power. Always prioritize safety and test brakes thoroughly after any repair.
Fixing Wheel Wobbles and Truing
Wheel wobbles on your Schwinn Sidewinder indicate a bent rim or loose spokes. Begin by inspecting the rim for visible dents or bends. If minor‚ carefully attempt to straighten it using a rim truing tool. More significant damage may necessitate rim replacement.
Next‚ assess spoke tension. Loose spokes contribute to wobbles. Using a spoke wrench‚ gradually tighten loose spokes‚ alternating between sides of the wheel to maintain even tension. A spoke tension meter ensures accuracy.
Spin the wheel and observe the wobble. Continue adjusting spoke tension incrementally until the wobble is minimized. If you lack experience‚ consult a professional bike mechanic to avoid damaging the wheel. Proper truing ensures a smooth‚ safe ride.
Identifying and Resolving Creaking Sounds
Creaking sounds on your Schwinn Sidewinder can be frustrating to diagnose. Start by systematically checking common culprits: the seatpost‚ stem‚ handlebars‚ and pedals. Remove‚ clean‚ and re-grease each component individually‚ then test for the creak.
Next‚ inspect the bottom bracket and headset for looseness. Tighten these components to the manufacturer’s specifications. A creak emanating from the wheels could indicate loose spokes or a dry hub. Lubricate the hub bearings and tighten spokes as needed.
If the creak persists‚ examine the frame itself for cracks or stress points. If you suspect frame damage‚ discontinue use and consult a professional. Thorough investigation and lubrication are key to silencing those annoying noises.
Detailed Repair Guides
Master essential repairs! This section provides step-by-step instructions for cable replacement‚ derailleur adjustments‚ and comprehensive wheel bearing maintenance procedures.
Replacing Brake Cables
Begin by disconnecting the old brake cable from the brake caliper. Carefully note the cable routing along the frame – replicating this path is crucial for smooth operation. Next‚ locate the cable anchor point at the brake lever. Remove the cable retaining cap and gently pull the old cable free.
Before installing the new cable‚ inspect the cable housing for any kinks or damage. Replace the housing if necessary to ensure optimal braking performance. Lubricate the new brake cable with a light oil before threading it through the housing and routing it along the frame‚ mirroring the original path.
Secure the cable at the brake lever‚ replacing the retaining cap. Then‚ attach the cable to the brake caliper‚ tightening the anchor bolt securely. Finally‚ adjust the cable tension using the barrel adjuster on the brake lever to achieve proper braking feel and responsiveness. Double-check all connections for security.
Adjusting Derailleurs
Start by ensuring the derailleur hanger is straight; a bent hanger is a common cause of shifting issues. Use the high and low limit screws on the derailleur to define the outer and inner limits of chain travel‚ preventing the chain from falling off the cassette or chainrings.
Next‚ adjust the cable tension using the barrel adjuster located on the derailleur or shifter. Turning the adjuster clockwise increases tension‚ while counterclockwise decreases it. Aim for crisp‚ precise shifts across all gears.
Fine-tune the shifting by observing the chain’s alignment with the cassette sprockets. If the chain hesitates to shift‚ slightly adjust the cable tension or limit screws. Consistent‚ smooth shifting requires patience and careful observation. Regularly check and readjust as cables stretch over time.
Wheel Bearing Maintenance
Begin by removing the wheels from the Schwinn Sidewinder frame. Inspect the bearings for signs of wear‚ corrosion‚ or damage. A gritty feel or excessive play indicates the need for service. Carefully disassemble the hub‚ noting the order of components like cones‚ cups‚ and balls.
Thoroughly clean all parts with a degreaser‚ removing old grease and grime. Inspect the bearing surfaces for pitting or damage; replace any worn components. Repack the bearings with high-quality bicycle grease‚ ensuring complete coverage.
Reassemble the hub‚ adjusting the cone nuts to eliminate play while maintaining smooth rotation. Over-tightening will cause friction and damage. Test the wheel’s spin; it should be free and silent. Proper bearing maintenance extends wheel life and improves ride quality.

Parts Diagrams & Resources
Access detailed Schwinn Sidewinder parts diagrams online for accurate identification and ordering. Explore supportive online forums and communities for expert assistance and shared knowledge.
Locating Schwinn Sidewinder Parts Diagrams
Finding accurate parts diagrams is crucial for successful Schwinn Sidewinder maintenance and repair. Several online resources offer these valuable schematics‚ allowing you to precisely identify components and their corresponding part numbers. A primary source is the Schwinn website itself‚ though availability can vary depending on the model year of your Sidewinder.
Third-party bicycle parts retailers frequently host exploded views and parts lists for older Schwinn models. Websites specializing in vintage bicycle components are particularly helpful. Searching using the Sidewinder’s model year and specific component (e.g.‚ “Schwinn Sidewinder 1998 derailleur diagram”) will yield targeted results.
Remember to verify the diagram’s accuracy against your specific Sidewinder configuration‚ as minor variations existed across production runs. These diagrams are invaluable for ordering replacement parts and understanding the assembly of your bicycle.
Online Forums and Support Communities
Schwinn Sidewinder owners benefit greatly from engaging with online forums and dedicated support communities. These platforms provide a space to share knowledge‚ troubleshoot issues‚ and connect with fellow enthusiasts. Numerous cycling forums host dedicated threads for vintage Schwinn bicycles‚ including the Sidewinder.
Experienced owners often share repair tips‚ parts sourcing information‚ and detailed advice on maintaining these bikes. Searching online for “Schwinn Sidewinder forum” or “vintage Schwinn bicycle community” will reveal several active groups. Don’t hesitate to post questions or search existing threads for solutions to common problems.
These communities are invaluable for accessing specialized knowledge and receiving assistance beyond what’s available in a service manual.