
Sears Battery Charger Owners Manual: An Overview
This manual provides essential guidance for Sears battery charger models‚ including the 71201‚ 71230‚ and 71240․
It covers operation‚ safety‚ and troubleshooting for various chargers like the 608․718380 and 608․718571․
Understanding your Sears charger is crucial for optimal battery maintenance and safe operation‚ especially with vintage models like the 608․71821․
Proper use ensures longevity and efficient charging‚ whether it’s a simple 1․5 amp charger or a more powerful 250 amp engine starter (model 71450)․
Sears battery chargers have a long and storied history‚ becoming a staple in garages and workshops across America for decades․ From the early manual models like the 71201 (1․5 Amp) to the more robust DieHard series (71230‚ 71240)‚ Sears provided reliable solutions for maintaining automotive and other lead-acid batteries․
These chargers weren’t just tools; they represented a commitment to self-sufficiency and vehicle maintenance for the average homeowner․ The popularity of models like the 71450 – a combined charger‚ tester‚ and engine starter – highlights Sears’ understanding of diverse user needs․
Even today‚ vintage Sears chargers like the 608․71821 (4 Amp‚ 12 Volt) are sought after by collectors and enthusiasts․ This manual aims to provide a comprehensive resource for owners of these classic chargers‚ offering guidance on operation‚ safety‚ and troubleshooting․ Understanding the specific features of your model (such as the 608․718380 or 608․718571) is key to maximizing its performance and ensuring safe usage․
Historical Context of Sears Battery Chargers
Sears‚ Roebuck and Co․‚ a retail giant of the 20th century‚ wasn’t just a department store; it was a provider of essential tools and equipment for the American household․ Their battery chargers‚ beginning with early manual models like the 200․71201 and evolving into the DieHard line (71230‚ 71240)‚ mirrored the growth of automotive ownership․
The post-war boom saw increased demand for reliable battery maintenance solutions‚ and Sears stepped in to fill that need․ Models like the 71450‚ offering charging‚ testing‚ and engine starting capabilities‚ became popular for their versatility․ Even as technology advanced‚ Sears continued to offer dependable chargers‚ including the 608․718380 and 608․718571․
The enduring appeal of vintage Sears chargers‚ such as the 608․71821‚ speaks to their build quality and lasting design․ These chargers represent a period when products were built to last‚ and self-reliance was valued․ Understanding this historical context helps appreciate the legacy of Sears battery chargers and their continued relevance today․

Common Sears Battery Charger Models
Sears offered a diverse range of chargers‚ including the 71201‚ 71230‚ 71240‚ and 71450․ Specific models like 608;718380 and 608․718571 were also popular․
Vintage options‚ such as the 608․71821‚ remain sought after․ These models catered to various needs‚ from basic charging to engine starting․
Model 71201: 1․5 Amp Manual Battery Charger
The Sears Model 71201 is a classic 1․5 amp manual battery charger‚ designed for maintaining and recharging 6-volt and 12-volt batteries․ This charger is ideal for smaller battery applications‚ such as those found in motorcycles‚ lawnmowers‚ and classic cars․ Its simplicity makes it a user-friendly option for those new to battery charging․
Operation involves manually setting the desired voltage (6V or 12V) and connecting the clamps to the battery terminals – red to positive‚ black to negative․ The charger features a straightforward ammeter to monitor the charging process․ Users should regularly check the battery’s electrolyte level during charging‚ especially with older‚ non-sealed batteries․
Safety precautions are essential; avoid charging in enclosed spaces and ensure proper ventilation․ Overcharging can damage the battery‚ so it’s crucial to disconnect the charger once the battery is fully charged․ This model is known for its reliability and affordability‚ making it a popular choice for decades․
Model 71230: DieHard-2/40/200 Amp Manual Battery Charger
The DieHard-2/40/200 Amp Manual Battery Charger (Model 71230) is a versatile and powerful unit‚ capable of handling a wide range of battery charging and jump-starting needs․ Its multi-rate design offers 2‚ 40‚ and 200 amp settings‚ making it suitable for cars‚ trucks‚ and heavy-duty vehicles․ This charger is a favorite among automotive enthusiasts and professionals alike․
Operation requires careful attention to the selected amperage to avoid damaging the battery․ The 200-amp setting is specifically for jump-starting‚ while the lower settings are used for charging․ Proper polarity connection is critical – red clamp to positive‚ black to negative – to prevent sparks and potential damage․
Safety features include overload protection and a robust construction․ Users should always consult the owner’s manual for specific charging times and recommendations․ Regular maintenance‚ such as cleaning the clamps and inspecting the cables‚ will ensure long-lasting performance․
Model 71240: DieHard 2/15/50/250 Amp Manual Battery Charger
The DieHard 2/15/50/250 Amp Manual Battery Charger (Model 71240) represents a significant step up in power and versatility compared to earlier models․ Featuring four distinct amperage settings‚ it caters to a broader spectrum of battery sizes and vehicle types‚ from compact cars to large trucks and even light-duty equipment․ This model is renowned for its robust construction and reliable performance․
The 250-amp jump-start capability makes it ideal for reviving deeply discharged batteries․ However‚ users must exercise caution and adhere to the recommended charging times for each amperage setting․ Incorrect usage can lead to battery damage or reduced lifespan․ Always prioritize safety by wearing appropriate eye protection․
Regular inspection of the cables and clamps is crucial for maintaining optimal charging efficiency․ Proper storage in a dry environment will also contribute to the charger’s longevity․ Consult the owner’s manual for detailed instructions and safety guidelines․
Model 71450: Manual Battery Charger/Tester/Engine Starter

The Sears Model 71450 is a multi-functional powerhouse‚ combining battery charging‚ testing‚ and engine starting capabilities into a single unit․ This versatility makes it a valuable asset for any automotive enthusiast or homeowner․ The integrated battery tester allows users to assess the health and charge level of their batteries before attempting a charge or jump-start․
The engine starting function provides a significant boost when jump-starting vehicles with deeply discharged batteries․ However‚ it’s crucial to follow the correct connection procedures to avoid damaging the vehicle’s electrical system․ Always refer to the owner’s manual for detailed instructions and safety precautions․
Regular maintenance‚ including cable inspection and proper storage‚ is essential for ensuring the longevity and reliable performance of this model․ Its robust design and multiple features make it a popular choice for both home and commercial use․
Model 608․718380: Specific Model Details
The Sears battery charger‚ model 608․718380‚ is a robust unit designed for reliable battery maintenance․ While specific details can be scarce due to its age‚ it generally functions as a manual battery charger‚ suitable for automotive‚ marine‚ and other 12-volt lead-acid batteries․ Users often seek information regarding its charging rates and optimal charging times․
This model typically features manual voltage and amperage settings‚ requiring the user to select the appropriate levels based on the battery’s specifications․ Careful monitoring during the charging process is crucial to prevent overcharging and potential battery damage․ Finding original documentation can be challenging‚ but online resources and forums often provide helpful insights․
Replacement parts‚ when needed‚ may require some searching‚ but are often available through online retailers specializing in vintage Sears parts․ Proper care and maintenance will ensure years of reliable service from this durable charger․
Model 608․718571: User Guide Information
The Sears Automobile Battery Charger‚ model 608․718571‚ is a manual unit designed for charging 12-volt automotive batteries․ A comprehensive user guide is essential for safe and effective operation‚ detailing proper connection procedures and charging cycles․ The guide typically outlines the importance of selecting the correct amperage setting based on battery capacity․
Users should familiarize themselves with the safety precautions outlined in the manual‚ including avoiding sparks and ensuring adequate ventilation during charging․ The guide also provides instructions on how to test battery condition and interpret the results․ Troubleshooting tips are often included to address common issues like the charger not powering on or a battery failing to charge․
Locating a physical copy of the original user guide can be difficult; however‚ digital versions are often available online through manual archive websites and Sears enthusiast forums․
Model 608․71821: Vintage 4 Amp 12 Volt Charger
The Sears Model 608;71821 is a highly sought-after vintage 4-amp‚ 12-volt battery charger‚ known for its robust construction and reliable performance․ This charger is particularly rare and often found among collectors of vintage tools․ Its design reflects the charging technology prevalent in its era‚ offering a simple yet effective solution for maintaining lead-acid batteries․
Operating this vintage charger requires understanding its basic functionality and adhering to safety guidelines․ Due to its age‚ the original user manual may be unavailable‚ necessitating research and careful observation․ Users should inspect the power cord and clamps for damage before each use․
Finding replacement parts can be challenging‚ but resourceful collectors often share information on sourcing components․ Proper maintenance will ensure this classic charger continues to function for years to come․
Key Features and Functionality
Sears battery chargers offer diverse capabilities‚ including voltage settings‚ battery testing‚ and engine starting assistance․ Models vary in amperage and features‚ catering to different needs․
Understanding these functions ensures optimal battery care and safe operation․ Features like the 71450’s testing ability enhance usability․
Charging Capabilities & Voltage Settings
Sears battery chargers boast a range of charging capabilities‚ primarily focused on 6-volt and 12-volt battery systems․ Different models offer varying amperage outputs‚ influencing charging speed and suitability for different battery sizes․ The 1․5 amp (Model 71201) is ideal for smaller batteries and trickle charging‚ while higher amperage models like the 4-amp (608․71821) and 200-amp (71230) are designed for faster charging and larger batteries․
Voltage selection is typically achieved through a manual switch or setting on the charger․ It’s crucial to select the correct voltage to avoid damaging the battery․ Incorrect voltage can lead to undercharging‚ overcharging‚ or even battery failure․ Many Sears chargers feature multiple charging rates‚ allowing users to adjust the charging process based on the battery’s condition and capacity․ Understanding these settings is vital for maximizing battery life and performance․ Always consult the charger’s specific instructions for proper voltage and amperage selection․
Testing Battery Condition
Many Sears battery chargers‚ particularly models like the 71450 (Battery Charger/Tester/Engine Starter)‚ incorporate battery testing functionalities․ These tests typically assess the battery’s voltage and ability to hold a charge‚ providing a general indication of its health․ The testing process usually involves connecting the charger to the battery and selecting the ‘test’ mode․ The charger then displays a reading‚ often indicating ‘good’‚ ‘weak’‚ or ‘bad’ condition․
It’s important to note that these tests are not always definitive and may not detect subtle internal damage․ A load test‚ performed by a professional‚ provides a more accurate assessment․ However‚ the built-in testing feature offers a convenient initial check․ Regular testing helps identify failing batteries before they cause unexpected issues․ Always refer to the owner’s manual for specific testing procedures and interpretation of results․ Understanding the limitations of the testing function is crucial for accurate diagnosis․
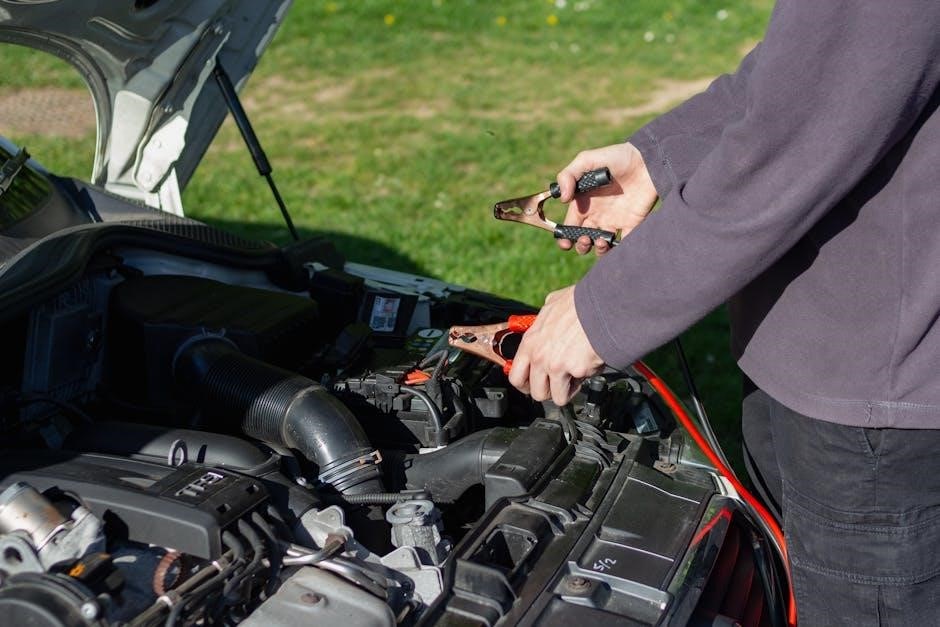
Engine Starting Assistance
Certain Sears battery chargers‚ notably the 71450 model‚ are designed to provide engine starting assistance․ This feature allows the charger to deliver a high current boost to a discharged battery‚ enabling the engine to crank and start․ Before attempting to jump-start an engine‚ ensure the charger is set to the appropriate starting amperage setting‚ as specified in the owner’s manual․ Proper connection is paramount: connect the positive (red) clamp to the positive terminal of the battery and the negative (black) clamp to a grounded metal part of the engine block․
Avoid connecting the negative clamp directly to the battery’s negative terminal to minimize the risk of sparks․ Start the engine and allow it to run for a few minutes before disconnecting the charger․ Always exercise caution when working with batteries‚ as they contain corrosive acid and can produce explosive gases․ Refer to the manual for specific instructions and safety precautions related to engine starting․

Safety Precautions and Operating Instructions
Always prioritize safety when using your Sears battery charger․ Read all instructions carefully before operation‚ ensuring proper ventilation and avoiding flammable materials nearby․
Correct polarity connection is vital; reverse connections can cause damage and potential hazards․ Never charge a frozen battery or attempt modifications․
General Safety Rules
Prioritize personal safety when operating your Sears battery charger․ Always wear appropriate eye protection‚ such as safety glasses‚ to shield against potential acid splashes or flying debris during battery maintenance․ Ensure the charging area is well-ventilated‚ as batteries release explosive hydrogen gas during the charging process – avoid sparks‚ flames‚ or smoking nearby․
Never attempt to charge a damaged or frozen battery; doing so could lead to an explosion or battery case rupture․ Inspect the charger’s cord and clamp connections for any signs of damage before each use‚ and immediately discontinue use if any defects are found․ Do not disassemble the charger casing‚ as this could expose you to dangerous electrical components․
Keep the charger dry and avoid operating it in wet or damp conditions to prevent electrical shock․ Always disconnect the charger from the power outlet before attempting any maintenance or cleaning․ This charger is intended for charging lead-acid batteries only; attempting to charge other battery types could result in damage or injury․ Supervise children closely when they are near the charging area․
Proper Connection Procedures
Before connecting the charger‚ ensure the vehicle is turned off and all electrical loads are disconnected to prevent voltage fluctuations․ Connect the red (positive) clamp to the positive terminal of the battery‚ and then connect the black (negative) clamp to a grounded metal part of the vehicle’s chassis‚ away from the battery․ Never connect the negative clamp directly to the negative battery terminal‚ as this can create sparks near the battery’s flammable gases․
Double-check the polarity before initiating the charging process; reversed polarity can severely damage both the charger and the battery․ Ensure the clamps have a secure grip on the terminals or grounding point‚ avoiding loose connections that could cause arcing․ Plug the charger into a properly grounded electrical outlet with the correct voltage․
After charging is complete‚ disconnect the clamps in the reverse order – first the black clamp from the chassis‚ then the red clamp from the positive terminal․ This minimizes the risk of sparking․ Inspect the connections for corrosion and clean them if necessary before future use․
Troubleshooting Common Issues
Addressing charger malfunctions is vital for restoring functionality․ Common problems include the charger failing to power on or a battery refusing to charge effectively․
Carefully inspect connections‚ check the outlet‚ and review the fuse before seeking more complex solutions for these frequent issues․
Refer to the manual for specific troubleshooting steps related to your Sears battery charger model for optimal repair guidance․
Charger Not Powering On
If your Sears battery charger fails to power on‚ several potential causes should be investigated systematically․ First‚ ensure the power cord is securely plugged into a functioning electrical outlet․ Test the outlet with another device to confirm it’s providing power․
Next‚ inspect the power cord itself for any visible damage‚ such as cuts or frayed wires․ A damaged cord presents a safety hazard and should be replaced immediately․ Many Sears chargers incorporate an internal fuse to protect against power surges; locate and check the fuse for continuity using a multimeter․
A blown fuse indicates a potential internal problem and requires further investigation or professional repair․ Some models may have a power switch; verify it’s in the ‘on’ position․ If the charger still doesn’t power on after these checks‚ there might be an internal component failure‚ necessitating repair by a qualified technician․ Do not attempt to disassemble the charger yourself if you are not comfortable working with electrical components․
Battery Not Charging
If your Sears battery charger is powered on but the battery isn’t charging‚ begin by verifying the correct polarity of the connections․ Red clamp to positive (+) and black clamp to negative (-) are crucial․ Incorrect polarity can damage both the charger and the battery․

Ensure the battery terminals are clean and free of corrosion․ Corrosion hinders the flow of electricity․ Clean them with a wire brush or a baking soda solution․ Confirm the charger’s voltage setting matches the battery’s voltage (typically 6V or 12V)․ Using the wrong voltage can prevent charging or cause damage․
A severely discharged or sulfated battery may not accept a charge․ Try a different battery to rule out a battery issue․ If the charger cycles on and off rapidly‚ it might indicate a problem with the charger’s automatic shut-off mechanism or a faulty battery․ If problems persist‚ consult a qualified technician for diagnosis and repair․

Sears Battery Charger Parts & Replacement
Finding replacement parts‚ like Part No․ 999555-007‚ is essential for maintaining your Sears charger․ Online retailers and parts suppliers offer various components․
Resources like eBay and specialized vintage tool sites can help locate hard-to-find parts for older models․ Always verify compatibility before purchasing․
Locating Replacement Parts (e․g․‚ Part No․ 999555-007)
Securing replacement parts for your Sears battery charger can often be achieved through several avenues‚ both online and potentially through local sources․ A frequently cited part number is 999555-007‚ often related to specific components within various Sears charger models․ Online marketplaces like eBay are excellent resources‚ frequently hosting listings from both individual sellers and dedicated parts suppliers specializing in vintage or discontinued items․
Dedicated vintage tool websites‚ such as The Vintage Tool Shed‚ may also carry specific parts or offer guidance on locating them․ When searching‚ having the complete model number of your charger (e․g․‚ 608․718380) is crucial for ensuring compatibility․ Cross-referencing part numbers and carefully reviewing product descriptions are vital steps to avoid ordering incorrect components․ Consider joining online forums or communities dedicated to Sears tools; members often share information and sources for hard-to-find parts․
Always prioritize safety and‚ if unsure about a repair‚ consult a qualified technician․
Resources for Parts Information
Finding detailed parts information for Sears battery chargers requires utilizing a variety of online and potentially offline resources․ ManualsOnline is a valuable repository‚ often containing exploded diagrams and parts lists for numerous Sears models‚ including the 608․718571․ Searching online forums dedicated to vintage tools and Sears appliances can yield valuable insights from experienced users who have previously located parts or identified compatible replacements․
eBay’s parts section is a consistently useful source‚ allowing searches by model number or specific part descriptions․ The Vintage Tool Shed specializes in older tools and may offer parts or guidance․ Retailers specializing in small engine repair sometimes stock generic components that can fit Sears chargers; Remember to have your charger’s complete model number readily available when searching‚ as this significantly narrows down the results and ensures compatibility․
Utilizing Sears’ archived documentation‚ if accessible‚ can also prove beneficial․