
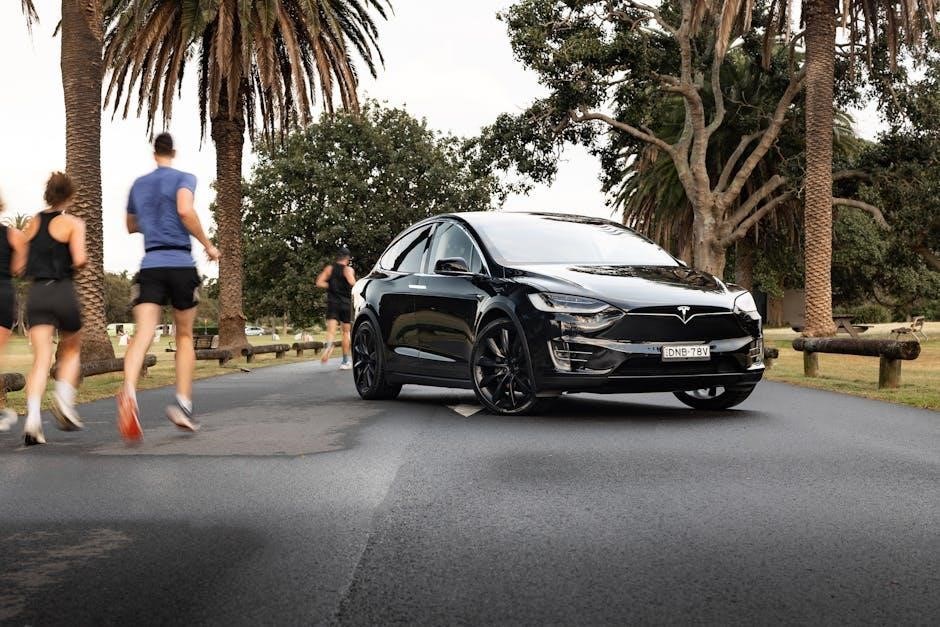
The Tesla Wall Connector Gen 3 streamlines home EV charging, offering enhanced features and a sleek design․ It’s a vital component for Tesla owners seeking convenient and rapid charging solutions, as discussed in various forums and reviews․
What is the Tesla Wall Connector?
The Tesla Wall Connector is a dedicated home charging station designed specifically for Tesla vehicles, offering a significant upgrade over standard wall outlets․ Unlike typical charging solutions, it delivers the maximum charging speed your Tesla can handle, substantially reducing charging times․ It’s more than just an adapter; it’s a fully integrated system communicating directly with your vehicle for optimal performance․
Discussions across online forums highlight its reliability and efficiency․ The Wall Connector isn’t limited to Tesla vehicles either – with the appropriate adapter, it can charge other electric cars․ It provides a secure and convenient charging experience, eliminating the need for extension cords or reliance on public charging stations․ It’s a core element of the Tesla ecosystem, enhancing the ownership experience․
Gen 3 vs․ Previous Generations
The Gen 3 Wall Connector represents a substantial evolution from earlier iterations, primarily focusing on enhanced connectivity and design․ Previous generations, while functional, lacked the Gen 3’s integrated Wi-Fi capabilities, requiring a Mobile Connector for remote monitoring and updates․ The new design is also more compact and aesthetically pleasing, blending seamlessly into modern home environments․
Forum discussions emphasize the improved power sharing functionality in Gen 3, allowing multiple Wall Connectors to operate on a single electrical circuit․ This feature wasn’t readily available in prior models․ Furthermore, the Gen 3 boasts a more robust build quality and simplified installation process, making it a superior choice for new and existing Tesla owners alike․
Key Features of the Gen 3
The Tesla Wall Connector Gen 3 is packed with innovative features designed to optimize the charging experience․ Integrated Wi-Fi connectivity enables over-the-air software updates and remote monitoring via the Tesla mobile app․ Power sharing capabilities allow multiple Wall Connectors to intelligently distribute power, ideal for households with several EVs․
Its sleek, modern design complements any home exterior, and the robust construction ensures long-lasting durability․ The Gen 3 also supports a wider range of amperage settings, adapting to various electrical setups․ User forums highlight the convenience of mobile app control, scheduling, and detailed charging statistics, making it a truly smart charging solution․

Installation and Setup
Proper installation is crucial for safe and efficient operation․ This involves careful planning, adherence to electrical codes, and secure mounting of the Wall Connector unit․
Safety Precautions Before Installation
Prior to commencing installation, disconnect power at the main breaker․ Confirm the circuit is de-energized with a voltage tester․ Installation should only be performed by a qualified electrician adhering to all local and national electrical codes․ Verify the electrical panel can support the Wall Connector’s amperage requirements to prevent overloading․ Inspect the installation location for any potential hazards, such as water pipes or gas lines, before mounting․ Always wear appropriate personal protective equipment, including safety glasses and insulated gloves․ Failure to follow these precautions could result in serious injury or property damage․ Double-check all connections before restoring power, and consult the official Tesla documentation for detailed safety guidelines․
Required Tools for Installation
A successful installation necessitates a specific toolkit․ Essential items include a voltage tester to verify power disconnection, a drill with appropriate bits for mounting surface compatibility, and a level to ensure proper alignment․ Wire strippers and crimpers are crucial for secure electrical connections․ A screwdriver set, encompassing various head types, is also necessary․ A stud finder aids in locating wall studs for secure mounting․ Depending on the installation, conduit and fittings may be required․ Don’t forget a measuring tape for accurate placement and a pencil for marking․ Always consult the official Tesla manual for a comprehensive list tailored to your specific installation scenario;
Mounting the Wall Connector
Secure mounting is paramount for safety and longevity․ Begin by locating wall studs using a stud finder, ensuring the connector is firmly anchored․ Utilize the provided mounting template for precise hole placement․ Drill pilot holes before inserting screws, preventing wood splitting․ The Wall Connector should be level to ensure aesthetic appeal and proper functionality․ Confirm the mounting surface can support the unit’s weight, especially with the cable connected․ Adhere strictly to the height recommendations outlined in the Tesla manual․ Double-check screw tightness post-installation, and verify the unit remains stable before proceeding with electrical connections․
Electrical Connection – Wiring Requirements
Proper wiring is critical for safe and efficient operation․ The Gen 3 typically requires a dedicated 48-amp circuit breaker, though amperage can vary based on regional regulations and desired charging speeds․ Use appropriately sized wiring – generally 6 AWG copper wire – to handle the current load․ A dedicated neutral wire is essential․ Always consult a qualified electrician to ensure compliance with local electrical codes․ Incorrect wiring can lead to overheating, fire hazards, or damage to the Wall Connector and your vehicle․ Grounding is non-negotiable; a proper ground connection is vital for safety․
Connecting to Your Home Electrical System
This step must be performed by a licensed electrician․ After installing the mounting bracket and running the appropriate wiring, the electrician will connect the Wall Connector to your home’s electrical panel․ This involves securely attaching the wires to the designated terminals within the unit’s enclosure․ Double-check all connections for tightness and proper insulation․ Once wired, the electrician will activate the circuit breaker․ Before use, verify the Wall Connector is receiving power․ Ensure all work adheres to local electrical codes and safety standards for a secure and reliable connection․
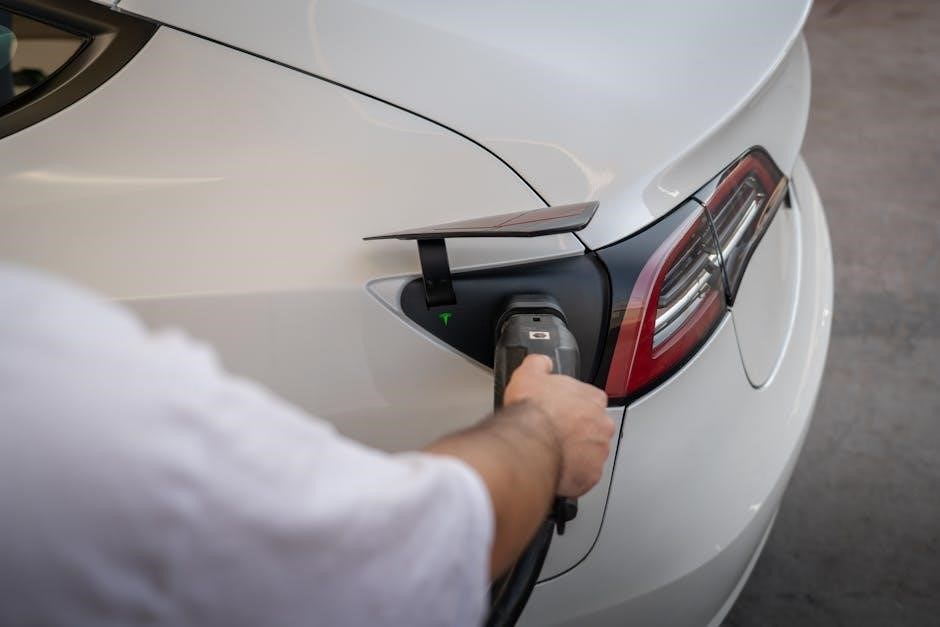
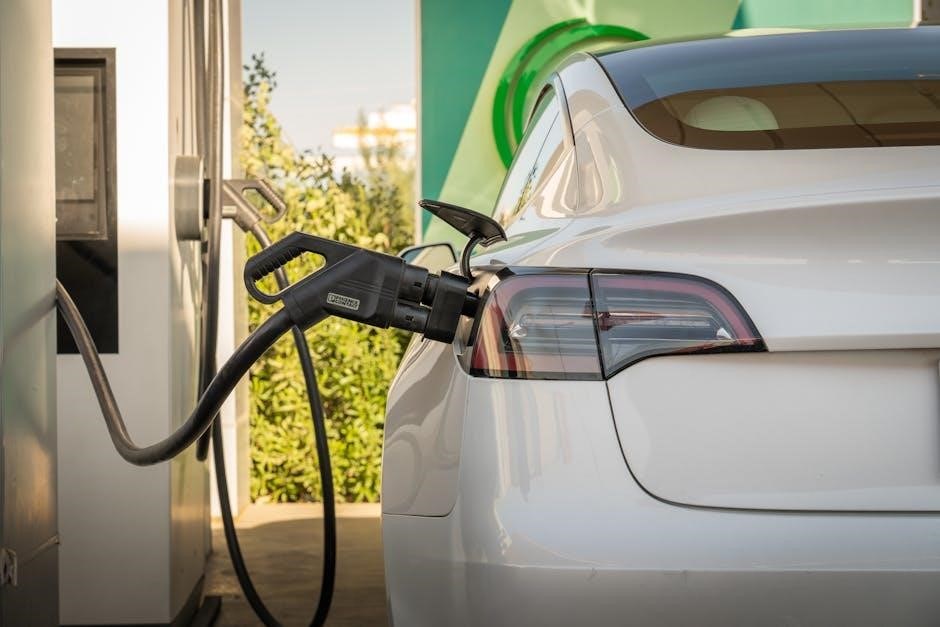
Using the Tesla Wall Connector
Simply plug in your Tesla to begin charging! The Wall Connector automatically communicates with your vehicle, optimizing charging speed and efficiency for a seamless experience․
Charging Modes and Amperage Settings
The Gen 3 Wall Connector offers adjustable amperage settings, typically ranging from 12A to 48A, allowing customization based on your home’s electrical capacity and charging needs․ Lower amperage settings are suitable for older electrical panels or shared circuits, while higher settings deliver faster charging speeds when supported․
Charging modes include standard charging, which prioritizes efficiency, and boost charging, maximizing speed when available․ The mobile app facilitates easy adjustment of these settings․ Understanding your home’s electrical setup is crucial before increasing amperage․ Incorrect settings could overload circuits․ Tesla recommends consulting a qualified electrician to determine the optimal amperage for your installation, ensuring safe and efficient operation․ Proper configuration maximizes charging potential without compromising electrical safety․
Understanding the LED Indicators
The Tesla Wall Connector Gen 3 utilizes a multi-color LED indicator to communicate its status․ A solid blue light signifies normal operation during charging, while a pulsing blue indicates the connector is idle but connected․ A solid red light signals an error, requiring troubleshooting via the Tesla app or manual․
A flashing red light often indicates a connectivity issue or a fault within the charging circuit․ A solid green light confirms a successful Wi-Fi connection․ The manual details specific error codes associated with different flashing patterns․ Regularly observing the LED provides quick insight into the connector’s operational state, aiding in proactive maintenance and swift issue resolution․ Referencing the manual’s LED guide is essential for accurate interpretation․
Mobile App Integration and Control
The Tesla mobile app provides seamless control over your Wall Connector Gen 3․ After initial setup, the app allows remote monitoring of charging status, energy consumption, and historical data․ Users can initiate or stop charging sessions remotely, ensuring vehicle readiness when needed․
The app also facilitates firmware updates, enhancing functionality and security․ Through the app, you can adjust amperage settings (within safe limits of your electrical system) and access advanced features like power sharing․ Detailed instructions within the manual guide the pairing process and explain all app-controlled functionalities․ Troubleshooting connectivity issues is also addressed within the app’s support section and the Wall Connector manual․
Scheduling Charging Sessions
The Tesla Wall Connector Gen 3, via the mobile app, enables precise scheduling of charging sessions․ This feature optimizes energy usage, potentially leveraging time-of-use electricity rates for cost savings․ Users can define specific start and stop times for charging, ensuring the vehicle is fully charged by a desired departure time․
The manual details how to create and manage these schedules, offering flexibility for daily routines or specific events․ Scheduled charging minimizes grid impact during peak hours and can be integrated with solar panel production (if applicable)․ The app provides clear visualizations of scheduled sessions and allows for easy modifications․ Detailed instructions within the manual cover troubleshooting scheduling conflicts and maximizing energy efficiency․
Troubleshooting Common Issues
The manual provides solutions for connectivity problems, slow charging, and vehicle recognition failures․ It details error message interpretations and guides users through basic diagnostic steps․
Connector Not Recognizing Vehicle
If the Wall Connector fails to recognize your Tesla, the manual suggests several checks․ First, ensure the vehicle is fully parked and the charging port is clean and free of obstructions․ Verify the connector is firmly inserted into both the vehicle and the Wall Connector itself․ A power cycle of both the vehicle and the Wall Connector – by unplugging it for 30 seconds – can often resolve communication glitches․
Additionally, confirm your vehicle’s software is up-to-date, as outdated software can sometimes cause compatibility issues․ The manual also advises checking the circuit breaker to ensure it hasn’t tripped․ If the problem persists, consult Tesla support, providing details about the error and any troubleshooting steps already taken․ Remember to reference the specific error codes displayed, if any, for faster assistance․
Slow Charging Speeds
Experiencing slower-than-expected charging with your Gen 3 Wall Connector? The manual highlights several potential causes․ First, verify the amperage setting on the Wall Connector matches your vehicle’s charging capabilities and your home’s electrical capacity․ Lower amperage settings will naturally result in slower charging times․ Ensure no other high-demand appliances are simultaneously drawing significant power on the same circuit․
Furthermore, ambient temperature can impact charging speed; colder temperatures may temporarily reduce charging rates․ Check the cable for any visible damage, as a compromised cable can limit power delivery․ If issues persist, consult the Tesla app to monitor charging current and voltage, and contact Tesla support with these details for further diagnosis and potential resolution․
Connectivity Problems with the App
If your Tesla Wall Connector Gen 3 isn’t communicating with the Tesla mobile app, several troubleshooting steps are recommended, as detailed in the manual․ First, confirm your Wall Connector is connected to a stable 2․4 GHz Wi-Fi network – 5 GHz is not supported․ Restart both your Wi-Fi router and the Wall Connector itself by toggling the breaker switch․
Ensure the Tesla app is updated to the latest version․ Verify your phone has a stable internet connection․ If problems continue, attempt to re-add the Wall Connector within the app․ If still unsuccessful, a factory reset of the Wall Connector (refer to the manual for instructions) may be necessary, followed by a fresh setup process․
Error Messages and Their Meanings
The Tesla Wall Connector Gen 3 utilizes LED indicators and the mobile app to display error messages․ A flashing red light often signifies a communication fault or electrical issue․ The manual details specific codes; for example, a rapid flash may indicate a ground fault, requiring immediate electrician intervention․
App-based errors might relate to Wi-Fi connectivity or power delivery problems․ Consult the app’s troubleshooting section for detailed explanations․ Common errors include “Vehicle Not Detected” (check cable connection) and “Reduced Charging Rate” (verify circuit amperage)․ Always prioritize safety; if an unknown error persists, disconnect power and contact Tesla Support․
Advanced Features and Settings
The Gen 3 offers power sharing, firmware updates via Wi-Fi, and customizable charging profiles through the Tesla app, optimizing energy usage and convenience․
Power Sharing Capabilities
The Tesla Wall Connector Gen 3 introduces intelligent power sharing, a significant advancement for households with multiple EVs or high energy demands․ This feature dynamically balances available power between connected vehicles, preventing circuit overload and ensuring consistent charging speeds․ Users can configure power sharing limits within the Tesla app, prioritizing specific vehicles or setting a maximum shared capacity․
This is particularly useful when combined with a Powerwall, allowing the system to intelligently distribute energy from solar generation, grid power, or battery storage․ The power sharing functionality is designed to optimize charging times while respecting the home’s overall electrical capacity, offering a seamless and efficient charging experience for multiple Tesla owners within a single residence․ It’s a key benefit highlighted in user discussions and manuals․
Firmware Updates and How to Apply Them
Tesla regularly releases firmware updates for the Wall Connector Gen 3, enhancing performance, adding features, and improving compatibility․ These updates are typically applied automatically overnight when the connector isn’t actively charging, requiring no direct user intervention․ However, users can manually check for updates through the Tesla mobile app․
Navigate to the charging settings within the app, select your Wall Connector, and initiate a firmware check․ Ensure a stable Wi-Fi connection during the update process, as interruptions can cause failures․ The app displays the update progress and confirms successful installation․ Keeping the firmware current is crucial for optimal functionality and access to the latest improvements, as detailed in the official Tesla documentation․
Customizing Charging Profiles
The Tesla Wall Connector Gen 3 allows for customized charging profiles tailored to your energy needs and preferences․ Through the Tesla mobile app, users can adjust amperage settings to align with their home’s electrical capacity and desired charging speeds․ Lower amperage settings can be beneficial for older electrical systems or during peak demand hours․
Furthermore, you can create specific charging schedules, prioritizing charging during off-peak times to potentially reduce electricity costs․ The app provides granular control, enabling you to define start and stop times for each charging session․ These personalized profiles optimize energy usage and ensure your Tesla is always ready when you need it, as outlined in the user manual․
Integration with Solar Panels and Powerwall
The Tesla Wall Connector Gen 3 seamlessly integrates with Tesla’s ecosystem, particularly solar panel installations and the Powerwall battery system․ When paired with these components, the Wall Connector can prioritize charging your vehicle using excess solar energy generated during the day, maximizing self-consumption and reducing reliance on grid electricity․
The Powerwall stores surplus solar energy, allowing you to charge your Tesla even when the sun isn’t shining․ The system intelligently manages energy flow, optimizing for cost savings and environmental sustainability․ Through the Tesla app, you can monitor energy usage and adjust settings to prioritize solar charging, creating a truly integrated and efficient energy solution, as detailed in the official documentation․
Technical Specifications
The Gen 3 boasts a robust design, supporting various voltage inputs and delivering substantial output power․ Detailed specifications ensure compatibility and optimal charging performance for Tesla vehicles․
Input Voltage and Current
The Tesla Wall Connector Gen 3 demonstrates impressive electrical flexibility, accommodating a wide range of input voltages to suit diverse residential electrical setups․ It’s designed to operate with a 208-240V AC input, ensuring compatibility with standard North American electrical systems․ The input current varies depending on the circuit breaker size and the amperage setting configured within the Wall Connector itself․
Typically, it can handle up to 48 amps, but this is configurable down to lower levels to align with existing electrical infrastructure․ Proper electrical capacity is crucial for optimal performance; a dedicated circuit is highly recommended․ Consulting a qualified electrician is essential to verify your home’s electrical panel can safely support the Wall Connector’s power demands before installation, preventing potential overloads or safety hazards․
Output Power and Connector Type
The Tesla Wall Connector Gen 3 delivers substantial charging power, capable of providing up to 11․5 kW (kilowatts) of output power․ This translates to significant range replenishment for your Tesla vehicle, especially when paired with a compatible vehicle and electrical setup․ The connector type is the Tesla proprietary connector, ensuring a secure and optimized charging connection specifically designed for Tesla vehicles․
This connector facilitates high-speed AC charging, significantly faster than standard Level 1 or Level 2 charging options; The Gen 3’s output is dynamically adjusted based on the vehicle’s charging capacity and the configured amperage settings․ It’s important to note that actual charging speeds will vary depending on these factors and the vehicle’s battery state․
Operating Temperature Range
The Tesla Wall Connector Gen 3 is engineered for reliable performance across a broad spectrum of environmental conditions․ Its specified operating temperature range is -30°C to 50°C (-22°F to 122°F)․ This robust design ensures consistent functionality even in harsh climates, whether experiencing frigid winters or scorching summers․
However, optimal performance is generally achieved within a more moderate temperature range․ Extreme temperatures, particularly prolonged exposure to heat or cold, can potentially impact charging efficiency or trigger protective measures within the unit․ It’s advisable to provide some degree of shelter or protection from direct sunlight or extreme weather elements whenever feasible to maximize longevity․
Dimensions and Weight
Understanding the physical specifications of the Tesla Wall Connector Gen 3 is crucial for proper installation planning․ The unit measures approximately 11․8 inches (300 mm) in height, 4․9 inches (124 mm) in width, and 3․7 inches (94 mm) in depth; These compact dimensions allow for flexible mounting options in various garage or exterior locations․
Regarding weight, the Wall Connector Gen 3 tips the scales at approximately 8․8 pounds (4․0 kg)․ This relatively lightweight design simplifies the mounting process, requiring minimal support from the wall structure․ Always ensure the mounting surface is capable of safely supporting the unit’s weight, adhering to local building codes and regulations for secure installation․

Maintenance and Care
Regular inspection and gentle cleaning will ensure optimal performance and longevity of your Tesla Wall Connector Gen 3, maintaining safe operation․
Cleaning the Connector
To maintain the Tesla Wall Connector Gen 3’s performance and appearance, regular cleaning is recommended․ Disconnect the connector from the power source before any cleaning attempt․ Use a soft, damp cloth to wipe down the connector body and cable․ Avoid abrasive cleaners, solvents, or high-pressure water, as these can damage the unit or compromise its safety features․
Pay particular attention to the connector pins, ensuring they are free from dust and debris․ A dry, clean cloth is best for this purpose․ Do not insert any objects into the connector port․ For stubborn dirt, a mild soap solution can be used, but ensure it is thoroughly rinsed and the connector is completely dry before reconnection․ Consistent, gentle cleaning will prolong the life of your Wall Connector and ensure reliable operation․
Inspecting the Cable for Damage
Regularly inspect the Tesla Wall Connector Gen 3’s cable for any signs of damage․ Look for cuts, cracks, or abrasions along the cable’s length and at the connector ends․ Pay close attention to areas where the cable bends or is exposed to potential stress․ Do not use the connector if any damage is detected; a compromised cable poses a significant safety risk․
Check for discoloration or melting, which could indicate internal overheating․ Ensure the cable is securely attached to both the Wall Connector and the vehicle․ If damage is found, discontinue use immediately and contact Tesla Support for assistance or replacement․ A damaged cable should never be repaired – it must be replaced entirely to ensure safe and reliable charging․
Long-Term Storage Guidelines
If storing the Tesla Wall Connector Gen 3 for an extended period, disconnect it from the power source and ensure it’s completely dry․ Store the connector indoors, in a clean and dry environment, away from direct sunlight and extreme temperatures․ Avoid storing it in areas with high humidity or potential for dust accumulation․
Coil the cable loosely, avoiding tight bends that could cause damage․ Do not store the connector with the cable wrapped tightly around the unit itself․ Periodically check the stored connector for any signs of deterioration․ Before resuming use, visually inspect the cable and connector for damage, and confirm proper functionality before connecting to a vehicle․

Warranty Information
Tesla provides a warranty covering defects in materials and workmanship for the Wall Connector Gen 3․ Details regarding coverage duration and claim procedures are essential․
Warranty Coverage Details
The Tesla Wall Connector Gen 3 comes with a four-year limited warranty, beginning with the date of purchase․ This warranty safeguards against defects in materials and workmanship under normal use․ It covers the cost of parts and labor needed to repair or replace a defective unit․ However, the warranty doesn’t extend to damage resulting from improper installation, misuse, accidents, modifications, or natural disasters․
Cosmetic damage is generally excluded, as is wear and tear․ Tesla reserves the right to inspect any claimed defect before authorizing repairs or replacements․ Furthermore, the warranty is non-transferable and applies only to the original purchaser․ Maintaining proof of purchase is crucial for any warranty claim․ Always refer to the official Tesla warranty documentation for the most accurate and up-to-date information․
How to File a Warranty Claim
To initiate a warranty claim for your Tesla Wall Connector Gen 3, first, gather your proof of purchase and the Wall Connector’s serial number․ Contact Tesla Support through the Tesla app or website, detailing the issue and providing the required information․ A Tesla representative will guide you through the claim process, potentially requesting photos or videos of the defect․
You may be asked to troubleshoot the issue with their assistance before a claim is approved․ If a repair or replacement is authorized, Tesla will provide instructions for returning the defective unit or scheduling an on-site service visit․ Keep all communication records and shipping documentation for your claim․
Limitations of the Warranty
The Tesla Wall Connector Gen 3 warranty doesn’t cover damages resulting from improper installation, misuse, abuse, or unauthorized modifications․ Normal wear and tear, cosmetic damage, and issues caused by external factors like power surges or environmental conditions are also excluded․
Furthermore, the warranty is voided if the unit is disassembled or repaired by anyone other than Tesla-authorized personnel․ Accidental damage, shipping damage (unless filed with the carrier), and consequential damages are not covered․ The warranty applies only to the original purchaser and is non-transferable․