
Total Gym Assembly Manual: A Comprehensive Guide
Welcome! This manual provides detailed instructions for assembling your Total Gym, enabling a full-body workout at home.
It covers parts, tools, and safety procedures for optimal fitness results.
Congratulations! You’ve invested in a versatile fitness system designed for all levels, promoting strength and well-being.
Total Gym represents a revolutionary approach to fitness, bringing gym-quality workouts directly into the convenience of your home. These systems utilize bodyweight resistance, offering a versatile and effective training experience suitable for all fitness levels. From beginners to seasoned athletes, Total Gym adapts to individual needs, promoting strength, endurance, and flexibility.
The core principle lies in adjusting the body angle on the glideboard, modifying the resistance level. This allows users to progressively challenge their muscles, achieving optimal results. Total Gym isn’t just about building muscle; it’s about improving overall health, increasing energy levels, and enhancing daily functionality.

This manual will guide you through the assembly process, ensuring a safe and effective setup. Proper assembly is crucial for maximizing the system’s benefits and preventing potential injuries. Remember to consult the included warranty information for details on coverage and support.
Unboxing and Parts Inventory
Carefully unpack all components from the shipping carton, ensuring you have ample space to avoid damage. Retain the original packaging until assembly is complete and you’re satisfied with the product. Begin by cross-referencing the included parts list with the physical contents. This inventory is vital to confirm all necessary components are present before proceeding.

Key items to verify include the support column, base, glideboard, roller assembly, pulley system, cables, and any included accessories like foot plates or ankle straps. Note the serial number located on the support column – you’ll need this for warranty registration and customer support.
If any parts are missing or damaged, immediately contact Total Gym customer service at 1.888.811.9740. Do not attempt assembly with incomplete or faulty parts.
Identifying Key Components
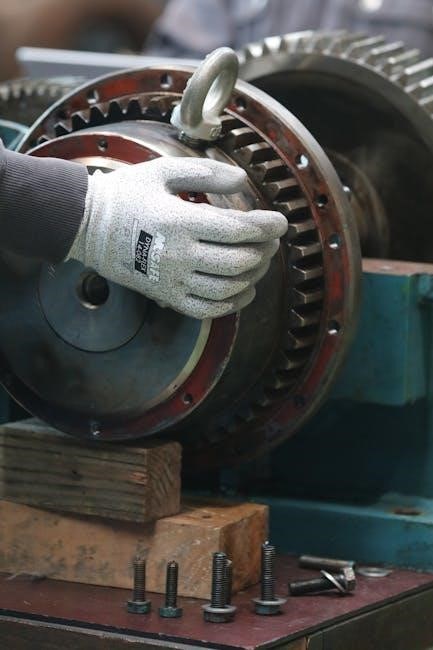
The Support Column forms the upright structure, providing stability during workouts. The Base provides a solid foundation, often with wheels for portability. Familiarize yourself with the Glideboard, the sliding platform where you perform exercises, and its Roller Assembly, ensuring smooth movement.
The Pulley System, consisting of pulleys and cables, delivers adjustable resistance. Understand how the cables connect to the glideboard and various accessories. These components work in harmony to provide a versatile and effective workout experience.
Proper identification of each part is crucial for correct assembly and safe operation. Refer to the owner’s guide diagrams for visual clarification.

Support Column and Base
The Support Column is the central vertical frame, providing the structural integrity for the entire Total Gym system. It’s crucial to locate the Serial Number on the bottom of this column for warranty registration and customer support. Ensure it’s securely connected to the Base.
The Base provides a stable foundation and often incorporates wheels for easy movement and storage. Verify the base is level before proceeding with assembly. A wobbly base compromises safety and workout effectiveness.
Proper alignment of the column and base is paramount for a safe and functional Total Gym. Double-check all connections before applying weight or beginning exercise.
Glideboard and Roller Assembly
The Glideboard is the sliding platform upon which you perform exercises, enabling a wide range of motion. It’s designed to smoothly travel along the rails of the support column.
Roller Assemblies are critical components, facilitating the Glideboard’s movement. Inspect these rollers for free rotation and secure attachment. Proper roller function is essential for a fluid and safe workout experience.
Carefully install the Glideboard onto the roller assemblies, ensuring it locks into place correctly. A secure connection prevents unexpected stops or instability during use. Regular inspection of these parts is vital for longevity.
Pulley System and Cables
The Pulley System is fundamental to Total Gym’s resistance mechanism, utilizing cables to provide adjustable tension; Understanding its setup is crucial for safe and effective operation.
High-strength cables connect to the weight stack and accessories, transferring resistance during exercises. Inspect cables meticulously for any signs of fraying or damage before each use; Damaged cables must be replaced immediately.
Proper cable routing through the pulleys is essential for smooth operation and preventing cable wear. Ensure cables are securely fastened and aligned correctly. This system delivers a versatile workout experience.
Tools Required for Assembly
Successful assembly of your Total Gym requires a few essential tools, ensuring a secure and stable fitness machine. Gathering these beforehand streamlines the process and minimizes frustration.

A standard adjustable wrench is vital for tightening bolts and nuts throughout the assembly. A Phillips head screwdriver is also necessary for securing various components. Consider a rubber mallet for gently tapping parts into place without causing damage.
Optional, but helpful, are a level to ensure proper alignment and a tape measure for verifying dimensions. Always prioritize safety and use tools correctly to avoid injury or damage to the equipment.
Step-by-Step Assembly Instructions
Begin by carefully reviewing all included parts against the inventory list. This ensures everything is present before starting. First, attach the support column to the base, aligning the holes and securing with provided bolts. Tighten firmly with the adjustable wrench.

Next, install the glideboard and roller assembly, ensuring smooth movement along the rails. Then, connect the pulley system and cables, following the diagram closely. Double-check cable routing to prevent tangling or damage.
Refer to the owner’s guide (TGXLS_ownerguide_BH7403.qxd) for detailed visuals; Patience and precision are key for a safe and effective assembly.
Attaching the Support Column to the Base
Begin by positioning the base on a level surface, protecting the floor with a mat if needed. Carefully align the support column with the designated mounting points on the base. Insert the provided bolts through the aligned holes, ensuring a flush connection.
Utilize the adjustable wrench to tighten the bolts securely, but avoid over-tightening, which could damage the frame. Double-check the column’s stability, confirming it stands upright without wobbling. Refer to the owner’s guide (TGXLS_ownerguide_BH7403.qxd) for visual guidance.
A stable connection here is crucial for the entire system’s safety and functionality during workouts.
Installing the Glideboard and Roller Assembly
Begin by carefully sliding the roller assembly into the designated tracks within the support column. Ensure the rollers move smoothly along the entire length of the track, verifying proper alignment. Next, position the glideboard onto the roller assembly, aligning the mounting points.
Secure the glideboard using the provided hardware, typically bolts or locking pins. Tighten these fasteners firmly, but avoid over-tightening to prevent damage. Test the glideboard’s movement, confirming it slides effortlessly and without obstruction. Consult the owner’s guide (TGXLS_ownerguide_BH7403.qxd) for detailed diagrams.
Proper installation ensures a safe and effective workout experience.
Connecting the Pulley System and Cables
Begin by attaching the pulley wheels to their designated mounting points on the frame, ensuring they rotate freely. Next, thread the cable through the pulley system, following the diagram in the owner’s guide (TGXLS_ownerguide_BH7403.qxd). Securely fasten the cable ends to the glideboard carriage, utilizing the provided clips or connectors.
Verify the cable runs smoothly through the pulleys without any kinks or obstructions. Double-check all connections to ensure they are secure and properly seated. Proper cable routing is crucial for smooth operation and safety. Refer to the manual for specific cable path instructions.
A correctly connected pulley system is vital for effective resistance.
Cable Adjustment and Tensioning
Proper cable tension is essential for a smooth and effective workout experience. Begin by adjusting the cable tensioning mechanism, typically located near the base of the Total Gym. Follow the owner’s guide (TGXLS_ownerguide_BH7403.qxd) for specific instructions on your model. Gradually increase the tension until the cable feels firm but allows for a full range of motion on the glideboard.
Avoid over-tensioning the cables, as this can strain the system and create a safety hazard. Periodically check the cable tension during use and readjust as needed. Ensure both cables are equally tensioned for balanced resistance. Consistent tension ensures optimal performance and longevity of your Total Gym.
Attaching Accessories
Enhance your Total Gym workouts with a variety of available accessories! Foot plates and ankle straps (mentioned in provided sources) allow for targeted lower body exercises, increasing versatility. The wing attachment provides additional upper body engagement, expanding exercise options. Refer to www.TotalGymCatalog.com for a complete selection of compatible accessories.
Securely attach all accessories according to the instructions in your owner’s guide (TGXLS_ownerguide_BH7403.qxd). Ensure a firm connection before beginning any exercise. Regularly inspect accessories for wear and tear, replacing them as needed. Proper attachment guarantees safety and maximizes the effectiveness of each workout session.

Foot Plates and Ankle Straps
Foot plates securely attach to the glideboard, providing a stable platform for various lower body exercises like leg presses and hamstring curls. Ankle straps, also mentioned in the documentation, connect to the cable pulley system, enabling focused calf raises, hip abductions, and adductions.
Proper positioning is crucial; ensure your feet or ankles are comfortably and firmly secured before initiating movement. Adjust the straps for a snug, yet non-restrictive fit. Inspect both foot plates and straps before each use for any signs of damage. Utilizing these accessories effectively targets specific muscle groups, enhancing your Total Gym routine.
Wing Attachment Installation
Wing attachments significantly expand the versatility of your Total Gym, enabling upper body exercises like chest presses, rows, and lat pulldowns. Installation typically involves inserting the wing’s mounting posts into the designated slots on the frame, ensuring a secure and stable connection.
Confirm the wings are locked into place before applying any resistance. Adjust the height of the wings to accommodate different exercises and user heights. Regularly inspect the attachment points for wear or looseness. Properly installed wings allow for a wider range of motion and targeted muscle engagement, maximizing your workout potential.
Safety Checks Before First Use
Prior to your initial workout, a thorough safety inspection is crucial. Verify all bolts and screws are tightened securely, paying close attention to the support column and glideboard connections. Inspect the cables for any signs of fraying or damage – replace if necessary. Ensure the glideboard moves smoothly along the rails without obstruction.
Confirm the pulley system operates correctly, with cables gliding freely. Check the stability of the entire unit on the floor. Familiarize yourself with the emergency stop mechanism. A pre-use check minimizes risk and guarantees a safe, effective workout experience, protecting you from potential injuries.
Glideboard Height Adjustment
Adjusting the glideboard’s incline modifies exercise intensity. Locate the locking pins on either side of the glideboard. To adjust, pull the pin outwards, reposition the glideboard to your desired angle, and securely re-insert the pin. Ensure both pins are fully engaged for stability.
Beginners should start with a lower incline, gradually increasing it as strength improves. Higher inclines target different muscle groups and increase resistance. Always double-check the pin locks before commencing your workout. Proper adjustment is key to maximizing effectiveness and preventing injury during your Total Gym sessions.
Resistance Level Adjustment
Total Gym resistance is adjusted via the friction dial located near the roller assembly. Turning the dial clockwise increases resistance, while counter-clockwise decreases it. Start with a lower resistance setting to familiarize yourself with the machine’s operation.
Gradually increase the resistance as your strength and endurance improve. Experiment with different settings to find the optimal level for each exercise. Ensure the dial is securely tightened after each adjustment to prevent slippage during workouts. Proper resistance is crucial for achieving effective results and avoiding strain.
Proper Form and Exercise Techniques
Maintaining correct form is paramount for maximizing benefits and preventing injuries. Keep your back straight and core engaged throughout each exercise. Control the movement, avoiding jerky or rushed motions. Focus on smooth, deliberate repetitions; Proper alignment ensures targeted muscle engagement.
Consult the included exercise chart or online resources for demonstrations of correct technique. Start slowly and gradually increase the range of motion as you gain strength and flexibility. Listen to your body and stop if you experience any pain. Prioritize quality over quantity for optimal results.
Maintenance and Care
Regular maintenance ensures the longevity and optimal performance of your Total Gym. Clean the glideboard and frame frequently with a damp cloth and mild detergent. Avoid abrasive cleaners that could damage the surfaces. Inspect cables before each use for any signs of fraying or wear. Replace cables immediately if damage is detected, utilizing official Total Gym replacements.
Periodically check all bolts and screws for tightness, and re-tighten as needed. Store the Total Gym in a clean, dry environment when not in use. Proper care will safeguard your investment and provide years of reliable fitness support.
Cleaning the Glideboard and Frame
Maintaining cleanliness is crucial for hygiene and extending the life of your Total Gym. Regularly wipe down the glideboard with a damp, soft cloth. Use a mild detergent if necessary, but avoid harsh chemicals or abrasive cleaners. These can damage the glideboard’s surface and compromise its smooth operation. For the frame, a similar approach applies – a damp cloth is usually sufficient.
Pay attention to areas where sweat and dirt accumulate. Ensure the equipment is completely dry before use to prevent slipping. Consistent cleaning not only enhances hygiene but also preserves the aesthetic appeal of your Total Gym.
Cable Inspection and Replacement
Regular cable inspection is paramount for safety and performance. Before each use, carefully examine the cables for any signs of fraying, kinking, or damage. Pay close attention to areas where the cable passes over pulleys or connects to accessories. If any damage is detected, immediately discontinue use and replace the cable.
Replacement cables can be ordered directly from Total Gym or authorized retailers. Follow the instructions in this manual for proper cable installation, ensuring correct tension and secure attachment. Never attempt to repair a damaged cable; always replace it entirely. Prioritize safety by maintaining cables in optimal condition.
Troubleshooting Common Assembly Issues
Difficulty attaching the support column? Ensure the base is on a level surface and all bolts are loosely fitted initially, allowing for alignment. Glideboard not sliding smoothly? Check the roller assembly for obstructions and verify proper lubrication. Pulley system issues? Confirm cables are correctly routed and tensioned, avoiding twists or kinks.
Missing parts? Contact Total Gym customer service at 1.888.811.9740 for assistance. Stripped screws? Use appropriately sized tools and avoid over-tightening. Refer to diagrams in this manual for visual guidance. If problems persist, consult the Total Gym website or contact support for expert help.
Warranty Information and Customer Support
Total Gym Fitness, LLC offers a warranty covering defects in materials and workmanship. Specific terms vary by model; consult your purchase documentation for details. For warranty claims, contact customer support with your serial number (located on the support column) and proof of purchase.
Need assistance? Reach Total Gym customer service at 1.888.811.9740 for parts, troubleshooting, or general inquiries. Explore additional accessories and information at www.TotalGymCatalog.com. Total Gym ® is a registered trademark protected by U.S; and international patents. Customer satisfaction is a priority; dedicated support is readily available.
Total Gym Model Variations and Specific Instructions
Total Gym offers diverse models, including the TGXLS and others, each with unique features and assembly nuances. Refer to the owner’s guide specific to your model (e.g., TGXLS_ownerguide_BH7403.qxd available at totalgymdirect.com) for tailored instructions. Variations may exist in pulley systems, cable configurations, and accessory attachments.
Always prioritize using the correct manual for your unit to ensure proper assembly and safe operation. Ignoring model-specific guidance could lead to incorrect installation or potential hazards. Detailed diagrams within each manual illustrate component placement and connection points. Confirm your serial number matches the manual before beginning.